Generic Sock - Part 4
 OK, so at this point, you've knitted all the way down the cuff, done a heel flap and heel turn, made your gusset, decreased your gusset and you're ready to do toes - right? Before you begin a toe, you have to know where to put it - no, the end of the sock isn't the right answer as anyone who has ever worn socks that were too short knows. You have to knit the foot just long enough so that your toe ends up being the perfect length for your foot. Most directions will tell you to knit the foot for as long as desired or about 2 inches short of your desired finished length. I learned a better way to know when to start my toe, and it hasn't failed me yet. I learned it from comments you guys left on my blog. So, as you're knitting your foot, try on the sock periodically and when the knitting reaches the place on your foot where your big toe connects to your other toes (where a flip flop would go), you're ready to start your toe decreases. This has worked on every sock I've made - mine, Caleb's, and my Sockapaloooza sock pal's (we have the same foot length measurement so I cheated). I haven't knit Mickael socks yet, but I see no reason why it won't work there either.
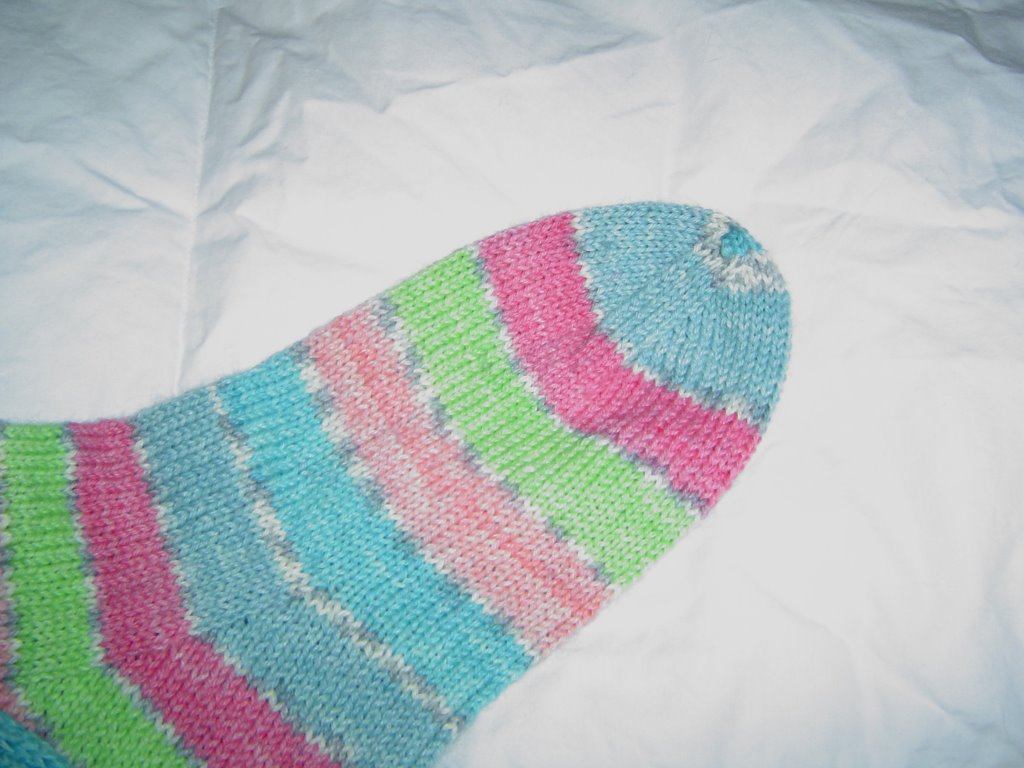
 OK, so you've knit down to where you need to start toe decreases, how do you do those? Easy. Remember your first cast on number of stitches? In my sample sock I cast on 64 stitches. I will work a toe decrease round (I'll give details in a minute) every other round until I have half the original number of stitches (32), then I'll work the decrease round every round until I have one quarter of the original stitches (16) left. Then I Kitchener Stitch the toe closed and admire my sock! If you get an odd number when you are figuring the last number, you can either round up or down. Use your foot type as a guide. My feet tend to be narrow so I always round down, but if you know you have wide feet, or just like toe wiggle room, round up.
Now that you know when and how many times you're going to decrease, how do you do it? Easy, the decrease round looks like this:Needle 1-K1, SSk, knit to end of needle, Needle 2-Knit to last 3 stitches, K2tog, K1, Needle 3- work as for Needle 1, Needle 4- work as for Needle 2. This only works if Needles 1 and 2 are your instep stitches and Needles 3 and 4 are your sole stitches. So once I have my socks at the correct length to start toe decreases I would work this round every other round (working even for the alternate rounds) until each of my 4 needles has 8 stitches (32 stitches), then I would work only the decrease round until each needle has 4 stitches (16 stitches). Then I Kitchener Stitch the whole thing together.
Kitchener Stitch is something that used to give me fits so I learned a way to Kitchener Without Knowing How To Kitchener and you're welcome to do this technique as well. I got into trouble when I decided to make socks for the Knitting Olympics - cheating at Kitchener takes more time and I needed that time to start another sock. Yes, I've learned to Kitchener Stitch, and after making 18 1/2 pairs of socks this year, I've learned to do it without looking up the directions. I learned from the book Sensational Knitted Socks. It has written directions for what you are supposed to do as well as really good pictures and for the first time in my life I was able to get something that looked like what Kitchener is supposed to look like. If you have trouble with Kitchener, take a look at this book and see if it will help you.
Congratulations! You just finished a sock - now knit another one for your other foot. Tomorrow I'll share some tips, tricks, and highly obsessive compulsive things I do when I knit socks.
posted by Melanie at 7:16 AM
![]()


2 Comments:
This was the whole reason why I wanted to learn to knit. To do socks. I sat at my kitchen table for 4 hrs trying to figure out how to hold three needles. I learned alot through trial and error - You must try it. One suggestion. If you know someone who knits - it is much better to have someone show you unless you can find something on the internet with step by step photos. Do print Melanies'instructions - so worth it!
Vanessa
Hi! I just wanted to thank you for the 4 part sock tutorial. I am a relatively new knitter (I learned over Christmas Break) and have made only hats and mittens and a pair of baby booties. I don't seem to have the patience for long projects...
Anyhow, I want to thank you because between your instructions and my friend's 'emergency sock hotline' (I think my friend is soprano spinner... I know her live and in person by a real name but I won't divulge) I am currently happily decreasing on my gusset. I have hope that this might be a sock when I finish! Yay! Then I only have to do the other foot because my daughter was born with the requisite two feet... I guess one sock wouldn't be terribly useful. (I have two lone mittens that I don't know what to do with but I didn't feel like doing part two. The yarn was... hard... rough... icky.)
Anyhow... Thank you and you are funny!
xo,
Joy
Post a Comment
<< Home