<body><script type="text/javascript"> function setAttributeOnload(object, attribute, val) { if(window.addEventListener) { window.addEventListener('load', function(){ object[attribute] = val; }, false); } else { window.attachEvent('onload', function(){ object[attribute] = val; }); } } </script> <div id="navbar-iframe-container"></div> <script type="text/javascript" src="https://apis.google.com/js/platform.js"></script> <script type="text/javascript"> gapi.load("gapi.iframes:gapi.iframes.style.bubble", function() { if (gapi.iframes && gapi.iframes.getContext) { gapi.iframes.getContext().openChild({ url: 'https://www.blogger.com/navbar/10582443?origin\x3dhttp://pinklemontwist.blogspot.com', where: document.getElementById("navbar-iframe-container"), id: "navbar-iframe" }); } }); </script>

Friday, May 30, 2008

Stealth Done!

I got the stealth project finished last night so I will start sewing in sleeves today! Yippeeee! Sweaters with sleeves!

OK, enough of that. No, I don't have any pictures right now, seeing as it's still a stealth project. I can answer the question about what color of Andean Silk I'll be using for Oblique though: Cream. I have to say though, that if you don't have the color cards for this, at least the batch I have has a more gray tone than the picture online at the Knit Picks site. It's definitely an offwhite, but while cream to me implies a warm, offwhite kind of color, the Andean Silk cream is cooler - maybe a thick fog color would be a better description.

Have a great weekend and I'll be back Monday with pictures of something!

Thursday, May 29, 2008

What's up next?

Just because I'm not actually starting a new project right now doesn't mean I can't decide what to start. I'm on the home stretch of the stealth project (sorry to drag it out, I don't mean to taunt you with it, but it's taking 90% of my knitting time right now and I'm not able to produce blog fodder), so my thoughts have turned to what I'll start when I'm done. I do have to get the sleeves sewn into the Highly Modified Chinese Lace Pullover by June 1 in order to finish that KAL project, so that will be what I do immediately after finishing the stealth, but a Pink Lemon has to have a plan and I think I've figured out what I want to do next:

Oblique! I loved this design the first time I saw it and it definitely fits into my Something To Wear Over the Ubiquitous T Shirt and Jeans Which is the Official Pink Lemon Uniform of Life category, and just to make things really great, I already have yarn in stash that should work for this. (Just as a side note, I know that this is supposed to be 18 stitches over 4 inches for the yarn, but that's in Stockinette. The gauge for the sweater is 17 stitches over 4 inches in Moss Stitch and my Moss Stitch gauge is always bigger than my Stockinette Stitch Gauge so I'm pretty sure this will work.) I'm off to Ravelry to double check notes from people who've already knit it!

Labels:

Wednesday, May 28, 2008

Remember This?

Ramius is trying to remember what it is too. It's the Gray Mist Bohus kit* I started a loooooong while back. Since I've finished up the Minimalist Cardi (except for the seaming) and I'm not starting another sweater until I get my stealth project finished (which will be later this week), I pulled out the Gray Mist. I got a whopping 6 rounds done last night but in my defense, I haven't touched it in so long, I had to figure out where I was and start slowly so that I could double check my gauge. I'm now up around 400 stitches in each round and I have one more round of increases coming up within the yoke section. I've also started the palest white color which will then start blending back to the darker colors, so I feel like I'm about halfway through the yoke, whether I am or not. The weird looking roll at the bottom of the picture is the folded down neckband that I will sew to the inside of the yoke at some point. I also have a bunch of ends to stitch down. I'm thinking I need to get started on both of those (the hem and the ends) or I won't want to do them later. Want to see it up close? Here you go!

greymist1


*Click "Bohus Stickning" at the top of the page for pictures of all the kits. I must admit, when I went to get the link, I saw the Swan for the first time, and I think I might have to get that one too! Gorgeous!

Labels:

Tuesday, May 27, 2008

Finished Sleevies!

minimalist cardi sleeves done


I hope you all had a great weekend! We saw the new Indiana Jones movie - good, solid summer action flick, lazed around the house and during the Deadliest Catch marathon on the Discovery Channel, I finished knitting the Minimalist Cardi's sleeves and decided that crab is probably way too cheap.

I ended up taking about an inch off the pattern's measurement before I started the sleeve cap shaping (I may have mentioned this Friday, but I haven't been caffeinated yet this morning, so bear with me.) When I finished, I held the top of the sleeve cap to my shoulder bone and I think it's going to fall perfectly so I can push it to just below my elbow and it will puff just a bit. By taking out some of the stitches for the lower ribbing, the cuff of the sleeve fits so it won't fall down either (this was a problem that several people in Ravelry noted).

Now I have sleeves to sew into two sweaters (no, I haven't put them in the Highly Modified Chinese Lace Pullover yet either). I'll get them finished soon, because I don't want a bunch of sleeves running around here*, but the weather has turned warmer here, so I don't think I'll be wearing either sweater anytime soon. I've pretty well decided that I'm going to be knitting things for Fall and Winter this Summer, so that I've got warm, snuggly things to wear when it does get cold (I realize this seems like a no brainer, but sometimes it's difficult to sit under heavier sweaters when its 90 degrees outside).

*I think there's a cheesy 50's horror movie there - Night of The Unsewn Sleeves or something.

Labels:

Friday, May 23, 2008

Sleevies!

minimalist cardi sleeves


Here are the sleeves for the Minimalist Cardi so far. I measured my arm from my shoulder bone to where I want the sleeve to hit and it came out to be 15 inches. After adding in a bit of extra ease for the puff above the ribbing (you can see how much was increased by the fact they won't lay flat), I will be knitting about an inch less than the pattern calls for. Hopefully this will work in reality as well as it does in Pink Lemon Land (my head). If it doesn't, I can always fix it later.

We had a little surprise this morning, two actually: baby bunnies! We've always had rabbits in the greenbelt area behind our house, and when you have rabbits, you get baby rabbits, but you don't often see them until they're bigger. This morning we got a treat and saw some tiny ones hopping through the grass after their mother. Caleb and Finn were equally impressed, although for different reasons.

I hope you all have a wonderful weekend. Here in the US, we're celebrating Memorial Day. I'd like to raise my knitting needles in respect and thanks to all of our armed forces, present and past, and say, "Thank You" for fighting for our country.

Labels:

Thursday, May 22, 2008

Minimalist Cardi - Body

minimalist cardi body


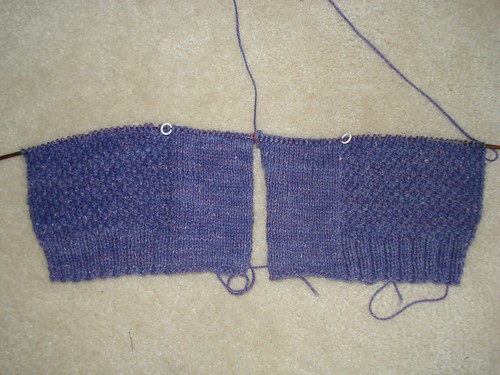
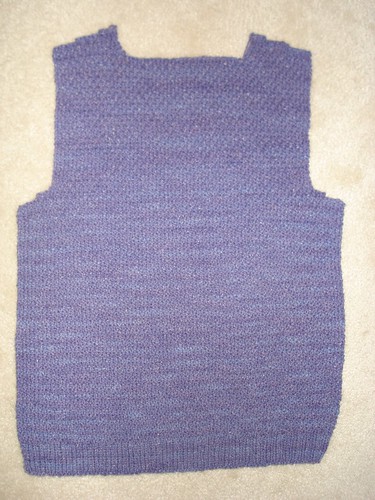
I finished up the body for the Minimalist Cardi! Because of the way the neckband works, you have to sew the shoulder seams up before you finish knitting the neckband. By adding back neck shaping, I changed the measurement of the back neck, so I couldn't follow the pattern exactly. I ended up knitting some of it, then sewing it down to the back neck (leaving the last inch or so free), and then knitting more of it to see where I was. Once the stitches on both sides were just one row apart, I Kitchener Stitched the middle back of the neck band and finished sewing the band to the back. It wasn't hard, just fiddley. You can see in the picture how the neckband wants to roll to the inside and I think that's going to be the best thing for it to do. I'm blocking the body now, just to get the neck/front bands trained the way I want them (this pic is pre-blocking which is why the sweater looks a bit squinky right now). I have opened up the front bands to almost their full width (I'm letting them roll in a bit to make the edge look finished), but around the neck, I'm letting the bands roll like they want to. I think it will fit my neck better that way than trying to keep them open all the way around.

I have started the sleeves, but I've already started messing with the pattern on them. If you look in the Ravelry section for this pattern, lots of people had trouble with the sleeves falling down and being longer than they wanted. The picture in IK shows them as 3/4 length sleeves, but since they get larger above the rib and make a blouson kind of shape, they need to be a bit longer than they look to get that "puff." If you look at the picture, you'll see that the model has her arms bent - could the sleeves be falling down on her and the bent arms was the way the stylist kept them in place? It's entirely possible that this is the case. For my own sleeves, I've decreased the stitch count for the ribbing (you do a huge increase when you start the seed stitch anyway, so a few more stitches won't matter) and I'm going to double check some measurements on myself before I decide how much sleeve to knit before I start the sleeve caps. For the size I'm making (35 1/2 inch bust), the total sleeve length as the pattern is written comes out almost to 19 inches. I've got to double check my shoulder bone to wrist bone measurement, but this sounds longer than 3/4 length sleeves, even allowing for a bit extra to puff.

Oh, and since I was blocking the body of the Minimalist Cardi, I'm also finally blocking the Highly Modified Chinese Lace Pullover. It looks like I'm going to be doing some seaming this weekend!

Labels:

Tuesday, May 20, 2008

Spinning and a Book Everyone Should Take a Look At

I feel like it's been ages since I did any spinning around here and I honestly don't really remember when I started this particular spinning project. This is the second bobbin (see, I really haven't been doing much spinning lately) of the Targhee roving. As you can see, it's making a textured kind of single and while a 3 ply yarn will even out some of the lumpy bumpys, the finished yarn will still have more texture than my usual yarn.

I also wanted to mention a book that's been discussed around the Internet in several different places: A Fine Fleece by Lisa Lloyd. This book seems to be described as a spinning book, but honestly, I think it's more of a knitting pattern book. There is some spinning information at the first of the book, but the majority of the book is patterns - mostly sweater patterns. I know what you're thinking and 9 times out of 10 I agree - why buy a hardback book of sweater patterns? In a year or two it will all be terribly datable and you won't want to knit the designs in it, right? In this case, it's a big, honking WRONG! Lisa's designs are firmly rooted in classic, traditional sweater design. They are updated a bit to make them more wearable today, but the timeless nature of the designs means this is a book that you will turn to for years to come. Each design is shown in both handspun and commercially available yarn so even if you're Sleeping Beauty and get violently ill around spinning wheels, you can still work these patterns. The other thing that's amazing about this book, and it's probably due to the classic nature of the designs, is the fact that I really like just about every design in the book. Most of the time, if I find more than half the designs interesting, I consider the book a good purchase, but this book has gems on every page. The biggest problem I see with it is deciding what design to start with!

Labels:

Monday, May 19, 2008

Minimalist Fronts

minimalist cardi fronts3


This weekend I did get some stealth knitting done, but I also got a big chunk of the Minimalist Cardi fronts worked on. I'm at least halfway up the armholes and I don't think it's going to be too much longer before I get the fronts finished. Then I have to sew up the shoulder seams and knit the front bands to the correct length to join them at the center back neck. Remember how I added back neck shaping? This also adds to the circumference of the neckline which means I need to knit the front bands longer than the pattern calls for. I plan to measure it along the neckline as I go to make sure I get it right.

I'm really amazed at how little yarn I've used so far on this project - I used one ball of yarn for the back and while I'm knitting on two balls for the two fronts, I've still got about half of each yarn ball left. I don't know if I'll be able to get the whole sweater made out of 3 balls of yarn, but the sleeves aren't long (they're 3/4 length) so I think it's possible. I actually bought 5 skeins of yarn so I've got plenty of yarn left, just in case you were wondering.

Labels:

Friday, May 16, 2008

More Minimalist - Is that a contradiction?

minimalist cardi fronts2


I got quite a bit done on the fronts of my Minimalist Cardi yesterday! At this point I'm about 20 rows away from armhole shaping. I plan on spending most of the weekend working on my stealth projects and maybe I can be back to regular blogging next week. I hope you guys all have a great weekend!

Oh, and just in case my uncaffeinated explanation the other day didn't make sense, here it is row by row.

Seed Stitch (over an odd number of stitches)
Row 1 and all RS rows: *K1, P1, rep from * to last stitch, end K1
Row 2and all WS rows: *K1, P1, rep from * to last stitch, end K1

Moss Stitch (over an odd number of stitches)
Row 1 (RS): *K1, P1, rep from * to last stitch, end K1
Row 2 (WS): *P1, K1, rep from * to last stitch, end P1
Row 3: *P1, K1, rep from * to last stitch, end P1
Row 4: *K1, P1, rep from * to last stitch, end K1

Labels:

Wednesday, May 14, 2008

Just a quick post today!

I don't have much to post about today since I spent yesterday working on the Fire Socks. The good news is that I've started the second design, so I hope to get the pattern finished up soon. The bad news is that I've planned two more stealth projects so you guys might be getting more Finn and Ramius than you usually do. (Not that I think you would mind, I think at least half of you are here for the furr baby blog days anyway! ;) )

Just to clarify, Seed Stitch is K1, P1 on the first row and all other RS rows and WS rows are worked as K the purls and P the knits. You have to pay attention to what you're doing on every row with that one. Moss Stitch is K1, P1 on Row 1, then the next row is K the knits and P the purls. Row 3 is P1, K1 (do the opposite of the stitch below it) and again the following row is K the knits and P the purls. You only have to think about what you're doing on RS (or odd numbered) rows - on the WS rows, you can go on autopilot. Hope that helps!

Tuesday, May 13, 2008

Minimalist Cardi Fronts

minimalist cardi fronts1


I've been working on the fronts to the Minimalist Cardi. I had been afraid when I started this sweater that I might have trouble with the moss stitch. Moss Stitch is related to Seed Stitch and I find Seed Stitch extremely fiddly to work. It doesn't help that I really like the way both stitch patterns look when knit. I decided to go ahead and knit the sweater because I really like the way it looks, and like I said, I really like the look of Moss Stitch in the knitted fabric. For some reason, it's not driving me nuts (maybe because unlike Seed Stitch, with Moss Stitch you only have to think about what you're doing on every other row) and I'm actually really enjoying it. I had more trouble with the ribbing, which is a K2, P1, than I'm having with the Moss Stitch.

There is some discussion on Ravelry about the front bands curling (they're in Stockinette Stitch), but so far, the curl seems to be minimal and I think when it's done and blocked, the curl will just give the front edges a finished look. The front bands might be doing different things in a different yarn though.

I hope the back neck shaping tutorial made sense and helped those of you who were wondering about it. I realize that it was a bit "wordy" (OK, I babbled for days), but I like to know not only the How but also the Why of something when I'm learning.

Labels:

Monday, May 12, 2008

Back Neck Shaping Tutorial

You asked for it, here it is.

If you look at the shape of the spine (scroll down to the second illustration) from the side, you can see that where the neck vertebrae and the thoracic vertebrae come together it curves to the back. The curvature of the spine is designed to handle the stresses, motions, and loads we place on it every day. The particular curve to the back at the base of the neck is what makes back neck shaping in a garment important. The vast majority of necklines will hit at this curve on the back of the neck. If the garment doesn't have some shaping along the back neckline (in other words, it goes straight across from shoulder to shoulder), the garment will fall backward to fit around the back neck curve. This is most noticeable in garments with larger front neck line shapes such as V necks, scoop necks and cardigans, which may or may not have closures, but are typically not fastened all the way up even when they do. We've all worn garments that fall back at the neckline and we spend all day pulling them forward, back into place. If the front neckline is a jewel neck, also a typical T shirt round neck, and the back neckline has no shaping, we won't spend the day pulling the garment forward so much as we'll spend the day feeling like our clothes are strangling us, because the smaller neckline area can't really go far enough to compensate for our natural spinal curve.

If you look at traditional folk knitwear you will find many examples of garments made without back neck shaping. We've learned a lot about shaping garments to the human body since then and have found that adding some back neck shaping is much more comfortable and flattering to wear. Now each designer has their own approach, and as I was looking through my books to figure out where I learned about back neck shaping and who's technique I was using (several places, and my own), I did find a note that back neck shaping can be avoided when you have a large collar. The theory behind that is probably that if you're going to add on all the extra for the collar, you'll eliminate any back neck shaping. I personally disagree, but this is my own personal feeling on the matter. Even on a garment with a hood (pretty much the biggest collar you can have), by adding back neck shaping, the hood itself will adapt to the curve of the spine. On the Minimalist Cardigan, there is a large collar that goes all the way down the front to the hem. This might, all by itself keep the cardi in place. I don't feel like taking the chance (because I hate clothes I have to fidget with and I'm too lazy to go back and redo a neckline after finishing the sweater), so I added back neck shaping.

I found a couple of books that dealt with back neck shaping and they both gave rules for figuring it out. Naturally, both of the rules were different, and since I figured the back neck shaping all by myself without looking it up, I made up my own rules. This just goes to prove that back neck shaping, like pretty much everything else in knitting can be done more than one way, so I'm not going to give you rules, I'm going to give you guidelines. If you've never changed anything about a pattern before, this is a good place to start - it doesn't take too much time, isn't too math intensive, and if you have long hair and really mess it up, no one will know. All you'll need is some paper and a pencil to make some notes with and a calculator if you don't trust your math. It doesn't take very long, so you don't even have to send the whole family out to pick up dinner (unless you want to, and really, that's not ever a bad idea when you get down to it).

The first thing you need to do is look at your pattern and figure out how many stitches you have after the last arm hole decreases are worked (these can be actual decreases or bind offs, depending on the pattern - just look for the stitch counts which are usually right before the sentence, "Continue working even until armhole measures X inches." If you've already begun your armholes, this is fine, but only work even until your armhole measures 1/2 of the X inches the pattern calls for before shoulder shaping, and then you can double check that your stitch count matches up with the pattern's.

The next thing you need to figure out is how many stitches are used in the shoulders (remember, there are two shoulders) and how many are used in the back neck. You should be able to say (2 x shoulder stitch count) + back neck stitch count = total stitch count after armhole decreases are completed. If this isn't adding up properly, double check your math and the pattern's math until you figure out for sure how many stitches go where. For the back neck shaping, you'll only be dealing with the back neck stitches so you have to know how many of them there are.

OK, here's where the guidelines come in. Your back neck shaping will usually be anywhere from 1" to 1/2" from the top of the shoulder shaping or final shoulder bind off. Most shoulder shaping takes up about 1/2" of the back length, so if you start your back neck shaping at the same time as the shoulder shaping, you'll end up with a back neck depth of about 1/2". I usually use 1" for my own back neck shaping because it gives me a little more spine space and means I definitely won't have to fidget with my garment. I don't really know of a nice way to say this, so I'll just say it: if you have a hunchback type of shape (I'm assuming if you do, you know this), you will want to have a deeper back neck shape than 1". This type of spine shape is more common among older women, but we are all different shapes and sizes. If you're honest with yourself about your own shape and size, you'll have better fitting garments and you'll look better than if you just pretend you don't have a bump on your back.

So, now you know how many stitches your back neckline will use in total and you know the depth your back neckline will be. Now we have to shape it. (You could theoretically just bind off the total neckline stitches at the correct depth and then continue working the shoulders as the pattern directs, but now you're putting a curve in a rectangular opening and if you're planning on picking up stitches to add a collar band of some sort later, you'll be unhappy with the way it goes around the corners. You'll be happier if you slope the back neck at least a little bit.) Since you know the depth of your back neck shaping, figure out how many rows you've got to use. This is where it's really nice if you've actually knit most of the back of the sweater, because you can measure the actual garment's row gauge instead of relying on a gauge swatch (gauge swatches lie sometimes). If you're getting 8 rows per inch and you're planning on a back neck depth of 1 inch, you've got 8 rows to do your back neck shaping in. If you're planning on a back neck depth of 1/2 inch, you've got 4 rows to do your back neck shaping in - see? Easy math!

I tend to write down the exact number of rows I have to work with in a list and then mark WS or RS so I can keep track of things while I figure the shaping. I like to bind off 75-80% of the total back neck stitches on the first row (make sure you bind off the center 75-80%, or your neck shaping won't be even). This is not set in stone of course - guidelines, remember. Then you have a couple of options. If you're working a shallower back neck (1/2 inch), you need to get the rest of the back neck stitches decreased pretty quickly. In that case, I might work a WS row even and then bind off the remaining stitches on each side of the center on the following two rows. If you're working a back neck of 1 inch deep, you can work your back neck exactly as I described above and actually work a few rows of shoulder stitches only (all the back neck stitches will be bound off by row 4) or you can work decreases at the neck edge for a few rows and spread your back neck shaping over more rows. (Don't forget, you can also combine decreases and bind offs - the possibilities are limitless, as long as you don't decrease or bind off more than the total number of stitches from the back neck.) Note that all theoretical row numbers used in the above examples go with the theoretical 8 rows per inch I used as an example in the previous paragraph - you have to use your own numbers because your sweater might be different.

The other thing to remember when you're doing this is that usually you will be working shoulder shaping for at least part of the time you're working back neck shaping (that dreaded instruction, "At the same time..." is important here), so make sure you don't get so wrapped up in your back neck shaping that you forget your shoulder shaping.

The first time you figure this out for a pattern, it might help to look at another pattern that does have back neck shaping and compare it to my notes, then you can see how back neck shaping is done with real numbers. It's not hard to do and if you sit down with your knitting and just follow the guidelines, you'll probably do just fine. The limited space involved in back neck shaping really cuts down on the amount of mistakes you can make, so go for it!

The two books I was able to find that discuss back neck shaping (and I know there's more, I just grabbed these two) were Deborah Newton's Designing Knitwear and the big Vogue Knitting book. Both discuss more design than just back neck shaping and if you find yourself tinkering with patterns a lot, or want to design your own sweater from scratch, you'll find them helpful. I personally prefer Newton's for just design instruction, but the Vogue Knitting is also good and covers a wider variety of subjects.

Friday, May 09, 2008

Random Friday

On Wednesday, Caleb's class went on a field trip. I was one of the chaperone's. Does this tell you where we went? Yes, we went to the National Zoo. Caleb and I had never been and the weather couldn't have been better for the trip! We actually got to see this panda climb the tree - it was completely silent as it climbed, which is amazing when you consider the size of this bear. They are just as beautiful and elegant in real life as they are in the pictures and while the wild pandas are not doing very well, the fact that zoos around the world are trying to preserve these guys is really cool. None of the pandas at the National Zoo belong to the US - we've borrowed them from China (actually, I think they're rentals).
I won't show you all the pictures I got, but this really cracked me up. The cheetahs have front row seats to the zebras. The zebras were wrestling with each other and this cheetah and two others you can't see in this picture were VERY interested. Don't worry, the top of the fence separating the two is electric so the zebras are quite safe. At one point one of the cheetahs put it's paw against the bottom part of the fence and the zebras backed off very quickly. The zebra/cheetah show was a big hit with the first graders!

Finally, I told you I'd share what I'd started knitting from the Sheldridge Farms Soft Touch Wool/Cotton:

Minimalist Cardi Back


This is the back of the Minimalist Cardigan from IK Fall 2007. I have to say, this issue of IK is definitely one of their best. I'm really liking the magazine since Eunny took over, but the Fall 2007 issue is jam packed with things I'd like to knit. I've only made a few tweaks to the pattern as written - I've fixed it so the ribbing and moss stitch will work properly all around the sweater and I've added neck shaping to the back neck. If you knit a sweater with the back neck straight across from shoulder to shoulder, the sweater will drop down in back and you will spend all day adjusting the sweater forward. By adding a bit of back neck shaping, the sweater will fit against your neck and shoulders properly, even with the collar added later.

Labels:

Tuesday, May 06, 2008

MDS&W Yarn


In the five times I've gotten to go to Maryland, I bought more yarn than fiber this year (except the first time I went when I hadn't started spinning yet). My fiber stash is pretty big at this point and the fact that I have several sweaters worth of wool to spin meant I really didn't need to go crazy with fiber. From left to right:


  1. Primero from Brooks Farm. I got one skein of this, but it's a 500 yard skein of DK weight Kid Mohair.

  2. Tierra Blend from Brooks Farm. I got one skein of this bulky lambswool and alpaca (70/30) and plan to make a hat out of it. Do not remind me that I don't really wear hats. It's soft. I like it.

  3. Duet from Brooks Farm. I have enough of this DK weight Kid Mohair/Fine Wool (one ply each) yarn to make a large, drapy sweater.

  4. Soft Touch Wool/Cotton from Shelridge Farms in Amethyst. This is a DK weight wool and cotton blend (85/15) that's very soft and the undyed cotton bits give it a bit of a tweedy look. It's also a handdyed solid, so it's not a flat color. I have enough of this to make a sweater and I've already started knitting one from it. I will show you what I have so far on Friday.

  5. Wullenstudio Sock Yarn in Sunshine on My Shoulder. This is a skein of yarn Caleb picked out for socks for himself. The boy is definitely not afraid of color!

As you can see, I spent a bit of time in the Brooks Farm booth this year! I've never braved the crowds before at their booth, but this year I wiggled my way into the middle (made easier by my big bag - if I clobbered you with it I'm sorry) and got to see what the fuss was all about. One thing I did finally see in person this year for the first time was the Clapotis. Now I know that two or three years ago everyone and their dog knit a Clapotis. (Some of you might have even knit one for your dog.) I am one of the twenty knitters worldwide who hasn't done this pattern yet. In fact, I haven't even seen one in person before last weekend for some reason. Anyway, after seeing several of them at the show, I will admit to being intrigued. Is there a Clapotis in my future? Who knows. I don't have yarn for one right now, but there is a possibility that I might be interested in making one this summer. I will have to think about this some more...

Labels:

Monday, May 05, 2008

MDS&W Part 1

Saturday morning I was dragging everyone out of bed and out the door to the Maryland Sheep and Wool Festival. I was there for the shopping and the sheep. They (Caleb and Mickael) were there for food on a stick. There were cuddly sheep. (All together now: AWWWWW!)
There were sheepdogs showing their stuff (and sheep being a bit sassy to the dogs - there was a brief attempt at staring down the dog at one point). This is the first time I'd watched the dogs in a couple of years and I must say that the obedience level of these dogs really puts Finn to shame. When the handler said, "Down" the dog went from a fast trot to a down in a split second. The dog actually slid into the down and the dirt kicked up, it went into down so quickly. Finn hears "Down" and stares at us for a minute, then leisurely puts his butt down and slides lazily into a full down position with a dramatic sigh. The whole act of Finn going into down takes a couple of minutes. There is no dust to settle at that speed. I guess I should be thankful that Finn isn't in charge of helping me with sheep. I'd have no sheep left. Maybe that's what happened to Little Bo Peep - she had the wrong kind of dog.
There was also shopping. I'm only showing the fiber today, I'll show the yarn tomorrow, and what I've already started knitting later this week. From left to right: 3+ ounces of REALLY sparkley batt from Loop on Etsy, a four ounce ball of roving (I have two more roving balls the same size I didn't show) of Forget Me Not from Three Bags Full, and a huge bag of Blue Blend roving from Kid Hollow Farm. The Kid Hollow Farm roving will be a sweater and the Forget Me Not will probably be a vest.

Oh, and if you were wondering if there was food on a stick? Mickael and Caleb ate their way around the fairgrounds and practically spent as much on food as I did on stuff.

Thursday, May 01, 2008

Progress

I realize that this isn't the kind of progress that I usually report on the blog, but it's Finn related, and since I'm pretty sure that at least half of you are only here for the dog (and cat when he wakes up), this one's for you.

Finn is a rather delicate dog. One morning when he was outside doing his business, a bird landed next to him and Finn freaked out, stopped what he was doing and ran and hid behind Mickael. I believe the bird was a robin, not a pterodactyl. Our current project with Finn is to toughen up his pads. After a winter of carpet and backyard, he just wasn't ready for the hard concrete of the suburban sidewalks. We've been working to toughen his pads or develop some nice callouses or something, so that he doesn't hurt himself on walkies. Like I said, Finn is delicate.

A couple of weeks ago, we were at the store and we were looking at dog toys. Finn has had toys with squeakers in them, but they've always been stuffed animal type dog toys which he rips to shreds in under 30 minutes. For obvious reasons, Finn doesn't get stuffed dog toys anymore. (Yes, we've tried the brand lined with nylon webbing - he ripped it apart anyway.) Caleb wanted to get him a squeaker toy and since we realized he'd never had one that wasn't stuffed around the squeaker, we decided to give it a try. That's what the pink elephant in the photo is - Finn's squeaker toy. We brought it home and Caleb gave it to him and showed him how to squeak it. Finn ran and hid. Caleb played with the squeaker toy for a bit and then we left it out for him to investigate on his own terms. Finn went way around it and pretended it wasn't there (except that he was going way around it). We put it away in his toy basket and it ended up on the top. Finn stopped getting out toys. A few days later, I sat down with the elephant next to me. Finn came charging over and sat in my lap (he thinks he's a lap dog). I held the elephant very carefully so it didn't squeak and he sniffed it. Then he smooshed it a bit with his nose and it squeaked a tiny squeak. He didn't freak out since he was in my lap, but I could tell he wasn't too sure of this thing. Once I got up, he went back to ignoring it. After about a week, he would occasionally touch it with his foot and make it make a small squeak, and a few days ago he barked at it.

Yesterday, he was in a playful mood so I threw it across the room. The retriever genetics took over and he chased it. Then he tried to pick it up. He couldn't figure out how to pick it up, but he finally figured out that he could grab the legs or trunk so he brought it back to me. He sat down and dropped it for me and I tossed it again, this time making it squeak when it landed and bounced. He went after it, picked it up and brought it back. We played fetch for a while yesterday with it and when Caleb got home I told him what had happened, so Caleb played fetch with Finn and the elephant. I'm not sure if the squeaker sounded too loud for him or he didn't like the texture of the elephant in his mouth or if he just got over it, but I'm proud to announce that Finn isn't afraid of his toys!

At least the ones he has now.

Labels: