<body><script type="text/javascript"> function setAttributeOnload(object, attribute, val) { if(window.addEventListener) { window.addEventListener('load', function(){ object[attribute] = val; }, false); } else { window.attachEvent('onload', function(){ object[attribute] = val; }); } } </script> <div id="navbar-iframe-container"></div> <script type="text/javascript" src="https://apis.google.com/js/platform.js"></script> <script type="text/javascript"> gapi.load("gapi.iframes:gapi.iframes.style.bubble", function() { if (gapi.iframes && gapi.iframes.getContext) { gapi.iframes.getContext().openChild({ url: 'https://www.blogger.com/navbar.g?targetBlogID\x3d10582443\x26blogName\x3dPink+Lemon+Twist\x26publishMode\x3dPUBLISH_MODE_BLOGSPOT\x26navbarType\x3dBLUE\x26layoutType\x3dCLASSIC\x26searchRoot\x3dhttps://pinklemontwist.blogspot.com/search\x26blogLocale\x3den\x26v\x3d2\x26homepageUrl\x3dhttp://pinklemontwist.blogspot.com/\x26vt\x3d4292445769315597913', where: document.getElementById("navbar-iframe-container"), id: "navbar-iframe" }); } }); </script>

Friday, July 31, 2015

Camp Loopy 2015, Project Three

image 
Tomorrow is August 1, which means Logan gets his heart worm pill, but also (more importantly to the blog), I can start project three for this summer’s Camp Loopy!  This month’s challenge is I Spy Something Different and in addition to the yardage requirements, we’re supposed to use a color or color combination we don’t usually use.  I will be using the fabrics above because I hardly ever use yellow and I’ve never used this many florals in one project.  (There is one paisley in there, the rest are florals.)  The top fabric on the left is the backing and the top fabric on the right (the red) is the binding.

I will be making the Painter’s Palette Quilt, sort of.  The pattern is free, and I downloaded it and printed up the templates because I was planning on rotary cutting it, but I needed to double check that it was a 60 degree triangle.  It wasn’t.  It was just barely off 60 degrees - the top point is slightly less than 60 and the two bottom points are slightly more.  If I was going to make this quilt exactly, I’d have to use the paper templates and the cutting would be much slower.  I decided to use a 60 degree ruler instead, which will make the cutting much faster.  If I’m going to get a quilt made in a month, I’ve got to be on top of things and move quickly!

Labels: ,

Thursday, July 30, 2015

One More Wiksten

image
I warned you this would be a week of Wikstens didn’t I?  I wasn’t kidding.  This is the third I’ve finished this week (and the last I currently have fabric for).  This is also the seventh Wiksten tank I’ve made.  I’m definitely getting my money’s worth out of this pattern!
image
This one is also made in Liberty of London’s Tana Lawn and this particular print will be great for fall and I’ll probably even get some wear out of it in the winter.  It’s a funny thing about Texas, the calendar says it’s fall, but it doesn’t really begin getting cool around here until late October.  It’s gets cooler (than the summer) sometime around mid-September.  I can always feel it in the air - it’s still hot, but the humidity drops a bit and you tell that it’s going to get better.  Summer won’t last forever.  Even though it takes so long to really get cool, we still like to pretend it’s cooler.  It is technically fall, after all.  So we put away our bright summer clothes and pull out our fall colored clothes, but really, they’re pretty much the same weight and same thing as our summer clothes.  If we’re really lucky, we might be able to toss a lightweight cardigan over something, if it’s cool enough for layers!

Labels:

Wednesday, July 29, 2015

Another Wiksten Tank and a Tutorial

After Monday’s Wiksten Tank post, there was a question from a blog reader about the neckline.  I realized that I had just been doing what I was taught years ago and had never really read the pattern.  I took a look at the pattern and decided to show you all, step by step how I do the arm and neck edges (they’re sewn the same way).  You will still need the pattern for the other steps in sewing this tank, and you’ll use the seam allowances listed in the pattern.

The pattern has you do the arm and neck edges in two steps: sew the bias facing to the edges and turn them and top stitch.  I use about four steps (with some little sub-steps in between):

  • Sew the bias facing strips to your neck and arm openings, right sides together, following the directions for seam allowance width in the pattern.
  • Under stitch
  • Trim the seam allowances
  • Turn the bias strips to the inside and topstitch.

This is not a particularly fast technique, but if you’re patient and take your time, the edges will lie flat and look perfect.  After you’ve done it a time or two, it does get faster.

Since I was finishing another Wiksten yesterday, I took a bunch of pictures to show how I did this.
image
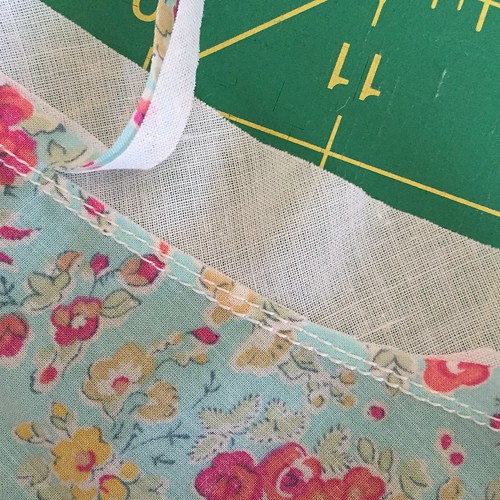
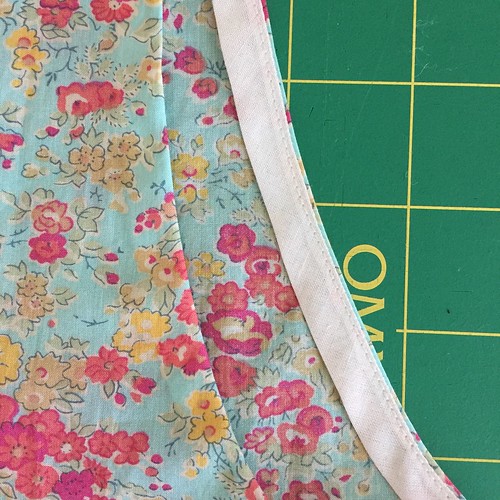
I’ve already sewn the bias facing strips to the neck and arm edges, right sides together.  I’ve also already under stitched in this photo.  On the left is what my arm edge looks like from the right side and on the right, you can see the wrong side.

If you’ve never heard of under stitching before, it’s not difficult.  Basically, after sewing your facing to your main project piece, you flip the facing away from your garment and topstitch the facing to the seam allowances.  You aren’t trying to stitch in the ditch, but you are trying to get as close to the edge of the facing as possible (without falling in the “ditch”).  I find that gently pulling the facing and the garment away from each other on either side of the presser foot, and periodically making sure my seam allowances are still flat underneath, makes it easier.  (Don’t pull so hard that you stretch your bias edges.)  Above, you can see the under stitching showing on the white facing strip on the left, and if you look at the wrong side of the arm edge, where you can see two rows of stitching very close together - the stitching on the left is the seam and the stitching on the right is the under stitching.  The under stitching will not show on the right side when your garment is finished, but it makes it easier to turn the facing smoothly and it helps the edge to roll to the inside (so your facing doesn’t show when you wear the garment).
image
The next step is to trim the seam allowances.  You do this for two reasons:  to reduce bulk and to keep the seam allowances from tightening up your arm and neck openings.  The first reason doesn’t really come into play with a lightweight fabric like Liberty’s Tana Lawn, but if you want your neck and arm openings to lie flat and not be too tight, you still need to trim your seam allowances.  Remember, the seam allowance edge is slightly smaller than your opening edge, and unlike your facing strips the seam allowance isn’t entirely bias.  Where the arm and neck edges are on the straight of grain, they will try to pull in.  Theoretically, on a light weight fabric where bulk isn’t a concern, you could clip the edges to get them to release that pressure, but having clips along the edge could weaken your garment and lead to tears in the future.  Since you have a double row of stitching around each opening (the original seam and the under stitching), you can trim very close to the under stitching and not worry about the integrity of the garment.  When you trim, take your time and make sure the facing itself doesn’t get trimmed.  You just want to trim the seam allowances, as close as you can to the under stitching line.

By the way, I tried not trimming the seam allowances on my first Liberty of London tank (back in March) and the neck and arms were way too tight.  I ended up spending time with the seam ripper and undoing them to get back to this point so I could trim the seam allowances.  Then I refinished the top and all was right with the world.  Learn from my mistake and save yourself some time.
image
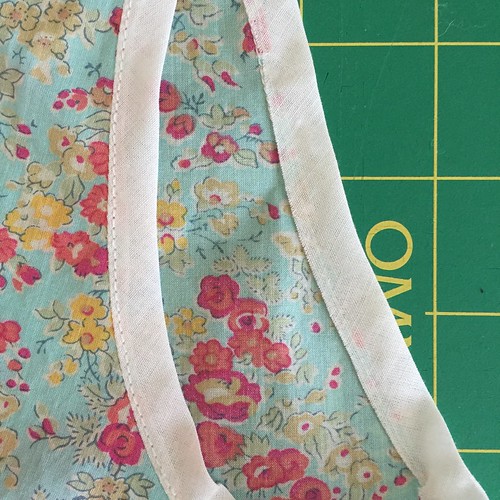
The next step is to go to the ironing board and start turning the bias facing strips to the inside.  I do this in two steps and I actually discovered a way to make it easier with fabric glue when I was getting photos for this tutorial, so thanks blog!  The first part of this is to turn the raw edges of the bias facing strips in.  I like to line up the raw edge with the inner stitching line, so both the seam and the under stitching are covered on the inside and press a fold into the bias facing strip.  Above, you can see this step completed.  On the left is the right side of the garment and on the right is the wrong side  of the garment.  You can still see the line of under stitching from the right side at this point, but both lines of stitching are covered by the bias facing on the wrong side.  Compare this to the first photo if you’re confused about what you’re seeing.

As I was trying to do this and get photos of the process, I used a fabric glue stick to hold the raw edges in place.  I just lightly dabbed some glue on the stitching on the wrong side of the garment, lined up the raw edges as I described above and pressed with my iron WITH THE STEAM OFF.  (If the steam was on, it could dissolve the glue, which would pretty much defeat my purpose.)  Using the glue was like having an extra hand and definitely saved time.  I’ll be using glue again!
image
The next step is to turn the bias facing all the way to the inside of the garment.  I didn’t use the glue for this second turn.  Since you under stitched earlier, the facing will turn with just the tiniest bit of your main garment piece to the back, keeping the facing from showing on the outside.  In the picture above, the right side of the garment is to the left and the wrong side is to the right.  You can now see the under stitching on the wrong side of the garment, and if you look at that edge, you can see a tiny line of the outer garment fabric, just outside the bias facing strip.  You want that.  If you had folded the bias facing strip exactly on the seam line, the edge of the facing strip would barely show from the right side of the garment.  Under stitching forces the the garment edge to follow the bias facing strip around that fold just a little bit, which makes things look neater.
image
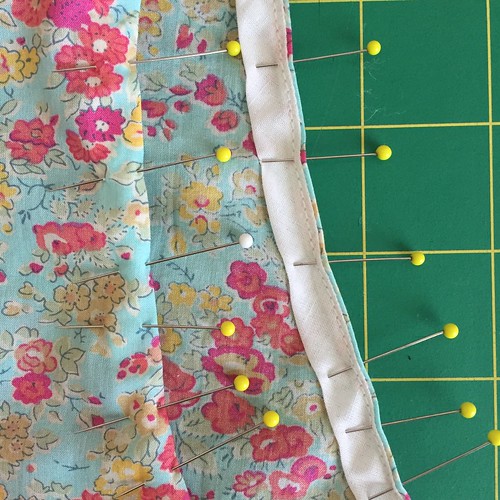
At this point you need to pin the bias facings to the inside.  (Yes, you’ve already pressed them, but I always pin before I sew just to make sure things don’t get weird while I’m sewing.)  I use lots of pins because I’d rather sew slowly than have to redo this seam.  It’s going to show from the right side, so you really don’t want to have to start and stop.
image
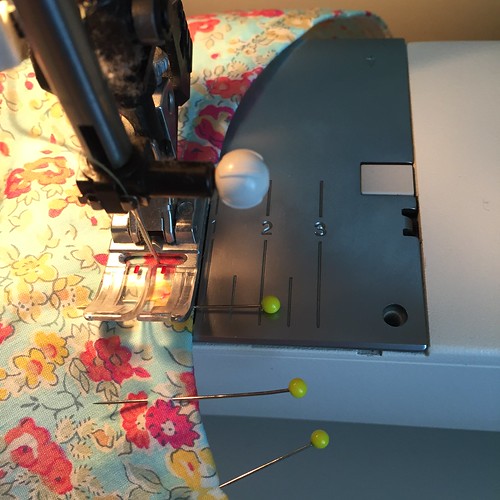
Then you sew.  Sew with the right side facing up and keep your distance from the edge consistent.  This line of sewing will show on your finished garment - you don’t want bobbles and wobbles. Take your time on this step.  You need to catch the fold of the bias facing strip on the inside, so before you start sewing, use a ruler and see where you need to put the garment edge.
image
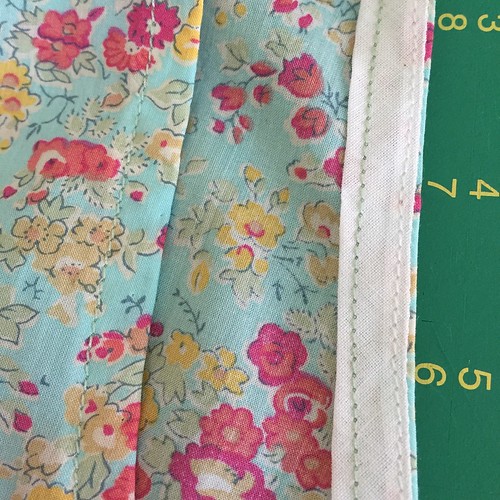
Here’s what the edge should look like once it’s all sewn.  Again, the right side is on the left and the wrong side is on the right.  You can see that I’m not quite all the way over to the edge of the fold of the bias facing, but it’s close enough that it’s not going to flap around, and my stitching from the right side is evenly spaced from the edge, all the way around the opening.  Also, I used a thread to match my fabric on this last bit of stitching (and the hem, which is already finished).  I sewed the side and shoulder seams, attached the bias facing strips and under stitched them with white thread because none of that will show from the right side of the garment.  I did this because I stitched three Wiksten tanks at once and then swapped to matching thread for hems and arm and neck opening top stitching.  If I was only sewing one tank at a time, all the thread would have matched the main fabric.
image
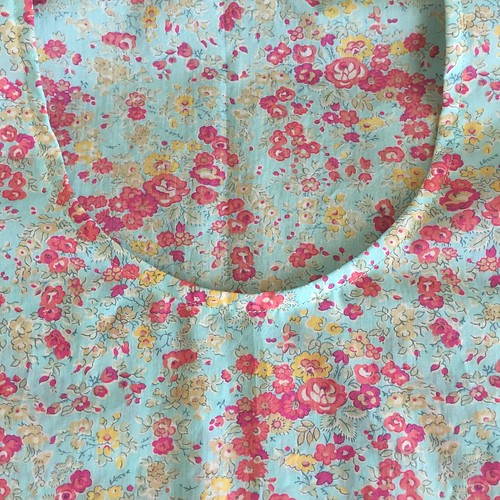
After top stitching the arm and neck openings, my neck edge isn’t quite laying flat.  Once I hit it with the steam iron, the bias relaxes into the shape of the curve…
image
…and everything lies flat!
image
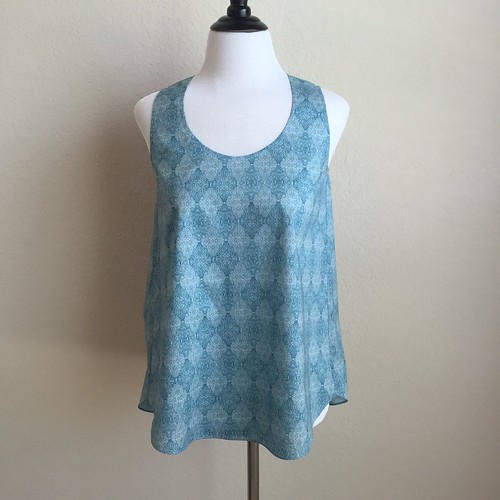
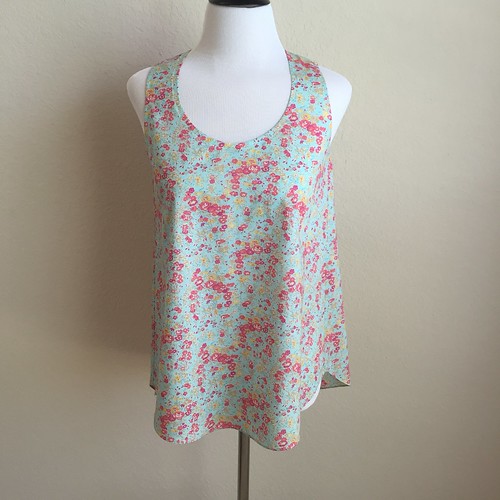
Now I have another finished Wiksten Tank!

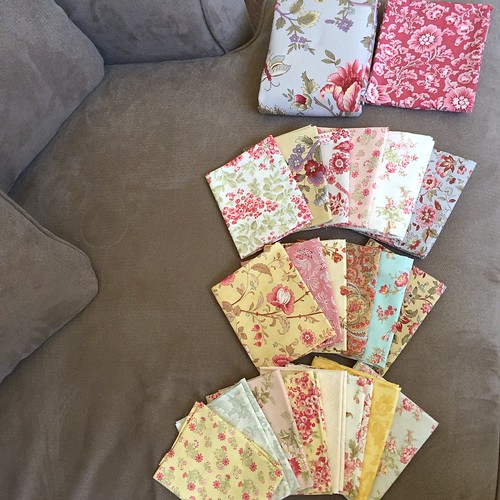
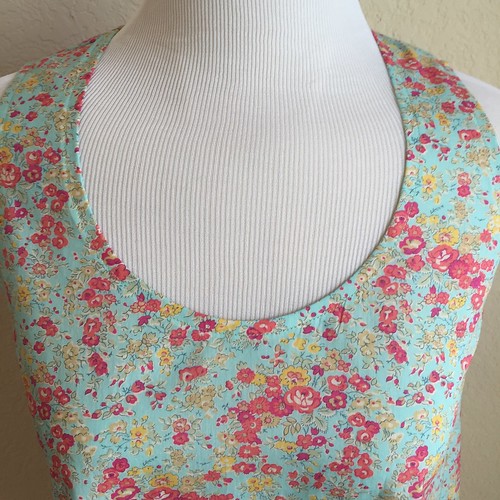
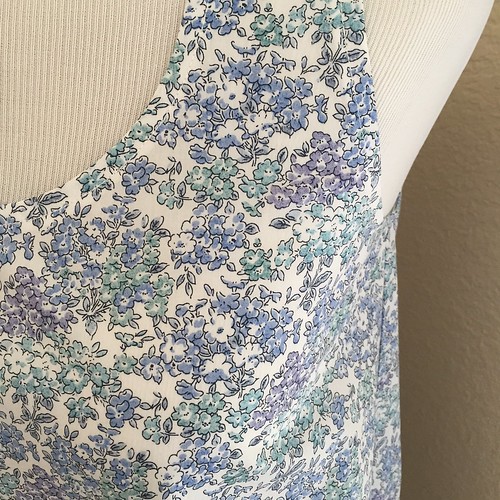
Just a side note, the Wiksten Tank pattern calls for using your main fabric for the bias facing strips.  On these pale colored tanks I’ve done, I’ve used a white cotton batiste instead of the Liberty of London Tana Lawn.  By using another fabric for these facings, I only need to buy a yard of Liberty to get a tank top in the XS size.  That’s why my bias facings are white, instead of matching my main floral fabric.


Labels: ,

Tuesday, July 28, 2015

Carrie

image 
I’ve finished my Carrie wrap/scarf/narrow shawl thing!  I did a light blocking, consisting of laying it out on towels and spraying it down with water and patting it into shape.  No blocking wires, no pins.  It was big enough without them.

This was an easy project that didn’t require a lot of concentration to knit.  I loved the little picot bind off and I think that’s a nice way to finish that final edge.  I think this pattern would work well in a multi-colored variegated yarn as well as a solid also.  I might be making more of these!

There was a question about the Wiksten Tank yesterday and since I’ll be finishing another one today, I’ll get some photos so I can explain how I finish the arm and neck edges tomorrow.  I don’t know if I’ve ever read the directions for those, I just do what I was taught years ago.  My way has a few more steps, but it makes them lie flat when they’re finished.

Labels: , ,

Monday, July 27, 2015

Another Wiksten Tank

image 
This may well be a week of Wikstens around here because I have two more that are almost finished!  This is another Liberty of London Tana Lawn print.  I love these fabrics.  Lawn is super soft and lightweight, but it’s still a surprisingly sturdy fabric.  It’s perfect for our climate here in North Texas and the prints that Liberty uses are easy to wear.
image
I haven’t checked yet, but I think this tank will work with my Alpengluehen cardigan, which would mean I can wear the tank past summer!  I’ll have to see, but those blue green flowers look like they’ll match the blue green yarn.

Labels:

Thursday, July 23, 2015

I’m Still Here

There’s not much blogging going on this week because there’s not much that’s bloggable going on this week!  I’ve been cleaning up my sewing/knitting room after The Bag and pre washing my fabrics for Camp Loopy Project 3.  I’ll show you my fabric choices and project plans next friday, right before I start cutting on Saturday, August 1.

I’m just about through straightening and cleaning upstairs, so I will be back with actual projects next Monday at the latest.

Have a great weekend if I don’t pop in tomorrow!

Tuesday, July 21, 2015

Crochet Kitty

Yesterday afternoon I sat down to crochet a couple more squares onto my blanket, but before I could get the first one finished, this happened.
image
Then he fell asleep.  Obviously, the Crochet had to wait.  Max needed cuddles!
image

Labels: , ,

Monday, July 20, 2015

It is Finished!

image 
I finished my Camp Loopy 2015, Project 2 over the weekend!  This is the Holiday in London Duffle Bag and I purchased the pattern from The Loopy Ewe.  Let me give you a tour.
image
On the inside of the bag (yes, I think if I folded him carefully, I could fit a Golden Retriever in here) there are five slip pockets.  The two you see above are big enough to hold my iPad and/or a magazine.  You can also see the key clip dangling at the top of the picture.  I suppose you could also clip other things to it as well.
image
On the other side of the interior are the other three slip pockets.  They are all deep enough that stuff won’t fall out easily.  You can also see the zipper pocket I made.  The zipper pocket and the key clip weren’t in the pattern, I just decided they needed to be there.  Just because.
image
I added some leather ties to the zippers just for fun.  They can work as zipper pulls or just as fun tassels.  I used a face to face zipper so I could unzip from either end.
image
Here is the front of the bag.  There are three slip pockets on the front, and three on the back (but no sparrow on the back).  The large pocket with the sparrow will hold another magazine or a folder.  On the left side of the bag, you can see the tab and D-ring, which is for the long strap, shown in the picture below.
image
I did make the long strap wider than the pattern called for because I read some comments that it just seemed too narrow for such a large bag.  I just bought bigger hardware and made the strap to fit it.  All of my notes and sources for hardware are on the Ravelry project page.  This is probably the most involved bag I’ve ever made, but working on a little bit each day made it manageable.

The bag is carry-on compliant, although this is going to have to go in the overhead bin - it won’t fit under the seat.  I really think I could probably pack for a week in this bag without any trouble.  I certainly won’t get lost in the airport!

Labels: ,

Friday, July 17, 2015

It’s Coming Together

image 
I’ve added the handles to the outside front and back of the bag, and the pockets to the outside and the lining.  You can see the front of the bag above with the pocket basted on.  I still have to sew the pocket dividers, but I think I’m about to start sewing the bag together!

Have a great weekend!

Labels: ,

Thursday, July 16, 2015

Camp Loopy 2015 - Pieces and Parts

image 
I’ve been doing a little bit of sewing on this project every afternoon, and I think that I’m finally ready to start putting it together!  Honestly, although I still have stacks of pieces laying on my sewing room floor, I’m probably about halfway through or more with the total amount of sewing on this bag.  Going clockwise from the top right you can see: the key clip (that will go in the interior of the bag and is something I added, not in the original pattern), the D-ring tabs (those are on the exterior of the bag to give the long strap someplace to clip), The zipper placket (it’s also fully lined on the underside), the long strap, and the handles.  I also made an interior zipper pocket on one of the sides of the lining.  The pattern has slip pockets both inside and out, but I decided I wanted a zipper pocket on the inside as well, so I added it.  I just forgot to get it in the photo.

I’m documenting all of the steps as well as sources for my hardware on the Ravelry page I set up for this project.  If you’re really curious and want more information, you can go here and check it out.

When we first got the details of this project, I wasn’t very excited about it and it took me a while to decide what to make and how to use the yardage.  I’m really enjoying it now.  I also understand why Vera Bradley bags cost so much!  On the other hand, my third Camp Loopy project will be much simpler.

Labels: ,

Wednesday, July 15, 2015

A Cardigan in July

image 
No, I’m not wearing a cardigan in July, but I’m knitting one!  I finished the back last night, so now the body is all finished (minus the neck and front bands, but those happen last).  I’m on to the sleeves next, or maybe I’ll weave in the ends.  I haven’t decided yet.  I usually use my tiny 9 inch long circulars for sleeves, but I don’t have a big enough size for this project.  I only have up to size 8’s (5.0 mm), and while I knit the body on 8’s, I’ve learned from experience to go up a size with the short circulars because I knit tighter on those.  I could try to track down a set of 9’s, or I could knit the sleeves using magic loop or double points.  I think it’s time to decide how I want to do this!

Labels:

Tuesday, July 14, 2015

More Blue Green

image 
I’ve added another color to my Carrie.  I’ve got a few ends to weave in, but I’ll do that when I’m all finished with the knitting.  I’ve just started the next color (it’s on the needle, so you can’t really tell), but in addition to that color, I have two more to go.  There will be a total of seven colors in this gradation.

Wonkydonkey commented yesterday that there was a lot of blue green around here right now and that’s absolutely right!  I’ve noticed as I scroll down through my Ravelry projects (they’re in order of WIP’s first, then most recently finished, going backwards in time) that there are definite color trends.  Right now it’s all about bright blues and greens, but go back a little and there are a few gray and cream projects, then red projects, then pale blue green, then dark green, then pinky, berry tones, and so on.  There are always a few projects that don’t seem to fit with the others, but I do seem to do several projects within a color range before moving on.

Have you noticed you work like this too, or are your color choices always random?

Labels: , ,

Monday, July 13, 2015

Camp Loopy 2015, Project 2

I’ve gotten some more done on my Camp Loopy project.  Actually, I’ve gotten a lot done, but I still haven’t started sewing it together!  Four of my fabrics are based on Venetian glass designs (I think they’re called Paperweights and Millefiori), and in order to use the required yardage I needed to piece them together to make a new “fabric” to cut out some of the bag pieces.  I played around with the numbers some and decided to make my squares two inches finished (2.5 inches cut size) and pieced them together into two rectangles for the outside of my bag.  (I had figured out the sizes of the rectangles beforehand so I could cut the bag pieces out.)
image
Once I had the pieced panels, I had to join them to the Soft and Stable (this is my first time using it, but it’s very similar to the batting used in Vera Bradley bags), and then quilt them.  The Soft and Stable doesn’t have to be quilted, you can just catch it in the seams, but I wanted the additional texture the quilting would give me, and I knew it would blur the edges of the squares a little more too.  I used basting spray to attach the pieced panels to the Soft and Stable and I was very happy with how well it worked!  Particularly since I wasn’t using a backing (the bag will be lined later), I didn’t want to mess with hand basting or pin basting.  The spray basting worked wonderfully for this and I didn’t have any trouble with stickiness on my needle or on the rotary cutter later.  I just quilted a diagonal grid, using the corners of the pieced squares as guides.  It’s not perfect, but you really can’t tell because the fabrics are so busy anyway.
image
Once I got both panels quilted, it was time to sit down and start cutting things out.  I started out by making myself a checklist of what I needed to cut from each fabric, and I think that may have saved me a lot of time during the actual cutting.  I’ve now gotten everything cut except a couple pieces of fusible interfacing, since I ran out (mine was 20 inches wide instead of 22 inches wide).  I’ll be swinging by the store later this morning to get some more so I can get those last pieces.  Hopefully today or tomorrow I’ll get it all fused to the lining pieces and then I’ll be ready to start sewing!

Labels: ,

Thursday, July 09, 2015

Some Knitting and a Birthday!

image 
I’m working on my third color in Carrie.  I’m really happy with how this is looking so far.  It’s a nice, easy knit that doesn’t require a lot of concentration.
image
In other news, today is Max’s 4th birthday!  He doesn’t spend anywhere near as much time here on the blog as Ramius did and I’ve realized that it’s because he’s almost impossible to photograph.  When Max is awake, he’s doing things.  Busy things.  Cat things.  In the last 15 seconds, he’s raced out from under the sofa to slap at Logan, looked at the level in his food bowl, tried to get into the dishwasher, inspected several things, thought about climbing behind the refrigerator (he won’t actually fit - for a reason), and is now attempting to get into Mickael’s coffee.  This is pretty much how he always is if he’s awake - zoom, zoom, zoom!  He never walks anywhere if he can gallop.  Photographing a moving object isn’t very easy.  He does stop moving when he goes to sleep, but Max doesn’t sleep the same way Ramius did either.  Ramius would sleep in sunshine, or on beds, places I could drape knits on top of him and snap a photo.  Max sleeps under the covers on our bed or under a sofa upstairs.  He will only sleep in his bed (or Logan’s bed - it’s barely big enough for his personality) if someone else is in the room.  I think this is partly due to his eyesight.  We don’t know for sure what’s going on, his eyes themselves are healthy, but if Max was a person, he’d wear glasses, and he might also have depth perception issues as well.  It’s not really a big deal in the day to day, but we’ve learned not to move the furniture around, particularly things he likes to jump off of.  He’s a very fun little cat, but completely different from his predecessor who practically owned the blog.  Maybe Max will slow down a bit as he gets older, but I don’t know.  My phone has taken hundreds of pictures of a pale gray blur.  Happy Birthday little blur!

Labels: , ,

Wednesday, July 08, 2015

Row Five

image 
Another row is finished on the blanket.  It’s definitely wider now and Max can get mostly underneath it as long as he curls up tightly and doesn’t move.  I’m weaving in the ends on this row now, before I start the next.

I know that you can weave in ends in crochet as you go (by crocheting the tails into the next round or row), but this pattern doesn’t seem to give me a chance to get them woven in really well.  At least I don’t feel like I can get them secured.  That could also be because I caught Max trying to disembowel the blanket-in-progress, so I feel like things should be tucked in really well.  I did crochet the ends in as I went on Caleb’s blanket and it worked well, but he uses it as a blanket, not as prey.

Labels: , ,

Tuesday, July 07, 2015

Another Finished Pair of Socks

image 
I finished my Snow White striping socks last night!  These are knit in Biscotte & Cie’s "Princesse et les 7 mailles" color way.  It’s a plain vanilla, stockinette stitch sock again, because I don’t want anything to distract from the striping.

A funny thing happened this time, that hasn’t ever happened with this brand of sock yarn before - they ended differently.  I cast on at the same point in the repeat for both socks (I take notes when I do the first sock so I can start the second sock the same way).  I always use a round counter when I knit socks (and really, when I knit pretty much anything), to make sure that the two will match.  I know these socks have the same number of rounds in the legs and the same number of rounds in the feet, but you can see at the toe that one sock ended in the blue and the second sock went into the yellow.  I actually noticed the difference as I was approaching the heel turn, but decided to just let the socks happen.  Since I’ll wear the socks inside shoes, I’ll be the only one to know that I have one yellow toe!  (Well, me and anyone who reads this blog and who now knows the secret of these socks.)

Labels:

Monday, July 06, 2015

Appliqué and Embroidery

image 
July’s Camp Loopy project requires a section of appliqué or embroidery, in addition to the yardage requirements.  I did a little bit of both.  I appliquéd the sparrow to the striped fabric using freezer paper and the needle turn technique, and then I embroidered details and an outline using the back stitch and perle cotton.  I’m very happy with the way he came out and I think he’ll look cute on the finished bag.  The striped fabric will be the front pocket.

My next step will be to do some piecing so I can use the required yardage!

Labels: ,

Friday, July 03, 2015

Happy Fourth of July Weekend!

If you’re here in the USA, I hope you have a safe and happy July 4th weekend!

If you’re not celebrating Independence Day, have a great weekend also!

Thursday, July 02, 2015

Cardigan and Lovey Dovey

image 
I’m up to the point where I’m going to separate the back from the fronts of my cardigan.  Once I’ve knit the fronts I’m finished with the cables (there are no cables on the sleeves or back of this cardigan), and everything else is stockinette.  This sweater already seems like it’s just flying off the needles!

In non-knitting news, I can’t believe it’s July already!  I don’t know where the time goes sometimes.  Today is also our wedding anniversary.  I can’t believe I’ve gotten to have 22 years with Mickael.  He still makes me laugh, still surprises me, and I love him more now than I did on our wedding day.  I may be the luckiest woman ever!

Labels:

Wednesday, July 01, 2015

Camp Loopy 2015, Project Two

image 
This month’s project requirements are to use at least a half yard of six different fabrics and the project has to have a section of either appliqué or embroidery.  I will be making the Holiday in London duffle bag with the six fabrics shown above (and a lining fabric that is somewhere in Ft. Worth according to the US Postal system - I changed my mind about the original lining fabric I purchased).  I’ve also tracked down all the hardware necessary for the bag and everything is together and ready to go!

As far as the appliqué or embroidery, you’ll have to wait and see what I’m going to do for that!  Although you won’t have to wait long because that’s one of the things I’ll be doing first.

Labels: ,