Pattern 15
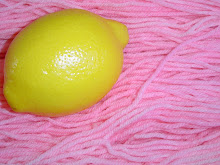
 Fabulous working name for the new wrap, huh? Over the weekend I got a LOT done! I realize it doesn't look like much, but believe me, there was major work done on Pattern 15. I don't know if I mentioned it or not, but I'm wanting this design to have a curve to it - it's still generally stole shaped (or will look that way when worn), but I felt like a slight curve would make it easier to wear. I'm going for something like a crescent moon kind of shape and I figured out three ways to do it. (There are probably more ways to do it, but these three seemed pretty obvious to me.) One way was to start from the neckline of the stole and work increases in a set pattern to make "wedge" shaped pieces and curve it that way. Another way is to start from the neckline and use EZ's Pi shawl directions, modified for a partial circle shape. The third way is to work from end to end (the way I usually write stoles) and work short rows to curve the piece. I chose the first way because I felt like it would be easier to use the lace motifs I wanted to design to use in this wrap.
Once the shaping technique was decided on, I sat down and started charting the lace. When I design lace motifs, I start with the YO's, then go back and add the decreases in the directions that will show off the shapes in the best way. I usually add the decreases on the computer when I put the chart in. I spent all day Saturday doing the computer charting, adding decreases, and finally adding beads. Then I printed all the charts out so I can work from them. By working from the actual charts I'll later put into the pattern, I can "proof read" them as I go. I work with a pen and a highlighter, so if I find a place where there's a mistake (I've already found one YO that had two decreases), I can correct it on the paper chart and highlight it. Then I go back and correct the computer files using the highlighted areas to find my mistakes.
What you see above is the first 12 rows from the charts plus the edging, worked from what will be the neckline, down towards the bottom edge of the wrap. I'm working on a 24 inch circular needle right now, but I can tell I'll be moving up in size very soon. Oh, and just in case you were concerned that the neckline of this wrap might be only 24 inches, it easily doubles that without really trying and will probably get a little bit bigger in the actual blocking at the end. Also, remember that it will increase substantially as I work it towards the bottom edge. This design is going to have a little bit of adjustability for extra length if it's needed and I'll be sure to give lots of measurements once I get it finished to help knitters decide if they need to make size adjustments.
Labels: pattern development


3 Comments:
It's great to see your newest creation in progress, Melanie!
Love the color you are using and I love to watch other create! I cannot do that for the life of me -= but I can enjoy the pattern.
Thanks Melanie!
To my mind one and all must go through this.
Post a Comment
<< Home