Snowbird
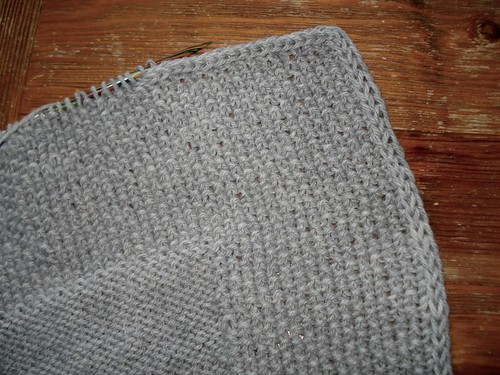
There was a question in the comments last time I blogged Snowbird about the i-cord edgings. This is a place I modified the original pattern. As the pattern is written, the front bands (and cuffs and hems) are in Stockinette Stitch and the edges just roll naturally. I decided to use Seed Stitch for my front bands (and cuffs and hems) because I adore Seed Stitch. I just love it's little bumpy goodness. Love. It. Seed Stitch doesn't roll (in fact, it's very well behaved and makes a beautiful, flat edge all by itself, did I mention how much I love it?) and I did like the rolled edge look of the original design. I had just finished Coraline right before I started Snowbird and Coraline uses an i-cord edge, so I figured if I added an i-cord edge to Snowbird, it would give a rolled look to my Seed Stitch and finish if off nicely. (If you do a search for i-cord cardigans in Ravelry, you'll get 11 pages of patterns - now some just use i-cord as embellishment and but the majority do seem to use it as edgings.) I used two different techniques for the i-cord on this project - I worked it along the edges as I knit the cardigan (front bands) and I used an i-cord bind off (cuffs and lower hem).
If you've never knit i-cord, you should give it a try and you do need to at least understand how it works before you use it or you're going to think the directions are crazy. You'll need two DPN's, of an appropriate size for your yarn. Cast on 3 stitches. (I used 3 stitch i-cord for Snowbird, so that's how I'll give directions.) Knit 3. *Without turning your work (your stitches are on the needle in your Right hand), slide the stitches to the other end of the needle and pass the Right needle to your Left hand, still without turning your work. Your working yarn will be all the way to the left and this will feel very, very wrong, but trust me, you're doing this right. Pull the working yarn over to the right keeping it behind your work (on the WS) and Knit 3. Repeat from * until your i-cord is the length you need it to be. The trick is to pull the working yarn tight across the back side of the work so that the first and third stitch are pulled together, making a cord. Here's a video of making i-cord if that helps.
To work i-cord edgings while you knit something in between (like a cardigan), it's a little bit different, but the principles are the same. Instead of using DPN's, you'll use a circular needle to hold all the stitches. You'll be using 3 stitches at each end of each row for your i-cord edgings, so, depending on your pattern, you might want to cast on an additional 6 stitches to compensate. I also put a marker between the i-cord edgings and the Seed Stitch front bands just to remind myself to pay attention. To begin, work a WS row as a setup row and keep the first 3 and last 3 stitches in Stockinette. (Since the setup row is WS, these should be purled.) Then you'll work as follows: RS rows- Slip 3 stitches with yarn held to wrong side, work to last 3 stitches in whatever stitch pattern you're using, end K3. WS rows- Slip 3 stitches with yarn held to wrong side, work to last 3 stitches in pattern, end P3. By slipping the first 3 stitches of each row, you're creating the i-cord on the edge of your work. The thing to remember with doing it this way is that you're only actually knitting (or purling) your edgings every other row while the main part of your cardigan is being worked on every row. If you pull your i-cord too tight it will draw up and make your fronts hang funny. No one wants funny hanging fronts, so be aware that you need to slip the stitches loosely but not too loosely or it will look sloppy. I can't be any more precise than that, just pay attention on the first few rows and you'll get a feel for your yarn and your gauge.
To do an i-cord bind off, I started it two different ways, but the bind off itself was identical once I got past the start. For the lower hem, I already had an i-cord edge so I didn't need to cast on anything extra. I did work knit one row on the three i-cord stitches to get the yarn where it needed to be to start the bind off and to give myself a little extra length to turn the corner. On the sleeves, I had just finished the Seed Stitch cuffs and didn't have an i-cord to work off of for the bind off, so I just cast on 3 stitches at the beginning of the bind off. (I probably used the backwards loop cast on.) Once you have your i-cord stitches, either from an existing i-cord edging or from a cast on, you work the bind off the same. *K2, SSK (you're using the last stitch from the i-cord and the first stitch from the thing you're binding off to work the SSK). Slip all three stitches back to the left needle without twisting them. Pull the working yarn back to the right behind the first stitch (tight enough to make i-cord, not so tight you make your lower edge pucker up), and rep from * all the way across the edge. Here's a video of the technique although she uses a K2tog tbl instead of a SSK - both are left leaning decreases. Once all the stitches are bound off, you'll have the three stitches from the i-cord left. On the sleeves, I put these on a stitch holder, sewed up the sleeve seams and I will Kitchener Stitch the i-cord ending together with the i-cord beginning. On the hem, I will bind off until the three i-cord stitches from the end remain as well as the three stitches I was using for the bind off, and then Kitchener Stitch them together immediately. By Kitchener Stitching the i-cord ends together, you keep the roundness of the i-cord and get a seamless corded edging. I know that not everyone likes to Kitchener, but it's only 3 stitches at a time and the finished look is worth it.
posted by Melanie at 8:03 AM
![]()


0 Comments:
Post a Comment
<< Home