<body><script type="text/javascript"> function setAttributeOnload(object, attribute, val) { if(window.addEventListener) { window.addEventListener('load', function(){ object[attribute] = val; }, false); } else { window.attachEvent('onload', function(){ object[attribute] = val; }); } } </script> <div id="navbar-iframe-container"></div> <script type="text/javascript" src="https://apis.google.com/js/platform.js"></script> <script type="text/javascript"> gapi.load("gapi.iframes:gapi.iframes.style.bubble", function() { if (gapi.iframes && gapi.iframes.getContext) { gapi.iframes.getContext().openChild({ url: 'https://www.blogger.com/navbar/10582443?origin\x3dhttp://pinklemontwist.blogspot.com', where: document.getElementById("navbar-iframe-container"), id: "navbar-iframe" }); } }); </script>

Friday, July 19, 2024

Christmas Candy Mischief Socks

Mischief socks

I've finished my first sock, the zig zag one, and now I've started the checked one!  These are the Mischief Socks using additional contrasting colors for the cuff, toe, and heel.  I've knit these socks before, but I feel like I've finally perfected the fit thanks to some project page comments left by other knitters who knit the gnome socks I made at the first of this year.  I thought I'd make sure to share this here, in case anyone else is struggling to find the sweet spot for fitting stranded socks.

For the majority of single color sock patterns* using fingering weight yarn, I use around 64 stitches per round and US 1's (2.25mm).  If I'm using a fine fingering weight yarn (Hedgehog Fibres Sock, the old Lorna's Laces Sock, Cascade Heritage Sock) I prefer to use about 72 stitches per round and US 0'S (2.00mm).  I find these combinations work well for my feet, which are on the narrow side of normal and have high arches.  Tweaking the stitches per round either plus or minus by two or three stitches doesn't cause any fit issues for me.

*Heavily cabled and certain lace designs where the increases and decreases are widely spaced are the exceptions to this rule as they have less elasticity in the fabric.

Then I started knitting stranded colorwork socks.  I actually used socks to figure out how to knit stranded colorwork because if there are tension issues (and there always are when you're learning), they don't really matter if they're stuffed in a shoe and no one can see them.  Stranded colorwork introduces two issues you don't normally have in a single color sock.  First, they're less elastic than stockinette stitch is in a single color.  That goes to the floats.  They need to be long enough not to pull the sock in, but if you make them too long your stitches look sloppy and the sock won't wear well.  Secondly, (and again because of the floats on the wrong side) the interior diameter of a stranded colorwork sock is smaller than the outer diameter.  The floats make the fabric thicker, thus the inside of the sock isn't as big as it looks from the outside.

So, knowing and understanding these things - my own feet, my generic sock recipe, and how stranded colorwork changes the fabric - I can adjust the fit.  Here's what I do:

  • Use the 72 stitch (or the closest the pattern has to this) size
  • Work the top ribbing in US 0's (2.00mm)
  • Switch to US 1's (2.25mm) for the leg colorwork and usually heel flap/heel turn (this gives me extra height for my high instep)
  • Switch back to US 0's for the gusset and foot colorwork, as well as the toe

This system gives me a looser lower leg with a fitted heel and foot.  It does mean I'm working with several different gauges, but by shifting needle size around I'm able to get a sock that fits my feet properly.

If the sock only has colorwork on the leg, after working the colorwork section I switch back to the US 0's (2.00mm) for the lower leg and keep using them for the rest of the sock.  If it still feels a bit big, I can always decrease a few extra stitches in the gusset decreases so the foot doesn't have as many stitches as the leg.  (See my Christmas Dudes socks for an example of these things.) Does this change the gauge between the colorwork and the rest of the sock?  Yes it does.  The colorwork section is slightly larger, but it's also smaller on the inside, so the fit is right.

Obviously, different shaped feet are going to have different fitting needs, but most of us don't start knitting colorwork socks for our first pair of socks.  Hopefully, after knitting a few pairs of regular socks, you'll have some idea of what does and doesn't work for your feet and can use these techniques to get a good fit in colorwork socks!

I hope this helps someone get their socks to fit better!  Have a great weekend!

Labels: , ,

Wednesday, July 29, 2015

Another Wiksten Tank and a Tutorial

After Monday’s Wiksten Tank post, there was a question from a blog reader about the neckline.  I realized that I had just been doing what I was taught years ago and had never really read the pattern.  I took a look at the pattern and decided to show you all, step by step how I do the arm and neck edges (they’re sewn the same way).  You will still need the pattern for the other steps in sewing this tank, and you’ll use the seam allowances listed in the pattern.

The pattern has you do the arm and neck edges in two steps: sew the bias facing to the edges and turn them and top stitch.  I use about four steps (with some little sub-steps in between):

  • Sew the bias facing strips to your neck and arm openings, right sides together, following the directions for seam allowance width in the pattern.
  • Under stitch
  • Trim the seam allowances
  • Turn the bias strips to the inside and topstitch.

This is not a particularly fast technique, but if you’re patient and take your time, the edges will lie flat and look perfect.  After you’ve done it a time or two, it does get faster.

Since I was finishing another Wiksten yesterday, I took a bunch of pictures to show how I did this.
image
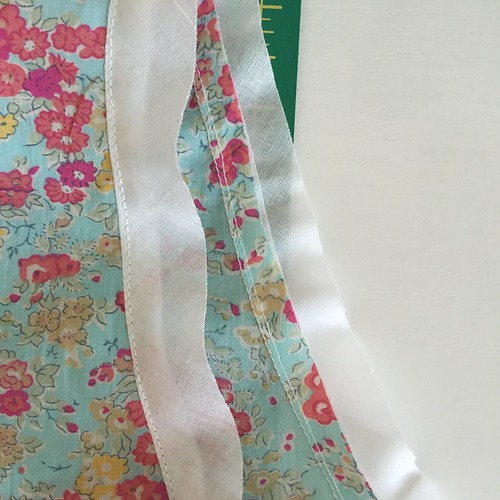
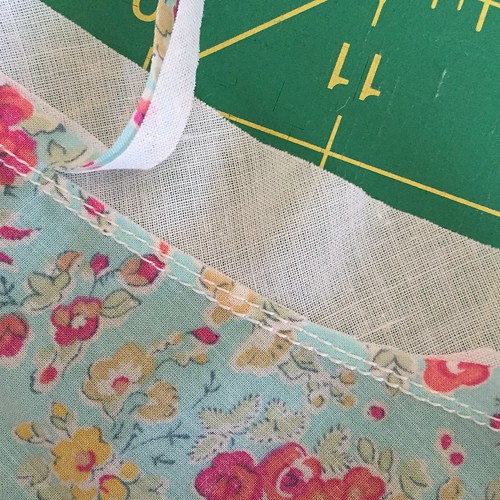
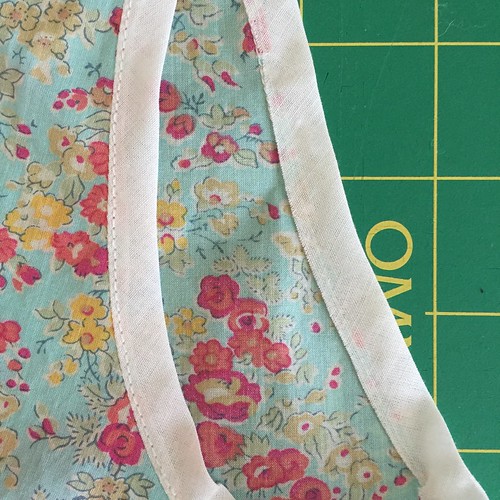
I’ve already sewn the bias facing strips to the neck and arm edges, right sides together.  I’ve also already under stitched in this photo.  On the left is what my arm edge looks like from the right side and on the right, you can see the wrong side.

If you’ve never heard of under stitching before, it’s not difficult.  Basically, after sewing your facing to your main project piece, you flip the facing away from your garment and topstitch the facing to the seam allowances.  You aren’t trying to stitch in the ditch, but you are trying to get as close to the edge of the facing as possible (without falling in the “ditch”).  I find that gently pulling the facing and the garment away from each other on either side of the presser foot, and periodically making sure my seam allowances are still flat underneath, makes it easier.  (Don’t pull so hard that you stretch your bias edges.)  Above, you can see the under stitching showing on the white facing strip on the left, and if you look at the wrong side of the arm edge, where you can see two rows of stitching very close together - the stitching on the left is the seam and the stitching on the right is the under stitching.  The under stitching will not show on the right side when your garment is finished, but it makes it easier to turn the facing smoothly and it helps the edge to roll to the inside (so your facing doesn’t show when you wear the garment).
image
The next step is to trim the seam allowances.  You do this for two reasons:  to reduce bulk and to keep the seam allowances from tightening up your arm and neck openings.  The first reason doesn’t really come into play with a lightweight fabric like Liberty’s Tana Lawn, but if you want your neck and arm openings to lie flat and not be too tight, you still need to trim your seam allowances.  Remember, the seam allowance edge is slightly smaller than your opening edge, and unlike your facing strips the seam allowance isn’t entirely bias.  Where the arm and neck edges are on the straight of grain, they will try to pull in.  Theoretically, on a light weight fabric where bulk isn’t a concern, you could clip the edges to get them to release that pressure, but having clips along the edge could weaken your garment and lead to tears in the future.  Since you have a double row of stitching around each opening (the original seam and the under stitching), you can trim very close to the under stitching and not worry about the integrity of the garment.  When you trim, take your time and make sure the facing itself doesn’t get trimmed.  You just want to trim the seam allowances, as close as you can to the under stitching line.

By the way, I tried not trimming the seam allowances on my first Liberty of London tank (back in March) and the neck and arms were way too tight.  I ended up spending time with the seam ripper and undoing them to get back to this point so I could trim the seam allowances.  Then I refinished the top and all was right with the world.  Learn from my mistake and save yourself some time.
image
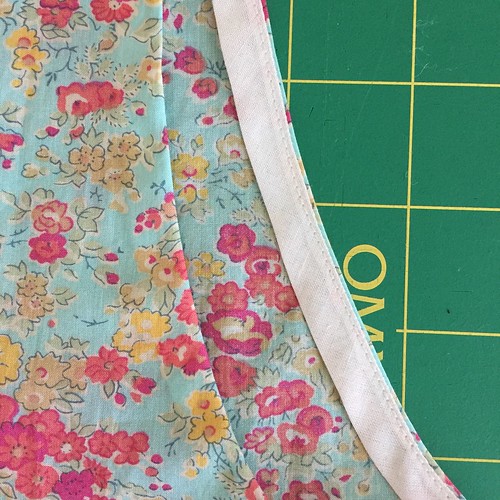
The next step is to go to the ironing board and start turning the bias facing strips to the inside.  I do this in two steps and I actually discovered a way to make it easier with fabric glue when I was getting photos for this tutorial, so thanks blog!  The first part of this is to turn the raw edges of the bias facing strips in.  I like to line up the raw edge with the inner stitching line, so both the seam and the under stitching are covered on the inside and press a fold into the bias facing strip.  Above, you can see this step completed.  On the left is the right side of the garment and on the right is the wrong side  of the garment.  You can still see the line of under stitching from the right side at this point, but both lines of stitching are covered by the bias facing on the wrong side.  Compare this to the first photo if you’re confused about what you’re seeing.

As I was trying to do this and get photos of the process, I used a fabric glue stick to hold the raw edges in place.  I just lightly dabbed some glue on the stitching on the wrong side of the garment, lined up the raw edges as I described above and pressed with my iron WITH THE STEAM OFF.  (If the steam was on, it could dissolve the glue, which would pretty much defeat my purpose.)  Using the glue was like having an extra hand and definitely saved time.  I’ll be using glue again!
image
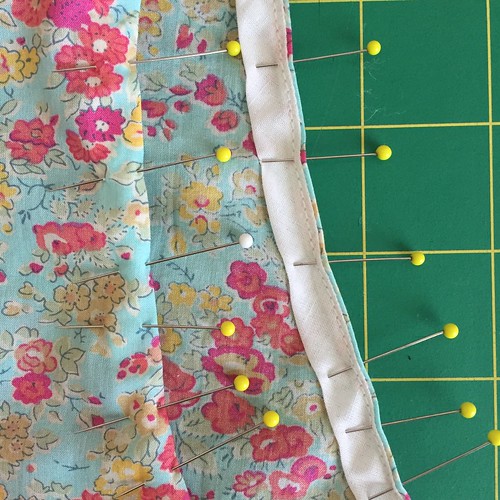
The next step is to turn the bias facing all the way to the inside of the garment.  I didn’t use the glue for this second turn.  Since you under stitched earlier, the facing will turn with just the tiniest bit of your main garment piece to the back, keeping the facing from showing on the outside.  In the picture above, the right side of the garment is to the left and the wrong side is to the right.  You can now see the under stitching on the wrong side of the garment, and if you look at that edge, you can see a tiny line of the outer garment fabric, just outside the bias facing strip.  You want that.  If you had folded the bias facing strip exactly on the seam line, the edge of the facing strip would barely show from the right side of the garment.  Under stitching forces the the garment edge to follow the bias facing strip around that fold just a little bit, which makes things look neater.
image
At this point you need to pin the bias facings to the inside.  (Yes, you’ve already pressed them, but I always pin before I sew just to make sure things don’t get weird while I’m sewing.)  I use lots of pins because I’d rather sew slowly than have to redo this seam.  It’s going to show from the right side, so you really don’t want to have to start and stop.
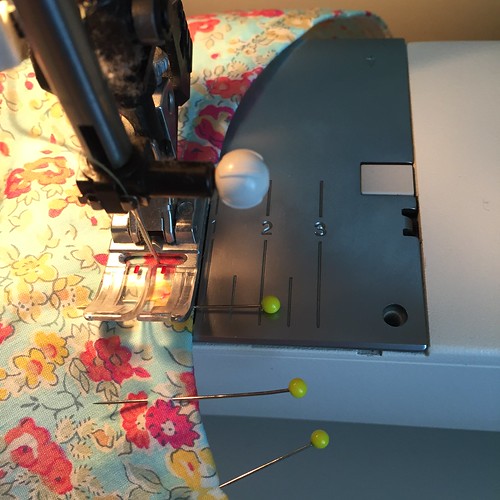
image
Then you sew.  Sew with the right side facing up and keep your distance from the edge consistent.  This line of sewing will show on your finished garment - you don’t want bobbles and wobbles. Take your time on this step.  You need to catch the fold of the bias facing strip on the inside, so before you start sewing, use a ruler and see where you need to put the garment edge.
image
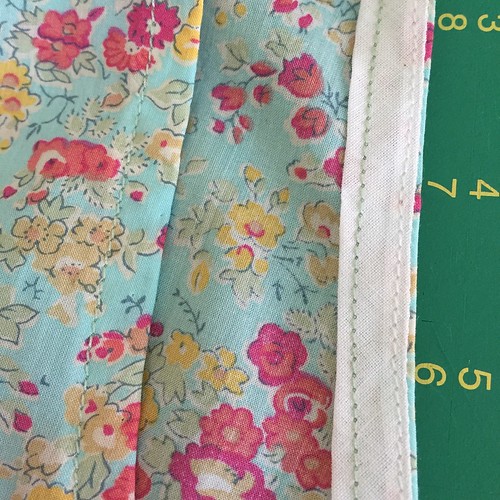
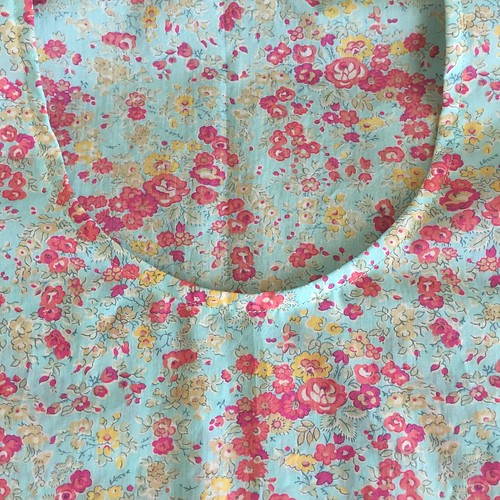
Here’s what the edge should look like once it’s all sewn.  Again, the right side is on the left and the wrong side is on the right.  You can see that I’m not quite all the way over to the edge of the fold of the bias facing, but it’s close enough that it’s not going to flap around, and my stitching from the right side is evenly spaced from the edge, all the way around the opening.  Also, I used a thread to match my fabric on this last bit of stitching (and the hem, which is already finished).  I sewed the side and shoulder seams, attached the bias facing strips and under stitched them with white thread because none of that will show from the right side of the garment.  I did this because I stitched three Wiksten tanks at once and then swapped to matching thread for hems and arm and neck opening top stitching.  If I was only sewing one tank at a time, all the thread would have matched the main fabric.
image
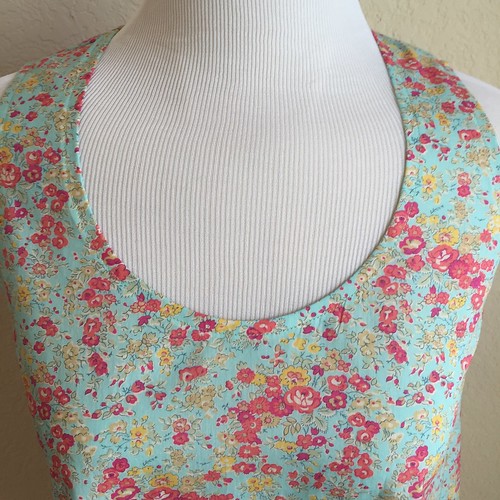
After top stitching the arm and neck openings, my neck edge isn’t quite laying flat.  Once I hit it with the steam iron, the bias relaxes into the shape of the curve…
image
…and everything lies flat!
image
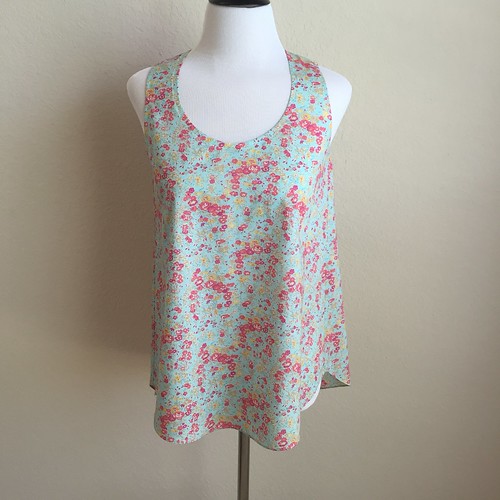
Now I have another finished Wiksten Tank!

Just a side note, the Wiksten Tank pattern calls for using your main fabric for the bias facing strips.  On these pale colored tanks I’ve done, I’ve used a white cotton batiste instead of the Liberty of London Tana Lawn.  By using another fabric for these facings, I only need to buy a yard of Liberty to get a tank top in the XS size.  That’s why my bias facings are white, instead of matching my main floral fabric.


Labels: ,

Friday, May 22, 2015

Excellent Question

I’ll be blocking my Extra Credit shawl today, but I really don’t have anything to show you right now. Fortunately, KayT of the comments asked a great question about the Yarn Over edging of Ondine!

Like many, many shawl patterns, Ondine uses Yarn Overs (YO) as increases.  This results in a row of YO’s at the edges of the shawl, which looks great and blends well with a lace pattern when there is lace in the middle of the shawl (Ondine has stockinette stitch, the only lace is the crocheted lace edge).  Since there is no other lace in the shawl, I didn’t feel like I was necessarily married to YO’s for my shaping increases.  Then, as I was reading through the notes on other people’s projects, I noticed one person mentioned that the YO’s at the edge made weaving in the ends from the stripes difficult.  That helped me make up my mind.  I was going to do this differently.

For my Ondine, I decided to go ahead and work the YO’s, but I would close them on the following row.  I could have worked Make One’s as my increases, those are closed when you make them; but they also tend to tighten the area they’re in.  With several rows of plain stockinette between them, it isn’t noticeable, but all of them in a single area (the edge) would have made it tighter than I wanted it.  By using YO’s, the edge didn’t get too tight, and then I could just twist them on the next row.  The YO’s at the beginning of Right Side Rows and the end of Wrong Side Rows were wrapped the usual way, and then knit (or purled) through the back loops on subsequent rows.  The YO’s at the end of RS rows and beginning of WS rows were wrapped reverse (back to front) and then knit (or purled) the regular way through the front loops.  This gave me the shaping the pattern called for, but made it easier to weave in the ends because I didn’t have a row of holes at the edge.  This is the only change I made to the pattern, which is beautifully written and very easy to follow.

I’ve added these notes to my project page on Ravelry as well so they’ll be easy to find (and I’ll be able to remember if I do this pattern again).

Labels: ,

Monday, February 25, 2013

And Now For Something Completely Different...

Remember the fabric from Friday's post?  Want to know what it became?  OK, I'll not only show you the finished project, but also tell you how to make it!  First though, I'm going to introduce my assistant for this project, and to the best of my knowledge, she's never been on the blog (although Max helped also, but you've already met him).
yarma
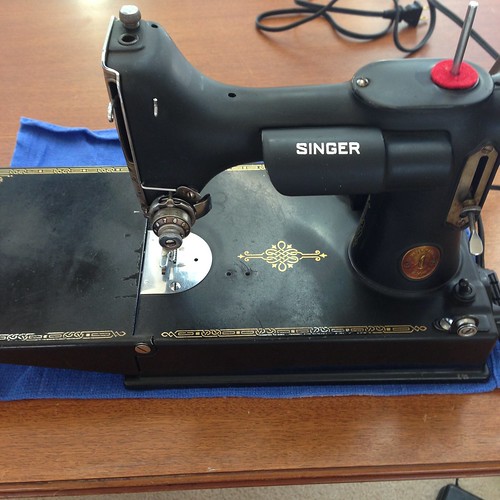
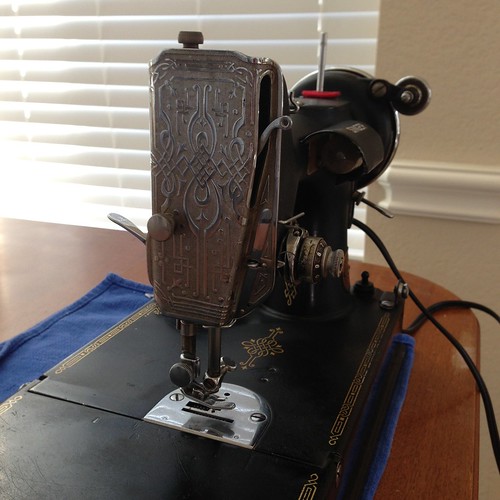
This is Elizabeth, my Singer 221, AKA the Singer Featherweight.  She is from 1939 and has the scrolled face plate.
yarma
Later models had a simpler, striated faceplate.  I got her about 15 years ago, but she hasn't done very much in a while.  I'm not sure if Caleb even saw her before this project.  She's just been quietly sitting in her case, waiting for me to use her.  The first thing I did was clean her up and oil her really well.  There are a couple of things that need to be replaced (her belt is cracking and will probably break any day, the handle on the case is falling to bits - literally, and her oil pad is just nasty), so as I was going over her I made a list and have ordered the parts she needs.  Thankfully, these weren't necessary immediately, so I was able to use her for this project.  She'd like to apologize for the blue towel under her, but she's missing a rubber foot and so she's got a bit of a wobble and will scratch the table without the foot or towel.  (I ordered some new feet cushions too.)

For those of you unfamiliar with the Featherweight, it is a small, straight stitch machine, made by Singer from 1933 until 1961 (black machines).  They later came in white and beige, but the whites are sometimes called green featherweights because there was copper in the paint and it changed color over time.  The machine was made of aluminum, which makes it much lighter than a cast iron machine, it was smaller than a full sized machine and made to be portable.  Like I said, they only do a straight stitch, they go forward and backwards, and take needles and bobbins that are still produced today.  They are very popular with quilters and for piecing they work great.  There is also a Singer 222, which is the Free Arm Featherweight and you can drop the feed dogs on that model, but it is mostly agreed that doing free motion quilting on a Featherweight is a great way to burn out the motor.  The 222 Featherweights are much more rare than the 221's and are priced accordingly.

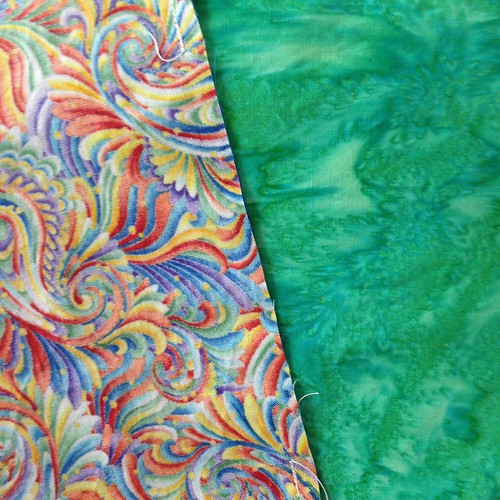
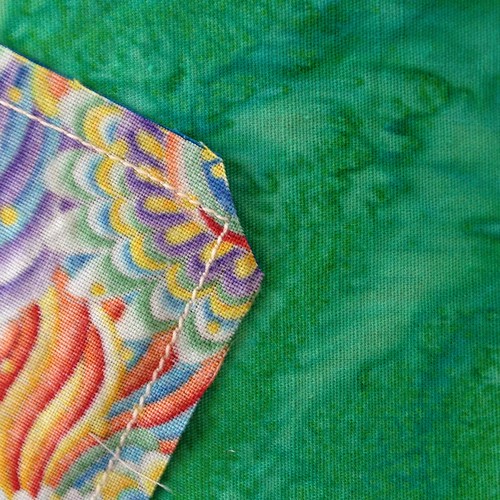
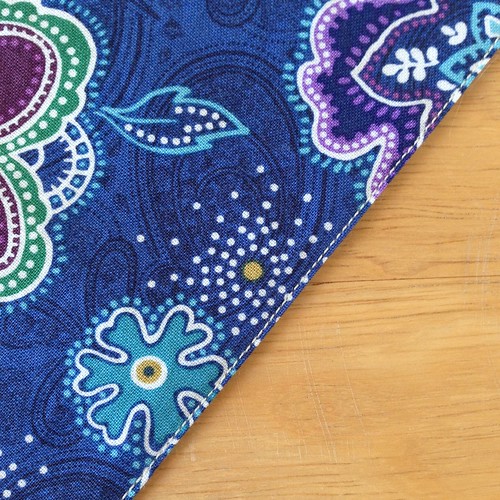
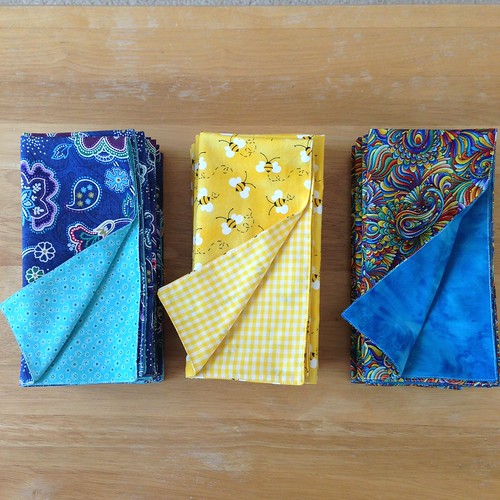
So, what was our project?  Napkins!  We've gotten back to using cloth napkins around here and they were looking a little sad.  Also, it kind of defeats the purpose of using cloth napkins if you only have a few and are running extra washing machine loads to clean them.  I went stash diving and found fabric for three new sets of six napkins.  We have three people in our house and the kitchen table seats six.  I made the napkins 17 1/2 inch square (that was pure, lazy math on my part).  For everyday napkins you want them to be about 16-18 inches square, but if you're doing formal napkins, you'd want 20-21 inch square napkins.  These are lined napkins because I used printed fabrics.  If you're using solid fabrics, woven plaids, or even batiks you wouldn't necessarily need to line them because they're the same on both sides - you could just hem them if you wanted to.  I also mostly used cotton quilting fabrics.  The lining for the bumble bee napkins is cotton/poly gingham because it was so cute.  I don't like using blends because they don't stick to 100% cotton.  Cotton sticks to cotton and will actually work with you when you're sewing it, so if you're buying fabrics for napkins, I'd suggest getting all cotton.

What you'll need:

  • Quilting cotton - you'll need 1/2 yard for every two napkins you make, but add in an extra 1/8 to the total just to give yourself a little wiggle room for cutting.  (6 napkins = 1-1/2 yards + 1/8 = 1-5/8 yards)  You'll need the same amount for lining.  (For the 6 napkin example- 1-5/8 yards of main fabric and 1-5/8 yards of lining fabric.)  Both fabrics will show as you use the napkin so feel free to use something cute for the lining as well as the main fabric.
  • Sewing machine - All you NEED is a straight stitch.  
  • Thread - I went with an offwhite cotton for all three sets.  You could coordinate your thread to your fabrics, but a neutral works also.  I usually use cotton thread with cotton fabrics but this is my quilting background.
  • Sewing machine needle.  Use a Microtex Sharp size 80/12, or a Quilting 75/11 for quilting cotton.  You could use a Universal if that's what you've got, but the topstitching looks neater with a sharp or quilting needle.  Start with a fresh needle.  Most of us don't change our needles often enough - you should change needles whenever you begin a new project.  
  • Point turner - a chopstick or large diameter knitting needle will work for this in a pinch.
  • Iron
  • Something to cut with.  I used my rotary cutter to do the cutting.  You could use scissors if you don't have a rotary cutter and mat.
Directions:
  1. Prewash and dry your fabric the same way you're planning on treating the napkins.  At my house this is hot water and extra scrubby with medium dry.  (The washing machine calls it towels or something, you get the point.)  I'm guessing this is what most of us would use, except for those people with white carpets who wear white clothes all the time and have non shedding white pets and serve only colorless liquids and foods that don't spill.  Unfortunately, most of us don't have unicorns doing our laundry.
  2. You could press the fabrics at this point.  If they're extra wrinkly you definitely should.  Mine came out of the dryer reasonably flat and I was feeling lazy, so I didn't.  The cutting will be more precise if you press them but these are napkins, not NASA.  If I was making napkins as gifts, I would have pressed them.
  3. yarma
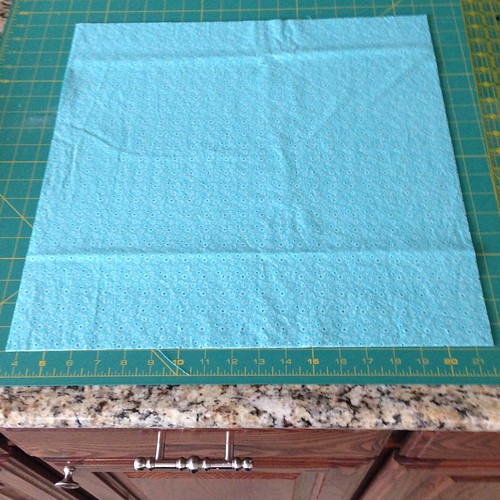
  4. Cut your fabric into 18 inch squares.  Again, I used a rotary cutter to do this.  You'll need one square of main fabric and one square of lining for each napkin.  If you really want to be efficient, you could layer your two fabrics right sides together and then cut them.  That would be impressive.  Keep an eye out for small children and pets who are under the impression they're "helpful."  Rotary cutters are sharp enough to take off fingers.
  5. yarma
  6. Go to the sewing machine.  Change the needle if you haven't already and thread it.  Double check your tension on a scrap of fabric left from your cutting.  If you don't know what correct tension looks like, check your sewing machine manual or google it.  Don't be afraid of adjusting this.  It's not scary and it's something everyone should be comfortable with on their sewing machine.
  7. yarma
  8. Place one main napkin square and one lining napkin square right sides together.  Using a 1/4 inch seamline start sewing about 2/3 of the way down one side.  If you don't have a 1/4 inch foot, just use the edge of your foot.  Even if it's a little bigger than a 1/4 inch, it won't matter as long as you're consistent.  Backstitch the first couple of stitches to lock it, go all the way around the square, stopping about 4-5 inches before the start - leaving a gap for turning.  You don't need a tiny gap here - the napkin is big enough you can make this easy on yourself.  Just make sure you sew past the corners and leave enough of an opening to get your hand through easily.  I didn't measure this, I just eyeballed it.  Do all the napkins like this.
  9. Clip the corners.  This makes the napkin corners easier to turn right side out.  Don't clip the stitching, just get close.
  10. yarma
  11. Turn the napkins right side out.  Use a point turner or chopstick or large diameter knitting needle to make the corners nice and pointy.  Be careful here.  If you're too enthusiastic you could go right through the corner.
  12. Press the napkins.  Roll the seamlines to the edge a little bit at a time as you press them.  You're just making sure the seams are at the edge of the napkins here.  I worked a couple of inches at a time and just kept my fingers a little ahead of the point of the iron.  Be careful.  Irons and fingers aren't a good mix, but you can get the iron pretty close to your fingers without burning yourself as long as you pay attention.  When you get to the side with the opening, fold the open edges in on both the lining and the main fabric and press so you have a straight edge between the beginning and end of the sewing.
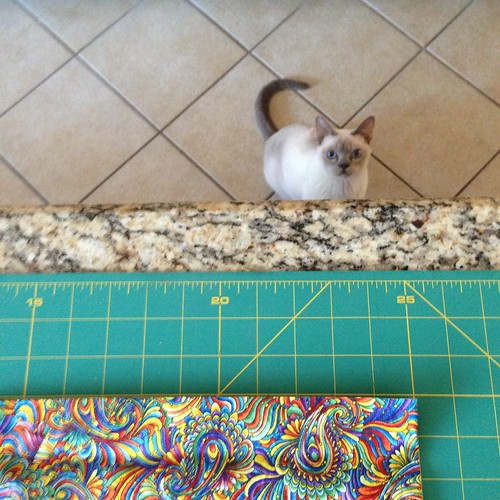
  13. Do this with all the napkins.  If you're lucky at this point the cat will come into to do a quality inspection and upon finding a pile of freshly pressed, warm napkins will joyously roll and purr upon them.  This means you are doing a good job.  Unfortunately, the camera was downstairs so I could not document the rolling purr of quality napkins.  Just be aware that there was much purring and the tiny gray feet were in the air in kitty bliss.  Also, happy wiggles.
  14. yarma
  15. Go back to the sewing machine and sew all the way around all four sides of the napkin to finish it.  At the end, make sure you sew a few stitches over the start to lock the stitching.  This stitching not only gives a nice edge, but also closes the gap from the turning.  You want to sew as close to the edge as you can and since this is visible topstitching, you want to sew as straight as you can.  Pick a place on your foot or the bed of the machine to line up the edge of the napkin and watch this part.  Do not watch the needle - amazingly, it will go up and down as long as you are pressing on the foot control.  Just watch the line you've picked and the edge of your napkin.  This is where using a sharp needle (Microtex or Quilting are both "sharp" types) will pay off - Universal's aren't made to pierce the yarns of the fabric - they shift the yarns to the right or left as they sew.  This is nice for knits, but can make your topstitching look wonky.  I prefer to use a Sharp because that way the topstitching goes in a straight line.  If I'm sewing knits, I use a Ball Point.  In my opinion, Universals are OK for everything but not really great for anything.  The specialized needles are there for a reason.
  16. yarma
  17. Now fold and admire your nice pile of new napkins!
If you are using a machine that does more than a straight stitch, you could use a decorative stitch for the final top stitching instead of a straight stitch.  I do recommend using fabrics with patterns on them.  Napkins get used and get food wiped on them.  Some foods stain (the bumble bees are totally NOT for spaghetti night), prints will help hide the stains.  I'm thinking that rainbow swirl fabric on the right could probably handle an entire lasagna wiped on it with no problem.  This project is really easy to do and could make nice gifts if you coordinate the fabrics to someone's kitchen colors.  I used the same color thread for all three sets of napkins so I just sewed them assembly line style and from start to finish, it didn't take too long.

This is a totally easy sewing project and it's easy to do the whole thing in one day.  Hope someone enjoys it!

Oh, and if you're wondering why we use cloth napkins, well for one reason they feel better, and for another reason, if you buy paper napkins or paper towels for this, you're buying something to wipe your face with and throw away.  Essentially, you're buying your trash.  (You're also buying stuff to throw away when you buy garbage bags, but I haven't figured out a way around this one yet.)  With the cloth napkins, we can usually use them for more than one meal (we really don't use a napkin most of the time at breakfast except to sit in our laps) and they're reusable until they fall apart.  Since I wash the napkins with the rest of the kitchen towels, assuming I have enough napkins, I'm not doing any extra laundry so I'm saving money over the long run.  I don't iron our everyday napkins, I just fold them fresh from the dryer and they're ready to go.


Labels: ,

Wednesday, May 04, 2011

Changing an existing pattern to fit a different sized foot

Now that everyone understands how the different parts of a sock relate to one another it will be easier to adapt an existing pattern. Most sock patterns are made for women's feet. To be more precise, most sock patterns are made for what's called "average women's feet." Average US shoe size is about a 7.5 or 8 for women, so if you're bigger or smaller (or just wider or narrower), you might have to adapt a pattern. If you're knitting socks for a man or a child you might also have to adapt the pattern.

Before you can adapt a pattern however, you will need to figure out the stitch repeat used in that pattern. If you're adapting a stockinette stitch or 2/2 rib pattern, you can just follow the directions for the basic custom sock pattern given in the first part of this tutorial. If you are using a more complex pattern you'll have to know your stitch repeat before you can start changing sizes.

A stitch repeat is the number of stitches that any pattern has before it starts over again (repeats). For instance K2, P2 is a 4 stitch repeat - you work 4 stitches before you start again at the K2. K1, P2, K1 is also a 4 stitch repeat. K1, YO, Slip one, K2tog, pass slipped stitch over, YO, K1 is a 5 stitch repeat. P1, 2/2 Cable Right, P1 is a 6 stitch repeat. There is no limit to the number of stitches a repeat can have, but when you're changing sock sizes, the smaller the repeat, the easier it is to adapt. (I'll give suggestions below for working with bigger repeats, but make your first pattern adaptation easy on yourself by working with a smaller repeat.)

Once you've figured out how many stitches are in each repeat, you will use this to adjust your primary number ("A" in our sample pattern). For instance, if I need 88 stitches to fit a sock to Mickael's foot and the stitch pattern I'm using has a 4 stitch repeat, I can just plug the numbers straight into my sample pattern and start knitting. 4 goes into 88 evenly (22 times) so I work the sock on 88 stitches, the heel over 44 stitches, work toe decreases every other round until I have 44 stitches, and every round until I have 24 or 20 stitches (22 isn't divisible by 4 so I have to juggle this last number a bit). On the other hand, if I'm making a sock with a 6 stitch repeat for Mickael, I need to change my "A" number. 6 doesn't go into 88 evenly, but it does go into 90. In this case I'd cast on 90 stitches, but I'd have to juggle my heel/instep stitches a little. Theoretically I should have a 45 stitch heel flap and use 45 stitches for the instep, but then I would only have 7 full repeats plus 3 extra stitches on the instep. I need full repeats* for the instep so I should either use 48 stitches for the heel flap and save the other 42 for the instep OR I could use 42 stitches for the heel flap and save 48 for the instep. I'd make that decision based on how wide or narrow Mickael's heel is. I'd have to juggle the toe decreases in a similar manner (either 90 dec to 48 dec to 24 OR 90 dec to 42 dec to 20) and I'd use the shape of his foot to make that decision - the first set of numbers will be more comfortable for widely spaced toes while the second set would fit longer, more close together toes because there would be more rounds. At this point, since we understand the basic relationship between the parts of the socks, it's easy to juggle numbers a bit so that we can fit the sock around a certain stitch pattern as well as a particular foot shape.

There's one other thing to take into account when you're adjusting patterns and this also affects the instep/heel flap stitch division. Some patterns aren't balanced in a single repeat and need an extra stitch or two be balanced. For instance, if you knit a leg in K2, P2 rib and knit another leg in K1, P2, K1, your legs will look the same. When you divide for the instep/heel flap though, the first leg will have a K2 on one side of the instep and a P2 on the other side and be unbalanced. The second leg will give you a K1 on each side of the instep and will be balanced. On a simple pattern like a K2, P2, in order to balance the instep you can easily work one extra knit stitch before turning for the heel flap and turn your stitch pattern into a K1, P2, K1. Then you wouldn't have to adjust numbers. On a more complex pattern, you might need to add a few stitches to the instep in order to balance it. If my stitch repeat is P1, K1, YO, Sl 1, K2tog, psso, YO, K1 (a six stitch repeat), I would use a multiple of 6 plus 1 for the instep stitches. Do you see the P1 at the beginning of my repeat? There isn't one at the end of the repeat so there's only a single purl stitch between repeats. By putting one more purl stitch at the end of the instep stitches (not at the end of every repeat), I've balanced my instep and have a better looking sock. Let's use Mickael's imaginary 90 stitch sock for an example (although I think the stitch pattern I've made up might be a little lacy for him). I've decided to work the heel flap over 48 stitches and the instep over 42, but now I'm going to need 43 stitches for the instep in order to balance the stitch pattern. This leaves me 47 stitches for the heel flap. Taking one stitch away from the planned heel flap isn't a big deal, but if it bothers you, or if you take out more than one stitch, you could always increase evenly over the first row of heel flap (the WS purl row). When you get to the gussets, just decrease back down to whatever your "A" number is.

If you are trying to adapt a pattern with a large repeat and it's just not working with your yarn gauge and foot size, try looking for places you can expand or decrease the actual repeat count. For instance, if you're adapting a cabled sock pattern and the cable is 24 stitches wide and you need your sock to be 64 stitches around, you can work two repeats, but you'll have 16 stitches left over. The easy way to adjust this would be to add two "filler" stitch panels of 8 stitches each between the two cable repeats. Filler stitches can be anything from ribbing to seed stitch, a small cable or a simple lace pattern - anything small that can be adjusted to fit the space you need to fill. Occasionally you will find a stitch pattern that just won't adjust to a different size very well. Your option here is to find a different yarn and needle combination that will give you a different gauge or find another stitch pattern that gives you a similar look that's easier to adjust.

I've adapted the sample pattern from the first part of this exercise to include adjustments for stitch repeats.
  1. Make a gauge swatch and figure out how many stitches per inch you are getting. Use any yarn weight and needles of appropriate size. Write down your gauge here:_____Stitches per inch.
  2. Measure your foot (or the foot of the person who's getting these socks) around the ball of the foot (or the widest part). Foot measurement:______ Inches around.
  3. Multiply the number of stitches you are getting per inch by your foot measurement. Write that down here:_____.
  4. Now, there is an option at this point regarding ease. Some people like their socks to fit snugly - if that's you, multiply the number you just got by 90% or 0.90. If you don't want your socks to fit snugly, don't change anything. Write down your new number here or the same number from Step 3 depending on the choices you made:_____.
  5. You'll need to know how many stitches are in each pattern repeat ______. If your number from Step 4 is divisible by your stitch repeat number, you won't need to change anything. If it's not, you'll need to adjust the number from Step 4 either up or down to make it divisible by your stitch repeat. For instance, if your repeat is 6 and you have 88 stitches in Step 4, you can round up to 90 or down to 84 stitches. Write down your new number that's divisible by your repeat here:_____.
  6. The number in Step 5 is your primary number or "A." This is the number that all your other numbers will be related to. Anytime I refer to this number, I will call it "A" with the quotes and everything. If I say "1/2 of A", you'll need to divide "A" by 2. If I say "1/4 of A", you'll need to divide "A" by 4. Don't worry, it's pretty easy.
  7. Cast on "A" stitches and divide them evenly over 4 DPN's. (I know, after all that math you forgot we were even knitting socks, didn't you?)
  8. Join without twisting stitches and work the leg of your sock in your desired stitch pattern. You might have a cuff, you might not - use the pattern you are adapting and work the leg until it is the desired length before the heel flap.
  9. Now we'll start the heel flap. The heel flap will be worked over "1/2 of A" stitches. Here is the first place we might have to juggle our stitch count. Also remember that you might need to balance the stitch pattern on your instep stitches. Plan for this now (chart it out if it helps you to see it better). The other stitches not used in the heel flap will be held for the instep. Turn your work and work a WS row as follows: Slip 1, P remaining heel flap stitches. If you need to increase any stitches in the heel flap, work those increases evenly across this first row. Turn your work and *Slip 1, Knit 1, rep from * to end of heel flap stitches. You've now worked 2 rows of the heel flap. Continue working these two rows until you've worked "1/2 of A" rows total in the heel flap, ending with a RS row. Make sure you end with a RS row here even if that means you work one more or one less than "1/2 of A" rows - you want to work an even number of rows in the heel flap for the rest of the directions to work.
  10. Start the heel turn as follows. (WS row) Slip 1, P 1/2 of the heel flap stitches (the total number of stitches on your right needle after this step will be 1/2 of the heel flap stitches plus 1), P2tog, P1, turn. Next row (RS) Slip 1, K3, SSK, K1, turn.
  11. Now that the heel turn is begun, you'll complete it as follows. WS rows: Turn, Sl 1, P to 1 stitch before the gap (there's a little gap between the stitches you've already worked in the heel turn and those waiting to be worked), end P2tog, P1. RS Rows: Turn, Sl 1, K to 1 stitch before the gap, end SSK, K1. Continue repeating these two rows until you've picked up and worked all the stitches from the heel flap.
  12. Divide the heel stitches over 2 needles. With the needle on the left (the one with the working yarn on it, pick up and knit stitches along the side of the heel flap, down to the joint between heel flap and instep stitches. It's more important to pick up enough stitches so you don't have holes here than it is to pick up a specific number of stitches. Work across the instep stitches in your stitch pattern, working any additional balancing stitches. Then pick up stitches along the other side of the heel flap. Try to get the same number of stitches you did the first time, but if you get one more or one less, you can just work an extra decrease on the side with the extra stitch later. Extra decreases aren't noticeable, holes are, so pick up what you need to not leave holes. Knit across the heel stitches and then back across the first gusset stitches. You will have completed this round when the working yarn is between the gusset stitches on the right and the first needle of instep stitches on the left. (New rounds begin with the instep stitches.)
  13. Work one round even. Keep instep stitches in pattern and keep heel and gusset stitches in stockinette.
  14. Decrease round - Work instep stitches in pattern. Heel/gusset stitches should be worked as K1, SSK, K to last 3 stitches of round, end K2tog, K1.
  15. Work the previous two rounds (decreasing every other round) until your total stitch count is "A" again. If you have an extra stitch on one side or the other, on the final decrease round, only decrease on that one side to get your stitch count back to "A." At this point you might not have the same number of stitches on each needle, particularly if you divided the heel flap and instep stitches unevenly. Before you begin the toe decreases, it's crucial that you have the same number of stitches on each needle and that the instep stitches are centered over the first two needles of the round. If you can't just shift stitches around to do this, consider working a couple of rounds of stockinette before starting toe decreases or work an additional decrease on the last round before toe decreases. (I've done this when I have an odd number of stitches on my instep. For example, if I have 33 stitches on the instep and 32 stitches on the sole, I'll decrease one extra stitch somewhere in the pattern on my last round of the pattern, then make sure I've got 16 stitches on each needle and the instep is centered over the first and second needles of the round before starting toe decreases.)
  16. Work even until the foot of the sock reaches the point between your big toe and it's neighbor (where a flip flop would go).
  17. Begin Toe Decreases. (If you're working the top of the foot in rib, you'll switch to stockinette for the toe.) Decrease Round: K1, SSK, K to last 3 stitches of instep, K2tog, K1, (sole of sock) K1, SSK, knit to last 3 stitches of sole, K2tog, K1. You've just decreased 4 stitches in this round.
  18. Work one round even.
  19. Continue alternating the Decrease Round with an even round until you have "1/2 of A" stitches left.
  20. Work the Decrease Round only until you have "1/4 of A" stitches left (you might need to tweak this number a bit if "1/4 of A" isn't divisible by 4.) Get as close as you can to "1/4 of A" in this type of situation.
  21. Kitchener Stitch the toe closed.
Again, any comments on what you'd like to see added to this tutorial would be great. I will include chart examples of stitch patterns and show how to balance them in the pdf but I didn't have time to work them all up for the blog post. Let me know if there's anything else sock related that you'd like me to cover and I'll see what I can do!

Labels:

Wednesday, April 27, 2011

Snowbird

DSC05105
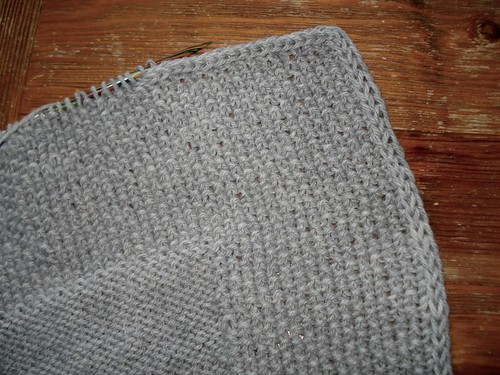
Do you see that corner? Do you know what that means? I'm binding off! I'll still have to go back and knit pocket linings and then there's a lot of finishing up to do before I'm really finished, but the majority of this cardigan is all finished!

There was a question in the comments last time I blogged Snowbird about the i-cord edgings. This is a place I modified the original pattern. As the pattern is written, the front bands (and cuffs and hems) are in Stockinette Stitch and the edges just roll naturally. I decided to use Seed Stitch for my front bands (and cuffs and hems) because I adore Seed Stitch. I just love it's little bumpy goodness. Love. It. Seed Stitch doesn't roll (in fact, it's very well behaved and makes a beautiful, flat edge all by itself, did I mention how much I love it?) and I did like the rolled edge look of the original design. I had just finished Coraline right before I started Snowbird and Coraline uses an i-cord edge, so I figured if I added an i-cord edge to Snowbird, it would give a rolled look to my Seed Stitch and finish if off nicely. (If you do a search for i-cord cardigans in Ravelry, you'll get 11 pages of patterns - now some just use i-cord as embellishment and but the majority do seem to use it as edgings.) I used two different techniques for the i-cord on this project - I worked it along the edges as I knit the cardigan (front bands) and I used an i-cord bind off (cuffs and lower hem).

If you've never knit i-cord, you should give it a try and you do need to at least understand how it works before you use it or you're going to think the directions are crazy. You'll need two DPN's, of an appropriate size for your yarn. Cast on 3 stitches. (I used 3 stitch i-cord for Snowbird, so that's how I'll give directions.) Knit 3. *Without turning your work (your stitches are on the needle in your Right hand), slide the stitches to the other end of the needle and pass the Right needle to your Left hand, still without turning your work. Your working yarn will be all the way to the left and this will feel very, very wrong, but trust me, you're doing this right. Pull the working yarn over to the right keeping it behind your work (on the WS) and Knit 3. Repeat from * until your i-cord is the length you need it to be. The trick is to pull the working yarn tight across the back side of the work so that the first and third stitch are pulled together, making a cord. Here's a video of making i-cord if that helps.

To work i-cord edgings while you knit something in between (like a cardigan), it's a little bit different, but the principles are the same. Instead of using DPN's, you'll use a circular needle to hold all the stitches. You'll be using 3 stitches at each end of each row for your i-cord edgings, so, depending on your pattern, you might want to cast on an additional 6 stitches to compensate. I also put a marker between the i-cord edgings and the Seed Stitch front bands just to remind myself to pay attention. To begin, work a WS row as a setup row and keep the first 3 and last 3 stitches in Stockinette. (Since the setup row is WS, these should be purled.) Then you'll work as follows: RS rows- Slip 3 stitches with yarn held to wrong side, work to last 3 stitches in whatever stitch pattern you're using, end K3. WS rows- Slip 3 stitches with yarn held to wrong side, work to last 3 stitches in pattern, end P3. By slipping the first 3 stitches of each row, you're creating the i-cord on the edge of your work. The thing to remember with doing it this way is that you're only actually knitting (or purling) your edgings every other row while the main part of your cardigan is being worked on every row. If you pull your i-cord too tight it will draw up and make your fronts hang funny. No one wants funny hanging fronts, so be aware that you need to slip the stitches loosely but not too loosely or it will look sloppy. I can't be any more precise than that, just pay attention on the first few rows and you'll get a feel for your yarn and your gauge.

To do an i-cord bind off, I started it two different ways, but the bind off itself was identical once I got past the start. For the lower hem, I already had an i-cord edge so I didn't need to cast on anything extra. I did work knit one row on the three i-cord stitches to get the yarn where it needed to be to start the bind off and to give myself a little extra length to turn the corner. On the sleeves, I had just finished the Seed Stitch cuffs and didn't have an i-cord to work off of for the bind off, so I just cast on 3 stitches at the beginning of the bind off. (I probably used the backwards loop cast on.) Once you have your i-cord stitches, either from an existing i-cord edging or from a cast on, you work the bind off the same. *K2, SSK (you're using the last stitch from the i-cord and the first stitch from the thing you're binding off to work the SSK). Slip all three stitches back to the left needle without twisting them. Pull the working yarn back to the right behind the first stitch (tight enough to make i-cord, not so tight you make your lower edge pucker up), and rep from * all the way across the edge. Here's a video of the technique although she uses a K2tog tbl instead of a SSK - both are left leaning decreases. Once all the stitches are bound off, you'll have the three stitches from the i-cord left. On the sleeves, I put these on a stitch holder, sewed up the sleeve seams and I will Kitchener Stitch the i-cord ending together with the i-cord beginning. On the hem, I will bind off until the three i-cord stitches from the end remain as well as the three stitches I was using for the bind off, and then Kitchener Stitch them together immediately. By Kitchener Stitching the i-cord ends together, you keep the roundness of the i-cord and get a seamless corded edging. I know that not everyone likes to Kitchener, but it's only 3 stitches at a time and the finished look is worth it.

Labels: ,

Friday, April 22, 2011

Essential Parts of A Sock and How They Work Together

If we're going to discuss modifying sock patterns and adapting them to fit the feet of those you love and knit for, it seems like a good idea to start with a good basic understanding of what goes into a sock. By starting at the very beginning (it's a very good place to start, after all) we'll all be on the same page as far as the basics, regardless of our actual sock knitting experience. Then when we get to the modifying and adapting part, you'll understand these basics and how they relate to each other in the whole sock.

When I began knitting socks I followed the patterns exactly. I didn't put much thought into it, (except after the heel turn where clearly, magic had happened and each heel turn got a dramatic pause of appreciation) but I just kept doing what the pattern told me to do. I remember the exact pair of socks that slapped me upside the head and made me realize, that maybe I needed to put some more thought into my sock knitting than I had previously. You see, I have narrow feet. I had successfully knit socks with 64 stitches around in an average fingering weight yarn before. Using needles in US 1 (2.25 mm). The pattern that made me have a lightbulb moment called for 64 stitches around in average fingering weight and US 2's (2.75 mm). Obviously, my feet swam in those socks like dolphins in the ocean (which is good if you're a dolphin but bad if you're a foot).

As I continued knitting socks, I began to notice that the majority of the sock patterns I was using had some proportional things in common. I started paying attention and started changing sock patterns to knit for Mickael and Caleb as well as adapting patterns to my handspun yarn. Sure enough, as long as I kept the proportions in mind, I could produce socks for any of our feet in any yarn. Now obviously not everyone has the same shape of foot, but if you know how your feet are different from the "average" foot, you can tweak the proportions and still get a nicely fitted sock.

A few things I should note here before we get into this is that I will be using Top Down (cuff to toe) socks knit on Double Points for my model for this discussion. There will be a lot of similarities to Toe Up socks and once you have your numbers figured out, you can just apply them to the parts of the sock you're working. If you knit your socks sideways, or wrong side out and backwards, you might not get too much out of this discussion. If you prefer to Magic Loop your socks, I am going to assume that you know how to adapt a pattern written for DPN's to your particular needle situation. I'm not personally a big fan of circular needles and the idea of using circular needles for acrobatic sock tricks really makes me a bit nauseous. If you've learned how to do this, recheck the book/site you learned it on and I bet there are directions for adapting from DPN's to your technique. Also, I will keep the math as simple as I possibly can, but there will be a little bit of math. Don't panic, I'll be right here.

Parts of a Sock
  • Gauge - This is often ignored by sock knitters, but affects fit in socks the same way it does in a sweater. There's just not as much knitting in a sock. Usually. Gauge is the number of stitches per inch (I almost never fool around with rounds per inch on socks and so far it's worked out) that a particular knitter gets on a specific size and type of needle, with a specific yarn. This means that your sock gauge will not match your best friend's. Your gauge on bamboo needles might be different from your gauge on metal needles, even if the needles are exactly the same size. Different yarns will also affect your gauge. The more socks you knit, the more experience with your own gauge you will have and the fewer gauge swatches you'll need to make, but until you get an idea of where your gauge tends to be, you'll need to swatch a bit. Most sock patterns will usually give gauge in stockinette stitch so cast on about 20 stitches onto the DPN's you plan to use and start knitting in stockinette. Now I should probably tell you to knit your gauge swatch in the round, but honestly I've always just knit mine back and forth and so far everything has worked out just fine. I usually knit for about an inch (again, I should probably tell you that bigger swatches are more accurate than tiny, postage stamp swatches, but whatever) and then start checking my gauge. Lay a ruler down on the little swatch and start counting stitches per inch. If you're happy with the look of the stitches (tight stitches on socks are a good thing and make the socks wear longer, but too-tight stitches on socks can make your hands turn into painful claws of misery that you won't be able to straighten out for months - use your own judgement here) and you like the way the yarn and needles are playing together, write down your gauge as the number of stitches per inch. If you're looking for a specific gauge, remember that smaller and grippier needles will give you more stitches per inch while bigger and more slippery needles will give you fewer stitches per inch. If you're just starting to knit socks, try to play around with different needle materials and lengths until you find something you like. My favorites are 6 inch bamboo needles - they are slick enough to work quickly but grippy enough that they don't fall out. They are also flexible which is easier on my hands. The 6 inch length doesn't get caught in the cuff of a long sleeved shirt the way I've had 7 inch needles do. Needle choice is personal, keep playing with different options until you find what works for you.
  • Proportions - This is something I've figured out after knitting a bunch of socks. It just hit me one day that there is a tendency for most sock patterns to follow a set of proportions. There are 3 important sizing numbers (possibly 4, depending on the relationship between the size of your feet and the size of your leg/ankle area - we'll cover this in the adapting sock patterns part) in every sock. The first is the number of stitches around the leg of your sock. This is the primary number that the other numbers are based on. The second number is the number of stitches in the heel flap and the third number is how the toe shaping works. For the majority of top down sock patterns, the proportions work like this: Cast on A stitches (A is the number of stitches around the leg of your sock). Work until it's time to start the heel. Leave "1/2 of A" stitches on needles for the instep and work the remaining "1/2 of A" stitches for the heel flap. Work "1/2 of A" rows for the heel flap. To begin the heel turn, slip one and then purl "1/4 of A" stitches, P2tog, P1, turn. Work the heel turn, pick up stitches for the gusset and continue down the foot, working the instep stitches as established and decreasing in the gusset area until you have "A" stitches again. Continue working the foot until it's time to start the toe decreases. Decreasing 4 stitches on each decrease row, work a decrease row every other row until you have "1/2 of A" stitches left, then work a decrease row every row until you have "1/4 of A" stitches left. Kitchener stitch them together for the toe and you've got a sock. (A real pattern would have more detail of course, this is just to illustrate how all of the major parts of the sock are based on a single number or fractions of that number.)
I realize this sounds a bit complicated, but pull out a top down sock pattern and look at it. Download a free one from Ravelry if you don't own any sock patterns. Without possessing any psychic powers, I can tell you that the majority of sock patterns using 64 stitches around will have a 32 stitch wide heel flap worked for 32 rows. You'll work toe decreases every other row until you have 32 stitches, then every row until you have 16 stitches remaining. If you're looking at a 72 stitch sock, you'll probably have a 36 stitch heel flap worked over 36 rows and you'll work toe decreases every other row until you have 36 stitches left and then every row until you have either 20 or 16 stitches remaining. In this case, you are decreasing to a multiple of 4 so you have to juggle the numbers a bit.

Once you see how the parts of the sock relate to each other as proportions, it's much easier to resize them. It's also much easier to figure out where to make changes to fit the shape of the feet you're knitting socks for.

Here is a sample sock for you to create to your personal gauge and the proportions of a sock made to fit that gauge. This will fit an average shaped foot. If you do not have an average shaped foot, hang in there and the next part of this little sock adventure will have directions for compensating for non-average feet. Please note that I say average shaped foot, not average sized foot. This pattern can be adapted for anyone from children to large men. Babies have differently shaped feet and usually chubby ankles, so I don't recommend using this basic sock pattern for them.

  1. Make a gauge swatch and figure out how many stitches per inch you are getting. Use any yarn weight and needles of appropriate size. Write down your gauge here:_____Stitches per inch.
  2. Measure your foot (or the foot of the person who's getting these socks) around the ball of the foot (or the widest part). Foot measurement:______ Inches around.
  3. Multiply the number of stitches you are getting per inch by your foot measurement. Write that down here:_____.
  4. Now, there is an option at this point regarding ease. Some people like their socks to fit snugly - if that's you, multiply the number you just got by 90% or 0.90. If you don't want your socks to fit snugly, don't change anything. Write down your new number here or the same number from Step 3 depending on the choices you made:_____.
  5. The math will work out better if your primary number is divisible by 4. If necessary, add or subtract from your number from Step 4 until it's divisible by 4. (Math refresher: if a number is divisible by 4, you can divide 4 into it evenly - 12, 48, 64, 72, 80 are all divisible by 4.) Write down your new number that's divisible by 4 here:_____.
  6. The number in Step 5 is your primary number or "A." This is the number that all your other numbers will be related to. Anytime I refer to this number, I will call it "A" with the quotes and everything. If I say "1/2 of A", you'll need to divide "A" by 2. If I say "1/4 of A", you'll need to divide "A" by 4. Don't worry, it's pretty easy.
  7. Cast on "A" stitches and divide them evenly over 4 DPN's. (I know, after all that math you forgot we were even knitting socks, didn't you?)
  8. Join without twisting stitches and work K1, *P2, K2, rep from * to last stitch, end K1 for as many rounds as desired for a cuff.
  9. Switch to stockinette stitch (Knit every round) and work until the leg is the desired length before the heel flap. Or keep going in the rib - they're your socks, go crazy!
  10. Now we'll start the heel flap. The heel flap will be worked over "1/2 of A" stitches. The other stitches will be held for the instep. Turn your work and work a WS row as follows: Slip 1, P remaining heel flap stitches. Turn your work and *Slip 1, Knit 1, rep from * to end of heel flap stitches. You've now worked 2 rows of the heel flap. Continue working these two rows until you've worked "1/2 of A" rows total in the heel flap, ending with a RS row.
  11. Start the heel turn as follows. (WS row) Slip 1, P "1/4 of A" stitches (the total number of stitches on your right needle after this step will be "1/4 of A" plus 1), P2tog, P1, turn. Next row (RS) Slip 1, K3, SSK, K1, turn.
  12. Now that the heel turn is begun, you'll complete it as follows. WS rows: Turn, Sl 1, P to 1 stitch before the gap (there's a little gap between the stitches you've already worked in the heel turn and those waiting to be worked), end P2tog, P1. RS Rows: Turn, Sl 1, K to 1 stitch before the gap, end SSK, K1. Continue repeating these two rows until you've picked up and worked all the stitches from the heel flap.
  13. Divide the heel stitches over 2 needles. With the needle on the left (the one with the working yarn on it, pick up and knit stitches along the side of the heel flap, down to the joint between heel flap and instep stitches. It's more important to pick up enough stitches so you don't have holes here than it is to pick up a specific number of stitches. Work across the instep stitches either in stockinette or in the rib pattern, whatever you were doing right before you started the heel flap. Then pick up stitches along the other side of the heel flap. Try to get the same number of stitches you did the first time, but if you get one more or one less, you can just work an extra decrease on the side with the extra stitch later. Extra decreases aren't noticeable, holes are, so pick up what you need to not leave holes. Knit across the heel stitches and then back across the first gusset stitches. You will have completed this round when the working yarn is between the gusset stitches on the right and the first needle of instep stitches on the left. (New rounds begin with the instep stitches.)
  14. Work one round even. Keep instep stitches in pattern (probably either stockinette or rib) and keep heel and gusset stitches in stockinette.
  15. Decrease round - Work instep stitches in pattern. Heel/gusset stitches should be worked as K1, SSK, K to last 3 stitches of round, end K2tog, K1.
  16. Work the previous two rounds (decreasing every other round) until your total stitch count is "A" again. If you have an extra stitch on one side or the other, on the final decrease round, only decrease on that one side to get your stitch count back to "A."
  17. Work even until the foot of the sock reaches the point between your big toe and it's neighbor (where a flip flop would go).
  18. Begin Toe Decreases. (If you're working the top of the foot in rib, you'll switch to stockinette for the toe.) Decrease Round: K1, SSK, K to last 3 stitches of instep, K2tog, K1, (sole of sock) K1, SSK, knit to last 3 stitches of sole, K2tog, K1. You've just decreased 4 stitches in this round.
  19. Work one round even.
  20. Continue alternating the Decrease Round with an even round until you have "1/2 of A" stitches left.
  21. Work the Decrease Round only until you have "1/4 of A" stitches left (you might need to tweak this number a bit if "1/4 of A" isn't divisible by 4.) Get as close as you can to "1/4 of A" in this type of situation.
  22. Kitchener Stitch the toe closed.
I hope this helped you to see how a sock is actually constructed. There's no magic in the numbers, they're all just proportions based on the gauge. (Obviously you can't write down your personal gauge numbers in my blog post, but once I get this turned into a pdf and uploaded to Ravelry, you can print out the sock knitting directions and make notes to your heart's content.)

I won't be turning this into a pdf file and uploading to Ravelry until I finish this whole little series, so if you have any questions or comments, let me know and I can add to it. I do plan to attempt to do this in several pdf's so you can print only what you need. Obviously you might want the sock directions more than once, but the other information you might only print once or just read online depending on your own preferences.

Labels: