In Progress
I thought I'd show you what I have done on the sewing machine head so far. I am still cleaning it, so no finished pictures yet (she was dirtier than I thought). The exposed metal parts have all been cleaned (needle clamp, end plate, back plate, hand wheel, bobbin cover plate, needle plate, and presser foot). I've taken apart the hand wheel to clean it, and I've cleaned the bobbin winder assembly as well as the actual bobbin area (the Singer 66 has a drop in bobbin, not a removable bobbin case). There was lots of metal polishing happening around here.
The smaller pieces actually got cleaned in my tumbler (the idea of which I am particularly proud). I've dabbled in making jewelry, and when you're all done with the making of it, it needs to be polished. If there are stones in the jewelry, you have to do it differently, but if it's all metal, you can put it into a tumbler (like what you'd polish rocks in) along with some polishing fluid and some stainless steel BB like things (they're different shapes - not just round - so they can get into all the nooks and crannies). This will not only polish your jewelry piece, but work harden it so it's less likely to bend. I tried it out on a couple of sewing machine pieces that I knew I could replace if for some reason it didn't work out like it did in my head. After a couple of hours, I checked, and everything was good, so at that point I tossed in everything that would fit (I always count how many pieces I toss into the tumbler, so I don't lose any in the BB's), and just let it go. While that cleaned and polished the smaller bits, I got to work on the bigger ones - the end plate and the back plate. Here's what they looked like before I started:

The smaller pieces actually got cleaned in my tumbler (the idea of which I am particularly proud). I've dabbled in making jewelry, and when you're all done with the making of it, it needs to be polished. If there are stones in the jewelry, you have to do it differently, but if it's all metal, you can put it into a tumbler (like what you'd polish rocks in) along with some polishing fluid and some stainless steel BB like things (they're different shapes - not just round - so they can get into all the nooks and crannies). This will not only polish your jewelry piece, but work harden it so it's less likely to bend. I tried it out on a couple of sewing machine pieces that I knew I could replace if for some reason it didn't work out like it did in my head. After a couple of hours, I checked, and everything was good, so at that point I tossed in everything that would fit (I always count how many pieces I toss into the tumbler, so I don't lose any in the BB's), and just let it go. While that cleaned and polished the smaller bits, I got to work on the bigger ones - the end plate and the back plate. Here's what they looked like before I started:
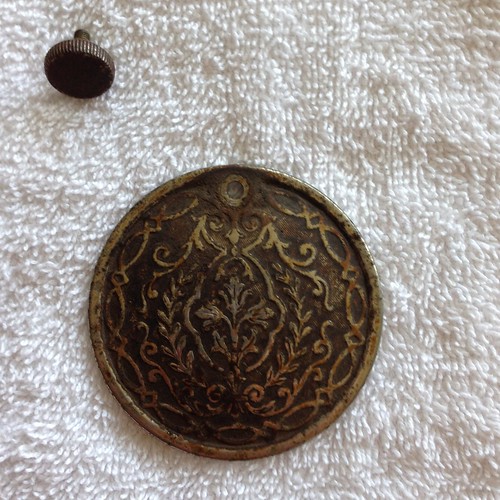
The back plate (the round one) was particularly disgusting. (The thumb screw in the picture went into the tumbler.)
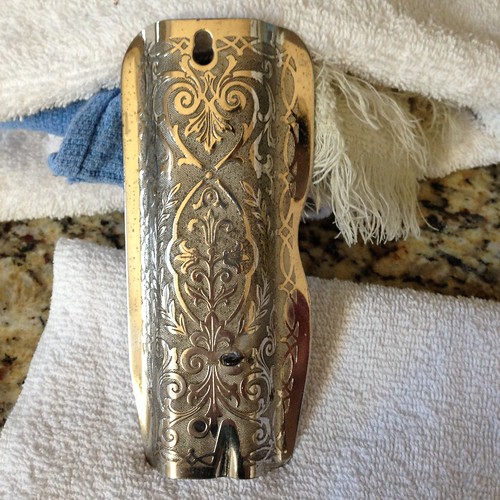
The end plate had a yellow brown coating of nicotine on it, but less grime overall. What you can't see (and it isn't showing up very well in the photos) is that in addition to the overall, large floral pattern on each of these, there is a teeny tiny honeycomb pattern in the background. There was gunk all the way into this honeycomb pattern! Here is the back plate all cleaned and polished:
And here is the end plate all cleaned and polished:
There are some places that just aren't polishing out, but I feel so much better about where we are (cleanliness-wise) on the machine head than when I started.
I'm still cleaning the head, but I'm definitely getting there. Here is an in progress picture of what I'm cleaning off of the head:
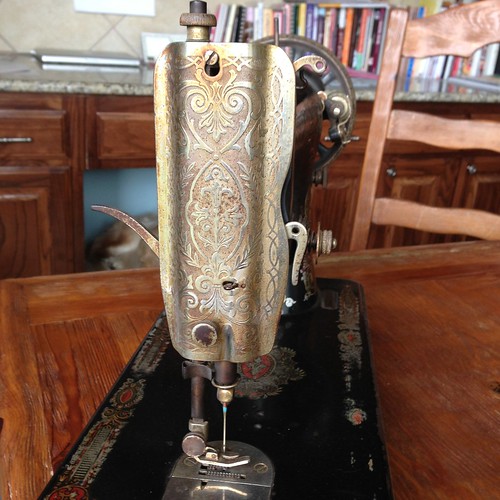
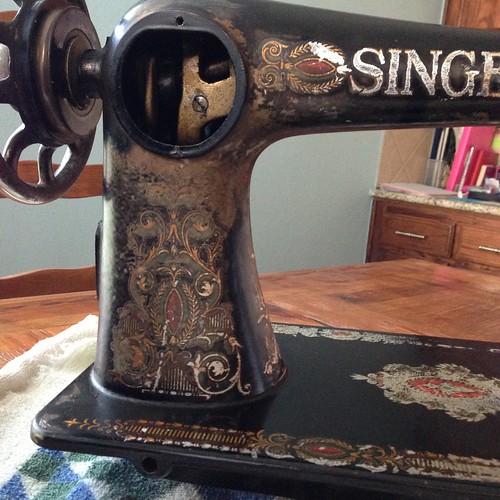 This stuff was everywhere and I have to clean it carefully and slowly or I'll silver my decals (some of them are already silvered or otherwise damaged, but I'm trying to keep in them in as good a shape as possible). I would like to be able to sew light colored things with this machine and as it is now, I'm not there yet. I'm hoping to get a lot done this weekend and then get her sewing again sometime next week. Here's what I've got left to do:
I'm still cleaning the head, but I'm definitely getting there. Here is an in progress picture of what I'm cleaning off of the head:
- Finish cleaning the exterior of the head
- Wax the head to protect the decals and shine her up
- Put everything back together
- Oil her up again really well
- Get her back into the cabinet
- Get the treadle belt installed
- Get her adjusted and sewing correctly again
Some things will take longer than others, and I know it will be worth it when she's all clean and ready to sew, but I was hoping I'd be a little farther along on her by this morning. I have been oiling her and running her with the hand wheel, just to flush out any old oil and get her moving again. She's moving really well now and if I roll the hand wheel towards me, it keeps going for a bit, so I know that when she's all clean and back together she'll sew like a dream!
Have a great weekend!
Labels: treadle sewing machine
posted by Melanie at 9:59 AM
![]()


3 Comments:
Gorgeous! you're doing a great job!
Oh, wow! I thought I was well acquainted with your machine. Wrong - I had no idea of the amount of shiny bright and color it had. I am SO impressed!
You're doing a fantastic job! Oh, how I wish my grandmother had given me her old treadle machine; but like so many of her things, it disappeared somewhere along the way (not surprising since she lived to 103 and shed possessions for 25 years before she passed away). You should be very, very proud of your beautiful new machine -- the love you're putting into it will be amply rewarded!
Post a Comment
<< Home