<body><script type="text/javascript"> function setAttributeOnload(object, attribute, val) { if(window.addEventListener) { window.addEventListener('load', function(){ object[attribute] = val; }, false); } else { window.attachEvent('onload', function(){ object[attribute] = val; }); } } </script> <div id="navbar-iframe-container"></div> <script type="text/javascript" src="https://apis.google.com/js/platform.js"></script> <script type="text/javascript"> gapi.load("gapi.iframes:gapi.iframes.style.bubble", function() { if (gapi.iframes && gapi.iframes.getContext) { gapi.iframes.getContext().openChild({ url: 'https://www.blogger.com/navbar/10582443?origin\x3dhttp://pinklemontwist.blogspot.com', where: document.getElementById("navbar-iframe-container"), id: "navbar-iframe" }); } }); </script>

Wednesday, May 08, 2013

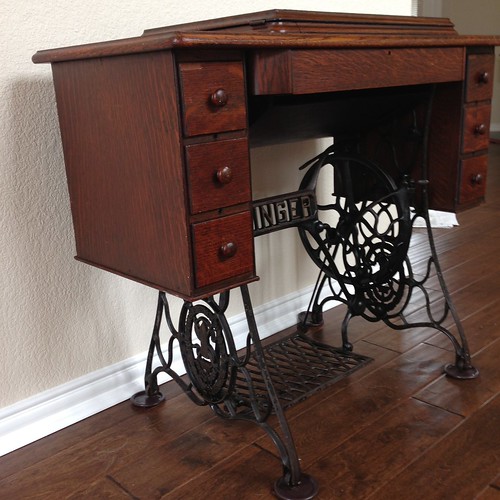
Getting to Know Each Other

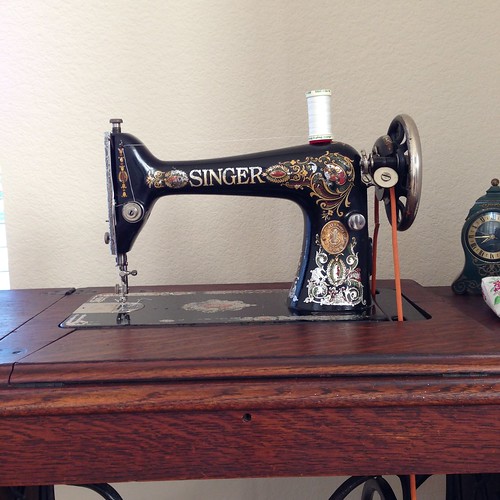
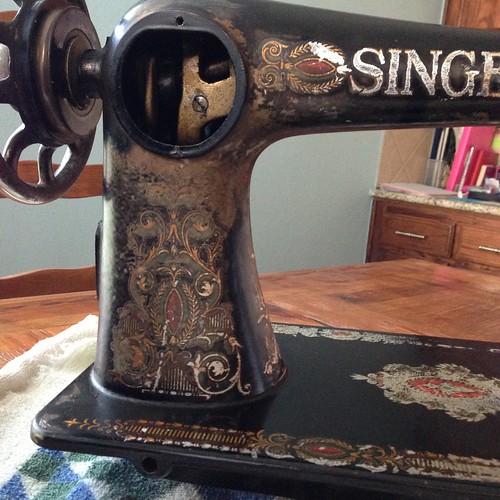
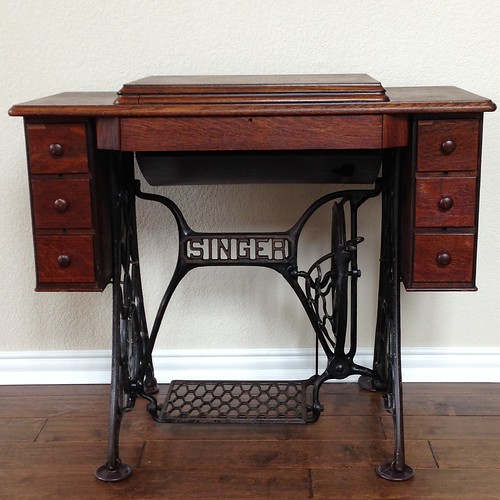
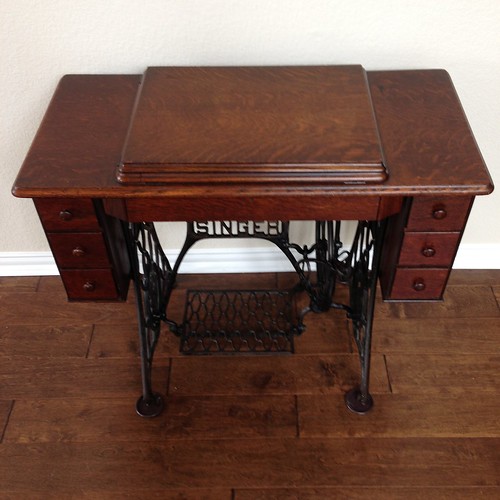
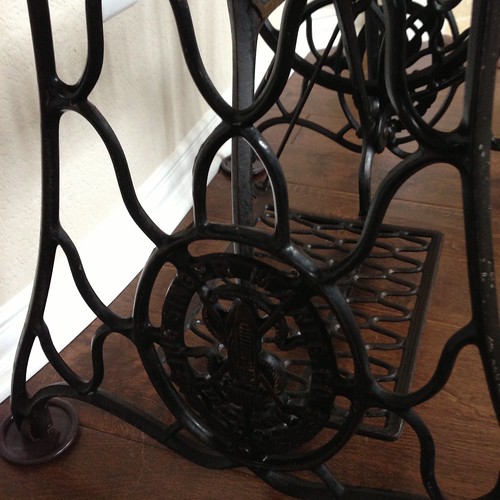
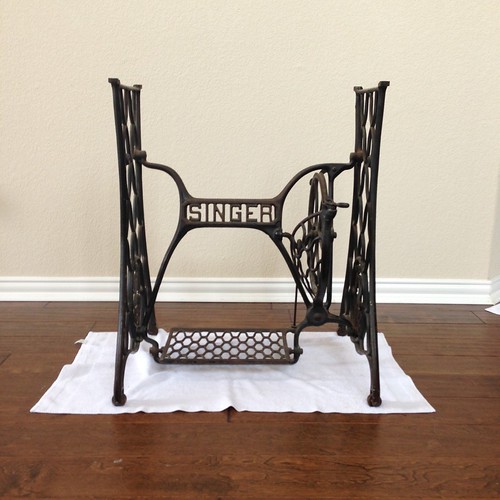
Once I got the treadle machine* all cleaned, I did some stitching on fabric scraps to work on adjusting her - getting the tension right, getting the stitch length and presser foot pressure right.  This time let me get everything just how I wanted it as well as let me get familiar with the machine and the treadling.  When you're sewing on scraps though, you're not necessarily putting the machine through its paces and concentrating on things like consistent seam allowances, pivoting, curves or topstitching.  I knew once I had everything going smoothly, I needed a project to really get to know her.  I decided to make this reversible sling bag.  (It's a really easy sewing project, if you're looking for something easy.)
yarma
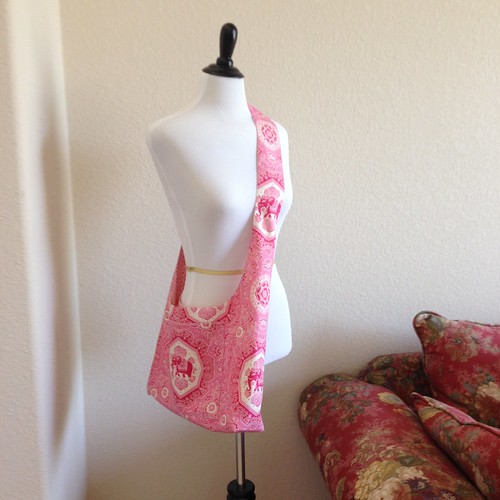
I used some quilting cotton and was very careful lining things up when I was cutting (also, I made sure the elephants would be right side up), but I realized right before I started, that I would have a seam running right down the middle of the side as I wear the bag.  I decided I wanted a pocket there instead - so I made one, with an elephant right in the middle.
yarma
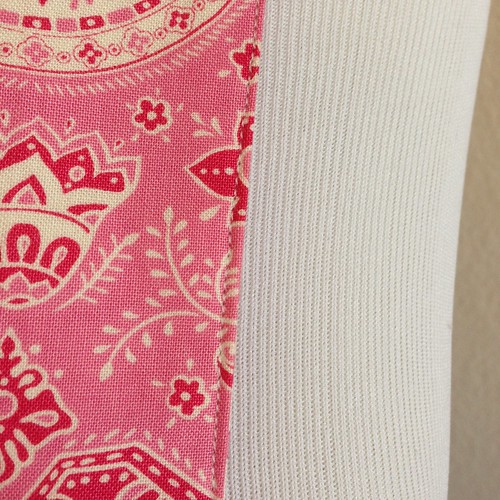
I also decided to use fusible interfacing on the back of the main fabric to give the bag a little more stability.  I'm glad I interfaced and added the pocket, but if I do this again, I might make the strap just a bit wider - you have to turn it right side out through the strap and the extra bulk made that interesting.  This is the other side which is what the front looked like before I put the pocket on - not terrible, since I didn't chop an elephant in half on it, but I like the front with the pocket.
yarma
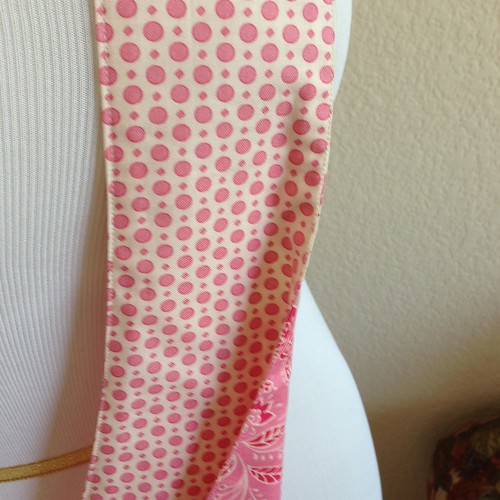
I lined it with this little dot print (the pocket is lined too).
yarma
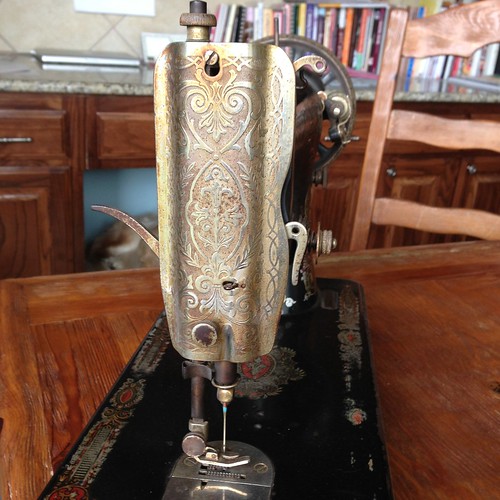
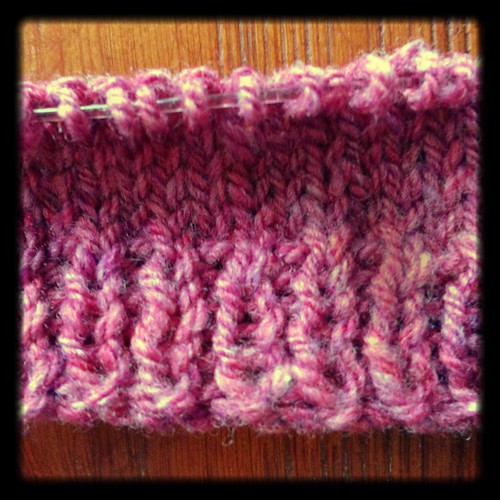
Since this was a getting to know the machine project, I also worked on topstitching with her.  I love good topstitching, but bad topstitching can break a project.  I think it's a good skill to have if you sew and I just enjoy topstitching (stitching in the ditch, not so much).  I wanted to do some topstitching, both for the practice it would give me with the machine, but also because it makes the project look so much more finished.  So we topstitched.  It's a little different treadling and topstitching, but we figured it out and she does a beautiful topstitch!
yarma
*I still haven't decided on a name for her.  I was leaning towards Kitty Mae (as in Miss Kitty and Mae West), but Ruby was suggested in a comment I read this morning and that hits the red (Red Eye), there's Ruby and Max (two really cute little bunnies that Caleb used to watch, and Max kitty loves the sewing machine), and also Kenny Roger's Ruby, who was apparently taking her love to town (so that gets her previous life as a dirty girl).  I'm going to keep thinking for a bit, but I think it might be one of these two names.

Labels: ,

Monday, May 06, 2013

The Big Ta-Da!

yarma 
It is finished.  Almost six weeks of work, 300 cotton balls, 1-1/2 bottles of sewing machine oil and countless encouragement and enthusiasm from Logan and Max, and the machine is up and running!  Coming from an era when virtually everyone smoked, the machine head was covered in a dark layer of nicotine and old sewing machine oil.  I actually found decals as I cleaned it, decals that were invisible under the old dirt.  I accidentally damaged some decals in cleaning them as well, but if I hadn't gotten all the dirt off, it would make a mess on whatever I was sewing.  Once the head was all cleaned, I waxed her (carnauba wax) and she shines now!  She has a new bobbin tire, a new spool felt, and a new  treadle belt.  Once I got her back into the cabinet and the treadle belt installed, she was up and running in no time.  A few adjustments, and she was stitching beautifully!
yarma
I'm planning a project for her - a small one first so I can get the hang of her and we can work out any issues we might have, then something bigger!

It feels good to have her up and running again, but after all the hours of cleaning and time we've spent together already, she still hasn't told me her name.  She's a 1923 Singer 66 Red Eye (the official name for the decals is "Scroll-Red").  My Featherweight is Elizabeth, so that (and all its variants) are out.  I thought she might be a Mary, but when I really got into cleaning her and found what a dirty, dirty girl she was, I thought maybe Kitty (also Max really likes her).  Any ideas?

Labels:

Friday, May 03, 2013

In Progress

I thought I'd show you what I have done on the sewing machine head so far.  I am still cleaning it, so no finished pictures yet (she was dirtier than I thought).  The exposed metal parts have all been cleaned (needle clamp, end plate, back plate, hand wheel, bobbin cover plate, needle plate, and presser foot).  I've taken apart the hand wheel to clean it, and I've cleaned the bobbin winder assembly as well as the actual bobbin area (the Singer 66 has a drop in bobbin, not a removable bobbin case).  There was lots of metal polishing happening around here.

The smaller pieces actually got cleaned in my tumbler (the idea of which I am particularly proud).  I've dabbled in making jewelry, and when you're all done with the making of it, it needs to be polished.  If there are stones in the jewelry, you have to do it differently, but if it's all metal, you can put it into a tumbler (like what you'd polish rocks in) along with some polishing fluid and some stainless steel BB like things (they're different shapes - not just round - so they can get into all the nooks and crannies).  This will not only polish your jewelry piece, but work harden it so it's less likely to bend.  I tried it out on a couple of sewing machine pieces that I knew I could replace if for some reason it didn't work out like it did in my head.  After a couple of hours, I checked, and everything was good, so at that point I tossed in everything that would fit (I always count how many pieces I toss into the tumbler, so I don't lose any in the BB's), and just let it go.  While that cleaned and polished the smaller bits, I got to work on the bigger ones - the end plate and the back plate.  Here's what they looked like before I started:
yarma 
The back plate (the round one) was particularly disgusting.  (The thumb screw in the picture went into the tumbler.)
yarma 
The end plate had a yellow brown coating of nicotine on it, but less grime overall.  What you can't see (and it isn't showing up very well in the photos) is that in addition to the overall, large floral pattern on each of these, there is a teeny tiny honeycomb pattern in the background.  There was gunk all the way into this honeycomb pattern!  Here is the back plate all cleaned and polished:
yarma

And here is the end plate all cleaned and polished:
yarma

There are some places that just aren't polishing out, but I feel so much better about where we are (cleanliness-wise) on the machine head than when I started.

I'm still cleaning the head, but I'm definitely getting there.  Here is an in progress picture of what I'm cleaning off of the head:
yarma
This stuff was everywhere and I have to clean it carefully and slowly or I'll silver my decals (some of them are already silvered or otherwise damaged, but I'm trying to keep in them in as good a shape as possible).  I would like to be able to sew light colored things with this machine and as it is now, I'm not there yet.  I'm hoping to get a lot done this weekend and then get her sewing again sometime next week.  Here's what I've got left to do:

  • Finish cleaning the exterior of the head
  • Wax the head to protect the decals and shine her up
  • Put everything back together
  • Oil her up again really well
  • Get her back into the cabinet
  • Get the treadle belt installed 
  • Get her adjusted and sewing correctly again
Some things will take longer than others, and I know it will be worth it when she's all clean and ready to sew, but I was hoping I'd be a little farther along on her by this morning.  I have been oiling her and running her with the hand wheel, just to flush out any old oil and get her moving again.   She's moving really well now and if I roll the hand wheel towards me, it keeps going for a bit, so I know that when she's all clean and back together she'll sew like a dream!

Have a great weekend!

Labels:

Wednesday, May 01, 2013

Beginnings

yarma
I started my new sweater yesterday.  There was a little time yesterday afternoon and I got it all cast on, then I started knitting last night while I watched TV.  I've just got a tiny bit done, but I think this cardigan will knit up quickly.

There was a question in the comments about pictures of the sewing machine.  I'm still cleaning the head.  I've gotten everything cleaned that I could take off, and cleaned as much of the inside as I can get to.  I'm now cleaning the outside, which has to happen very carefully and very slowly because I don't want to damage the decals any more than they already are.  That makes it fun to get the layer of nicotine and old sewing machine oil off of it.  I am getting there, it's just slow going, and every time I think I'm just about done, I find more to clean.  I realize this could get a bit obsessive compulsive, but I do need to get it clean enough to sew light colored fabrics, and it's just not there yet.  I am still hoping to show it to you Friday, but I might not have it sewing yet.  My original goal was to get it all cleaned and put back together and adjusted and sewing by Friday morning's blog post.  That isn't going to happen.  I have actually uncovered some decals that I didn't even know were there, so that gives you an idea of the amount of crud covering her!

Labels: , ,

Friday, April 19, 2013

Progress

Photo bomb in 3...2...1...
yarma 
I've finished the cabinet for the treadle machine!  I've gotten it all bolted back to the treadle irons and I've got before and after pictures!  Above is the machine when I brought it home.  You can see the center front drawer isn't hanging on its brackets right and while you can see a little bit of wood grain, it just looks dark brown.  The top left drawer and the lower right drawer are both missing a little bit of veneer.  Also, the underbelly (in the center behind the center front drawer) is lopsided because its missing a couple of screws on one of its brackets.
yarma
Here's what it looks like as of yesterday afternoon.  (Max was asleep and wasn't available for photos, he apologizes for any inconvenience this might cause to blog readers.)  The center front drawer is now mounted on its brackets and seated straight, the underbelly has replacement screws where it had some missing.  I moved the lower right drawer up to the upper right placement because the missing veneer isn't as obvious right under the edge of the cabinet top.  The biggest difference though is that you can see the wood grain on the cabinet.  The wood just glows now - it's a rich, reddish brown versus a plain brown from before!
yarma
Here's another shot from the top.  I hope you can see the difference in these pictures.  The difference in person is huge.  I just keep looking at it and staring at it.
yarma
Here's the side.  There are still some scratches and scuffs, but when you're 90 years old, you're entitled to some scratches and scuffs.  The thing about the cabinet that flustered me the most was one of the drawers.
yarma
If you look carefully at the previous picture of the cabinet, you can see tiny key holes above each drawer and in the center front drawer.  Because it was possible to lock these drawers, people put all kinds of things into their treadle cabinet that they didn't want their kids getting into.  One of my drawers has a lot of dark staining inside.  (The above picture was before I cleaned it all out and conditioned the wood.)  Cleaning didn't really help very much and I was concerned about getting whatever it was on whatever I decide to put in the drawer (I think each drawer could easily hold 200-300 grams of sock yarn depending on how the skein is wound, just as a size reference, in case you were wondering).  I kicked around several ideas in my head as I was cleaning the drawers and cabinet, but most of them would have been fairly permanent.  (The stain goes all the way through the wood, so sanding it out wouldn't work.)  I just couldn't decide what to do, until I thought of drawer liner papers!  Instead of using paper though, I grabbed some acid free cardstock since the cardstock wouldn't slide around in the drawer.  It covered up the stain nicely, it isn't permanent, it shouldn't cause any damage and I can change it if I get bored of the colors I used.  I put the cardstock in all of the drawers, so now when I open them, I get a little pop of color - three colors to be exact!
yarma
Lime, turquoise, and violet (the colors are dark in the photo).  It makes me smile when I open the drawers, and now they are ready for the little sewing tools and feet that I'll store in them!

Now I get to start cleaning up the machine head, and I can't wait to get it done so I can sew on it!

Have a great weekend!

Labels:

Tuesday, April 16, 2013

Cleaning

Yesterday I got the rest of the cabinet washed and I got the biggest paint scuffs off with a Magic Eraser.  The wood grain is now visible, even on some smaller parts that looked like they were just solid, dark brown.  I didn't get any pictures and my next job is to start oiling the wood (we all feel better after a bath when we put lotion on, right?)  I'm using a recipe that someone's grandmother gave her and she posted on Ravelry (Rav has everything!):  1/3 cup vegetable oil and 1 tsp bottled lemon juice.  You can also use olive oil, but Logan loves olive oil with every whisker of his being.  I don't think the cabinet needs a tongue bath.  I've mixed up a big batch of it and will start rubbing it into the cabinet, drawers, and underbelly.  I will also get some knitting done today that I can show on the blog tomorrow.

Labels:

Friday, April 12, 2013

Wood Work

yarma
I've started cleaning the cabinet and underbelly portion of the treadle machine.  I started with the drawers since I was afraid I'd forget them otherwise.  (I pulled them out to air them when I took the whole thing apart.)  I'm starting with Murphy's Oil Soap because it's safe for wood and it's been around long enough, it should be fine for the old finish on the cabinet.  See the picture above?  The drawer on the left is washed and the drawer on the right isn't.

I'll be oiling the wood a couple of times and then rubbing in some Wood Beams - I use this on my drop spindles and spinning wheels.  There is a very faint smell of smoke to the cabinet when it's open (it had been used as a table for years and was just closed up), so I figure years and years ago, someone smoked around it.  Of course, years ago, everyone smoked apparently, so that makes sense.  I'm hoping that with the airing out of the entire cabinet, the washing, the oiling, and the Wood Beams (which has a scent to it), I can pretty much get rid of the smoky smell.  It is a mellow, soft smoky scent - not at all the harsh gross smell of recent smoking - so I think it will go away soon.

I'm hoping to get the rest of the wood cabinet washed this weekend and then get everything oiled and treated.  I can't wait to start on the machine head and I hope I get to next week!

Have a great weekend!

Labels:

Friday, April 05, 2013

Treadle Irons

I've decided to clean the treadle machine from the bottom up.  That way I can put things back together as I go, and I don't have a machine head all clean and ready to go, staring at me, "Please, can I sew?"  I started with the treadle irons.  There is more than one way to clean these and each set of irons needs different things.  Mine had been in a house so there was very little rust.  I also didn't have any threads wrapped around places it shouldn't have been.  In fact, as far as function, the irons move smoothly and soundlessly.  (Like an oiled dolphin, zipping through the ocean currents.  Or something.)  They just needed all the nooks and crannies cleaned out which can only be done when you have the irons separate from the cabinet and head.

I went to the Internet for help.  (Can I just say here, that the irony of using the Internet to get a 1923 treadle machine clean and running does not escape me.)  I found these directions for cleaning treadle irons, which seem very thorough.  They explain how to take everything apart and clean and paint each individual piece and then put it back together and how to adjust them so they're working right again.  My irons aren't in the kind of condition that would warrant doing all this, and since they're SO SMOOTH, I didn't want to undo anything.  So I kept on looking for some less extreme ways to clean up the irons.  Then I found this which clearly states it's not a tutorial, but it is.  This sounded more my speed.  Here are the irons before:
yarma
I hauled them outside and started scrubbing.  I scrubbed and I scrubbed and scrubbed some more.  I found that the toothbrush did a better job than the big scrub brush, so I scrubbed them with the toothbrush.  There was rinsing and washing and rinsing, and more washing and it pretty much went on all day.  I would let them dry, and then see more that needed scrubbing, so I'd scrub again.  It was like doing laundry for a newborn - it just never seemed to end.  Finally, I decided they were clean enough, so I oiled them.  I put oil in the moving parts (that you would normally oil), but I also coated the whole shebang with oil (just standard sewing machine oil).  I rubbed it in (and got out some more dirt) and made sure that every surface of the irons was oiled down.  Then they came inside for the night.

The next day I started waxing them - Turtle Wax.  Again, all the little nooks and crannies had to be waxed and then buffed when it dried.  It took me two more days to finish the waxing, but now that it's all done, they glow!  It was so worth it and I keep looking at the before and after photos:
yarma
See what I mean?  I didn't paint them and the gold on the logo is still there (it doesn't show in the "after" because of the lighting), it's a dark, antique gold.  They look so much happier than they did, and they still move like butter, no noise, no clanks, no squeaks, nothing.

Next up is the cabinet portion of the machine.  I'm off to mix a batch of Murphy's Oil Soap!  Have a great weekend!

Labels:

Monday, April 01, 2013

Just Trying to be Helpful!

yarma 
This weekend I took the treadle machine apart so I can clean it.  It's now in four pieces - the machine head, the cabinet, the underbelly of the cabinet (this the part the head swings into when the cabinet is closed and probably has a better name, but I'm referring to it as the underbelly), and the treadle irons.  Turns out, the cabinet makes a great Fortress of Solitude for Max.
yarma
Why did I take it apart?  Because what's safe for the irons isn't good for the wood pieces and what's safe for the wood won't work on the irons, and pretty much nothing I use on those parts needs to be anywhere near the machine head if I want to have decals left in the end.  Also, now that everything is separate I can really get into all the nooks and crannies and clean things up REALLY well.  I took lots of pictures, made notes and all screws and parts are in individual baggies with labels inside.  Also, I found out that I'm missing a few screws (not a surprise), so I'll have to see about getting some replacements.

There were enough comments from Friday's post about people who had/have/are looking for/need to clean up treadle machines, I thought I'd list a few links for parts and information.  Also I'm going to tag this post (and tag Friday's post as well) with "treadle sewing machine" so if you click the tag, it will list all posts with that tag and put any additional information I stumble across all in one place.  Sound good?

Vintage Sewing Machines:  This is a group on Ravelry, and you do have to be a Rav member to get to it, but they've got lots of information and links and cover anything from really, really old chainstitch treadle machines, all the way into the 1970's.  It's a helpful and friendly group and just reading through the old threads, I got a bunch of information.  Also, check their pages - lots of info there too.

ISMACS:  This is the site for the International Sewing Machine Collectors Society.  They have a huge amount of information here.  Old manuals, a catalog of the Singer decals (great to identify a machine on Craig's List, assuming the photo quality is good enough - huge assumption there), serial number dating information, needle information, all kinds of things, and not just Singer or treadles either.

Treadle On:  This is a mailing/discussion list for treadle fanatics, but the site has a lot of information on it as well, particularly cleaning, and fixing treadle machines, but also what to look for when buying one and other helpful information.  I tried to subscribe to the list, but never heard anything from them. Maybe the Internet gnomes ate the message, I don't know.

Sew-Classic:  Parts and Supplies as well as articles and reviews of older machines.  I haven't ordered from her yet, but I will be placing an order soon.  The Ravelry group recommends her a lot.  I would have ordered from her when I got the parts my Featherweight needed, but I couldn't find oil pads on her site at the time - they're under "Misc. Screws and Fasteners."  (At that time, I ordered from 221parts.com instead, but they really specialize in Featherweight parts ((like the name says)), and don't have everything I need for the treadle.)  Oooh, look, double parentheses!

You can find treadle sewing machines on Craig's List (keep a sense of humor here) and in antique stores.  Yard/garage sale season is just getting started so you might be able to track something down there as well.  Ebay and Etsy both tend to run high on old sewing machines (you're paying for convenience) and be sure to watch feedback and be aware that shipping is going to be crazy high even for an electric machine out of a cabinet (or a treadle head, alone).  Sewing machines aren't easy to pack properly and there are horror stories out there of how things have been shipped.  With the size of a treadle cabinet and irons, I'd just stay local.  Also Goodwill runs an auction site and sells sewing machines as well, but again, unless the machine is local to you, you're paying shipping and you have no way of knowing how a machine works.

Hopefully, these links and info will keep you busy for a bit.  I'm going to start cleaning from the bottom up, so treadle irons will be cleaned shortly!  Let me know if you have any questions, I'll try to help out or send you places that actually can!

Labels: