<body><script type="text/javascript"> function setAttributeOnload(object, attribute, val) { if(window.addEventListener) { window.addEventListener('load', function(){ object[attribute] = val; }, false); } else { window.attachEvent('onload', function(){ object[attribute] = val; }); } } </script> <div id="navbar-iframe-container"></div> <script type="text/javascript" src="https://apis.google.com/js/platform.js"></script> <script type="text/javascript"> gapi.load("gapi.iframes:gapi.iframes.style.bubble", function() { if (gapi.iframes && gapi.iframes.getContext) { gapi.iframes.getContext().openChild({ url: 'https://www.blogger.com/navbar.g?targetBlogID\x3d10582443\x26blogName\x3dPink+Lemon+Twist\x26publishMode\x3dPUBLISH_MODE_BLOGSPOT\x26navbarType\x3dBLUE\x26layoutType\x3dCLASSIC\x26searchRoot\x3dhttps://pinklemontwist.blogspot.com/search\x26blogLocale\x3den\x26v\x3d2\x26homepageUrl\x3dhttp://pinklemontwist.blogspot.com/\x26vt\x3d4292445769315597913', where: document.getElementById("navbar-iframe-container"), id: "navbar-iframe", messageHandlersFilter: gapi.iframes.CROSS_ORIGIN_IFRAMES_FILTER, messageHandlers: { 'blogger-ping': function() {} } }); } }); </script>

Monday, June 30, 2014

Fixing things

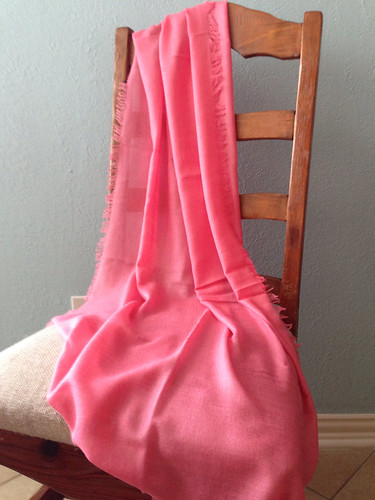
Last week, I ordered a couple of Pashminas (I don’t always want to wear or worry about hand knits) and I actually got them both for free because of credit card points.  When they arrived, the gray one was a lovely medium gray which will go with anything in my closet.  The one they called pink was not pink at all.  Despite the name and the color on the website it wasn’t pink, it was coral.  I don’t really have a problem with coral, it’s pretty and I do wear it, but I felt like this coral was too spring and summer colored and I really wanted a four season pink.  (Just in case the name on the blog wasn’t enough of a clue, I think pink is always appropriate.)  Here’s what it looked like:
image
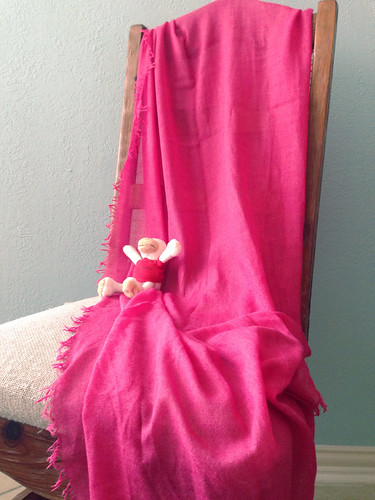
It was pretty, but not quite what I was hoping for.  Ordinarily I would return it and get another color, but there wasn’t another color I wanted (I had my heart set on pink) and going someplace else wouldn’t be free.  Then I thought about it a minute, pashmina is cashmere and silk.  Cashmere and silk are both protein fibers.  Protein fibers are dyed with acid dyes.  I have acid dyes in my dye bucket out in the garage.  I could over dye the pashmina!  Also, just to make this super easy, I wouldn’t have to worry about felting.*  So I trotted out to the garage, grabbed my dyepot, my big dye stirring spoon and mixed up some cool red.  I decided that since coral has pink (and orange) in it already, I just needed to tip it towards the blue side of red and it would be pink, hence the cool red.  I stirred and cooked and cooked and stirred until the dye was exhausted.
image
What I pulled out is exactly what I was hoping for - a strawberry red.  It’s the pinkest that pink can get before it turns back into red!  Loopy is sitting there to help the camera - his shirt is a true, pure red.  You can see how close I got to red, without quite getting there.  I love it and I’m so glad I thought of over dyeing it.  This is so much better than the original coral!

So, what did you do this weekend?

*True cashmere doesn’t felt.  If it’s been mixed with lambswool (which some cheaper things labeled as cashmere have been), it will felt, but if you buy your cashmere from a reputable source, so you know it’s cashmere, it shouldn’t felt.  I actually wash my cashmere sweaters in the washing machine on the delicate cycle.  I’ve had success with LL Bean and Garnet Hill cashmere.  I do dry it flat.

Labels: ,

Friday, June 27, 2014

Camp Loopy 2014, Project 2

Project Two begins on July 1 (next Tuesday), but I thought I’d go ahead and show you my yarn and what I’m doing today.  The challenge is to use 600 yards or more of any weight yarn in a project that reminds you of your favorite vacation or relaxation spot.  It can also be a place you’d like to visit, but haven’t yet.  I really love the way they’ve done camp challenges this year.  I feel like while there are obviously requirements, they’ve left things open ended enough that there’s plenty of room for interpretation by each individual knitter.  Also, since there haven’t been yarn weight requirements, I feel like the store isn’t getting ransacked by the other campers.  There’s a sense that you can actually think through your project before ordering rather than just grabbing the first thing that you find, and then finding a project.  Maybe it’s just me, but I feel like Sheri is giving us plenty of wiggle room within the requirements of the projects.
image
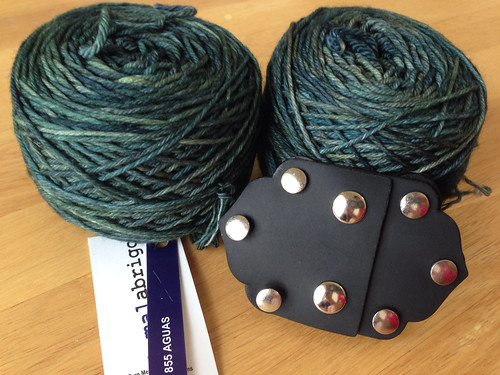
I will be knitting the Storyteller Hoodie in Malabrigo Rios in the Aguas colorway.  I decided that I didn’t want to use buttons on this, but instead I got a leather clasp.  I saw one of these a few months ago and I loved the look of it (there are a few different styles and sizes).  My inspiration for this second project is the woods.  I love being in the woods, walking through the trees, and seeing the little squirrels and birds busily doing their woodland chores.  When I picked the Storyteller Hoodie for my pattern, I thought of Little Red Riding Hood, and I felt like this clasp would be the kind of thing Little Red might use to clasp her cloak.  I think it will add a subtle fairy tale style to what should be a useful little vest.  Unfortunately, The Loopy Ewe doesn’t carry these, so I ordered it from Jimmy Beans Wool.  Just in case you’re curious, it screws onto your knitting and snaps closed, and while it has some weight, I don’t think it will be a problem on worsted weight knitting.  The leather is also super soft, not floppy, it holds its shape, but it’s still really soft.  I’ve got all five skeins of yarn wound and numbered - since it’s hand dyed yarn, I’ll be alternating balls every two rows and I wanted to make sure I had them in order before I started knitting.

I can’t wait to start this project Tuesday and I hope you all have a wonderful weekend!

Labels: ,

Thursday, June 26, 2014

Sewing!

I’ve been doing a little sewing in the afternoons and yesterday I finished a few projects!  First up are five pairs of shoe bags for travel.

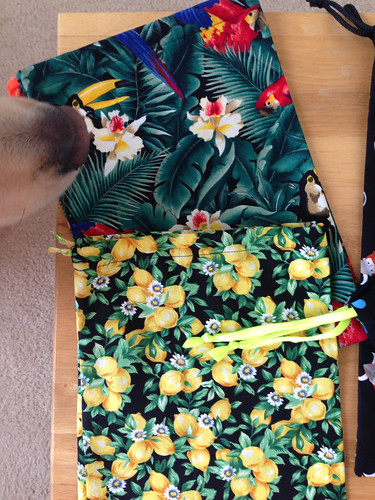
Shoe bags are a super easy project and since they don’t really take much wear, you don’t have to line them or make them heavy duty.  Their whole purpose is to protect the things in your suitcase from your shoes (and vice versa), so you can use just about any fabric.  I used quilting cottons, and with the exception of Mickael’s fabric, they were from stash.  I didn’t use an official pattern for this.  I came up with measurements for mine and Mickael’s bags by measuring actual shoes (mine will hold one running shoe per bag, or a complete pair of ballet flats, Mickael doesn’t usually wear ballet flats, so his fit one shoe per bag).  When I was cutting fabric for Caleb’s bags, I made them as close to Mickael’s size as I could (I didn’t have quite as much of those fabrics).  His feet are bigger than mine and since shoe bags last forever, I’d like them to be usable for a long time.  As far as the sewing, I didn’t use a specific pattern or tutorial, I just winged it (drawstring bags are pretty easy).  I used shoestrings for the drawstrings (except for one pair with ribbons, but they had lemons on them).
image
These are my bags, lemons (obviously) and tropical birds.  They were having their final inspection by The Nose.  Fun note:  the bird fabric was directional but if the birds were right side up, the orchids were upside down.  Daddy raises orchids so after growing up around them, I notice things like this.  (I don’t raise orchids.  I kill orchids.  I wonder if that’s a marketable skill?  Orchid Assassin!)  Oh, and I went with right side up birds.  Sorry orchids!
image
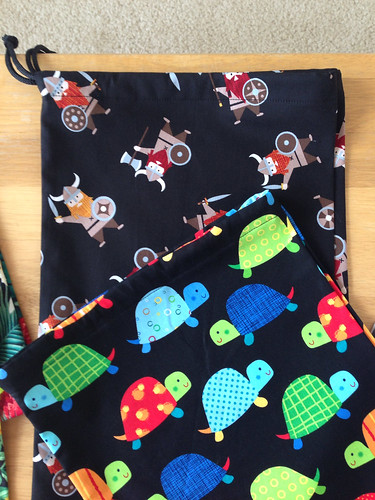
Caleb has turtles and Vikings.  I’m pretty sure Ragnar has a pair of the Viking ones.  You don’t want your shoes getting scuffed as you pack up to go raiding England.
image
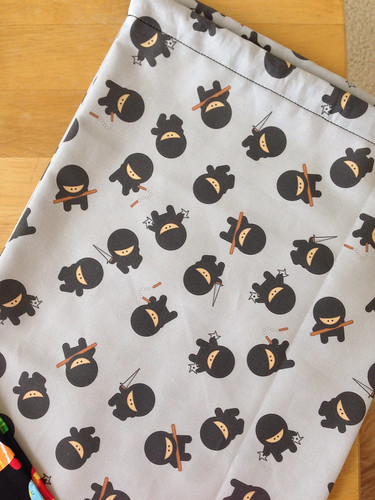
Mickael has ninjas!  I ordered this fabric from Spoonflower back when I got the Sherlock fabric.  Mickael has two more pairs of shoe bags waiting to be made, but they need a different thread color so I’ll be doing them later.  (I used black thread on these first five pairs of bags.)  Just thought I’d mention that Mickael will be getting more bags, seeing as he travels way more than Caleb and I do.
image
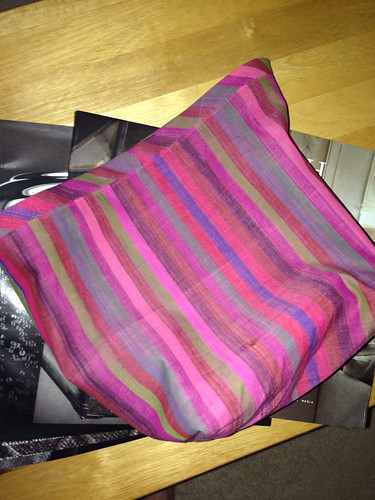
After I finished the shoe bags yesterday, I cut fabric for another bag, and then I actually got it all finished (except drawstrings) last night!  (Please notice that I’m using the Restoration Hardware Catalog Collection as a background to the bag.  I figure if Restoration Hardware is going to UPS their catalogs to people who spent $4.00 in their store three years ago, then I’ll use them.  If we get a wasp or a fly in the house this summer, I fully plan on rolling one of these up and bashing it over the head.  I’m not going to let these bad boys go to waste!)  This is from the Sock Sack in Three Sizes pattern.  It’s meant for knitting two socks at once (which I don’t do), but I thought I could keep yarn on one side and the project itself on the other.  The three sizes are Small for socks, Medium for shawls, and Large for sweaters.
image
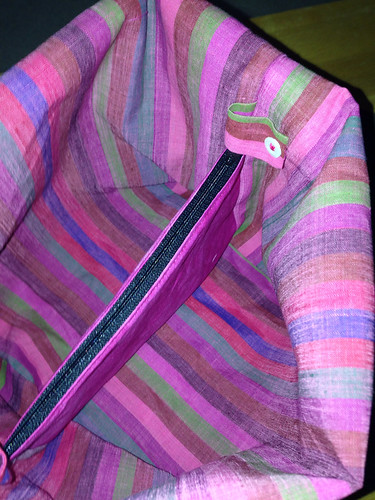
I made the medium size which should be perfect for a shawl.  I love the zipper pouch as the center divider.  This bag also has yarn guides (the little tabs with buttons) to keep your yarn from getting wonky in the bag.  The yarn guides snap closed, I just used a button on the back side of the tab snap to reinforce it.  The casing at the top of the bag (where the drawstrings would be if I had any) isn’t supposed to be on the bias, but I wanted to have the stripes on the casing run a different direction than the body of the bag, and after mis-cutting one piece, I didn’t have enough fabric left to do the casing stripes perpendicular to the body stripes, but I could do them on the bias.  So I did.  The directions on this pattern are really well written, with lots of pictures.  Once I saw how the bag went together and how the center divider worked, I understood it, and the actual construction was pretty easy to do.  The size is perfect and I’m really happy with the finished bag.  It doesn’t have a wrist loop (you could use the drawstrings), but that’s easy to add.  I will definitely be making more of these bags!

Labels: ,

Tuesday, June 24, 2014

Random Tuesday

Made with Fragment #fragmentapp 
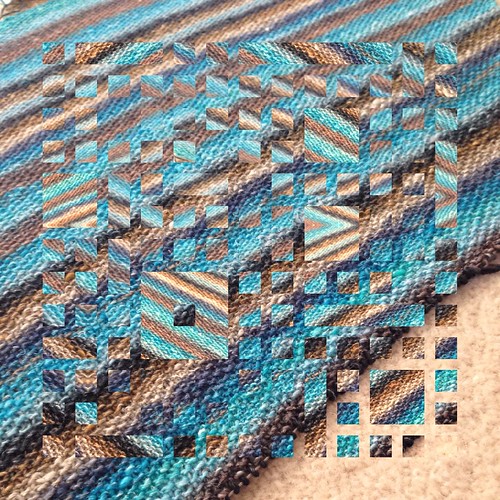
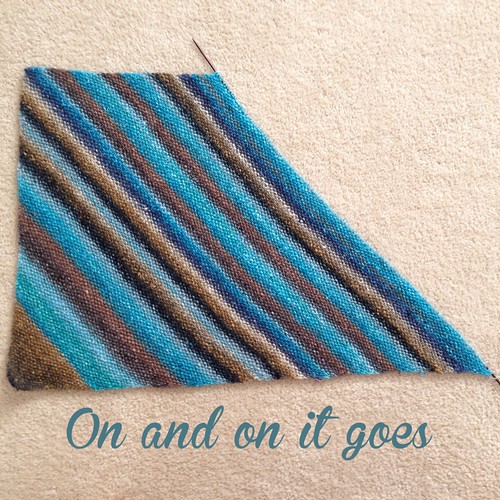
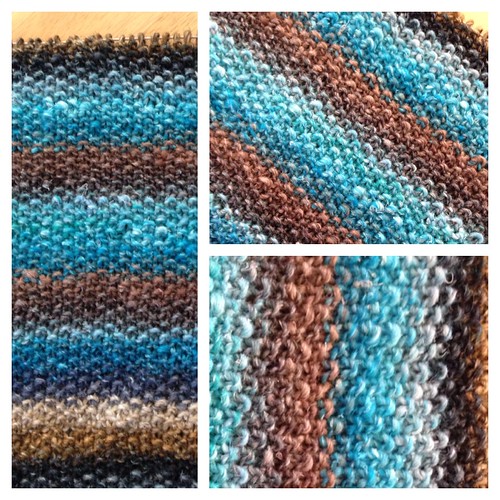
I’ve added about 3 or 4 more inches to my Noro wrap.  It kind of looks the same, so I ran the photo through Fragment to make it more interesting.  Isn’t it more interesting?  Ooooooooh…

Also, I’ve started my fifth ball of yarn on this project.  Since I bought a bag of yarn, and a bag has 10 balls, once I finish this ball of yarn, I’ll be halfway there.  See kids?  You will use all that math you had to learn.  You’ll use it when you knit.  I don’t know what non-knitters use math for.  I guess everyone should learn to knit.

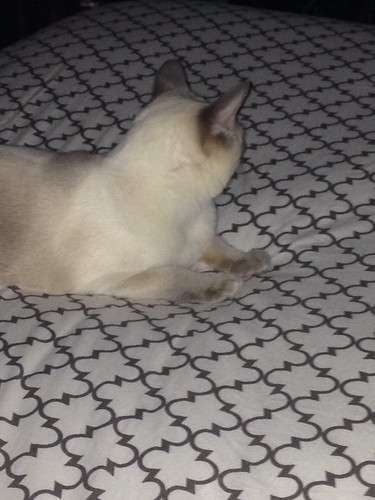
In random news, we got some new sheets.  For years we’ve had solid colored sheets.  Like 19 out of the almost 21 years we’ve been married.  Unfortunately, the majority of nice, solid colored 100% cotton sheets that I’m finding (that will also fit our insanely thick mattress) are sateen weave.  Now a sateen weave looks lovely and feels smooth because it’s 3 over, 1 under (plain weave is over, under, over, under).  By going 3 over, the yarn can reflect the light which adds a sheen to a fiber not normally shiny (cotton), but those long floats also make the fabric more fragile - particularly if you have a cat.  It’s really easy for tiny, kitty claws to snag those floats.  Then your sheets don’t last very long.  So I talked to Mickael about getting printed sheets.  He said he didn’t care, he planned on having his eyes closed while he slept.  I asked him what he thought Max would think.  (Max has some vision issues so I generally try not to freak him out, and he sleeps under the covers every night.)  Mickael thought about it, but he thought Max would probably be OK.  So I ordered the sheets.
image
Yesterday I put them on the bed for the first time, and as I was getting the fitted sheet on the mattress, Max heard the sound of bed making and came tearing in to assist.  He jumped up, all ready to be “helpful," and as soon as he landed, he saw the pattern.  He stopped.  He lay down on the bed.  And then he sat there staring at it.  He spent a good long while staring at it.  I stopped making the bed for a bit so he could get a feel for the new patterned sheets.  When I came back later and finished the bed, he climbed between the blankets to take a nap.  By bedtime last night, he just jumped into bed and climbed under the covers the way he always does, so I guess we’re good.  He didn’t kill us in our sleep and he doesn’t seem to be weirded out any more.

Finally, in other random news, UPS showed up yesterday with the new Restoration Hardware catalogs.  Yes, you read that right, they shipped them through UPS.  According to the label, the whole package, which is kind of huge, weighs 12 pounds.  Really?  The funny thing is, we bought some paint samples there like three years ago.  That’s it!  Part of me wants to do a Kramer and drop the catalogs off at the store and make a run for it, but the closest store is 45 minutes away and I’m too lazy to drive that far.  I haven’t even opened the shrink wrap that’s holding them together.  I’m still in shock at the whole catalog situation.

Labels: , ,

Monday, June 23, 2014

Camp Loopy 2014, Project 1

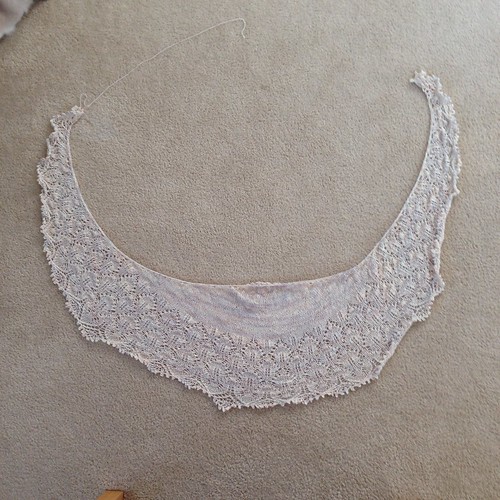
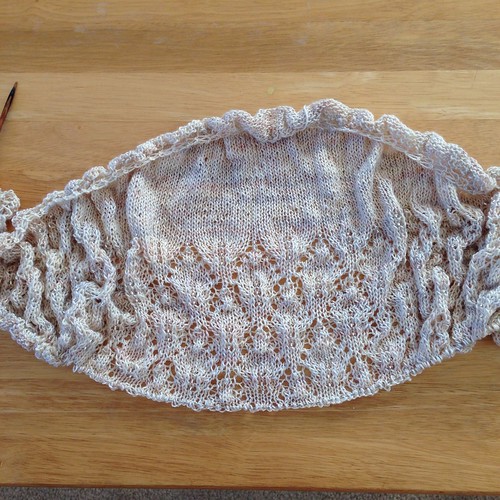
Here it is!  All finished and blocked!
image
Logan has gotten so good at modeling knits - unless Max taunts him in the middle of photos.  Max’s preferred taunt is the Arched-Back-Sideways-Hippity-Hop.  That one always works.  Max was asleep yesterday when we did photos though.  Logan’s expression looks a little sarcastic to me in this shot though, don’t you think?
image
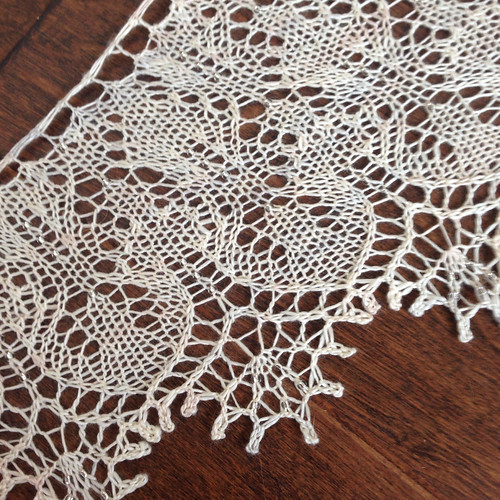
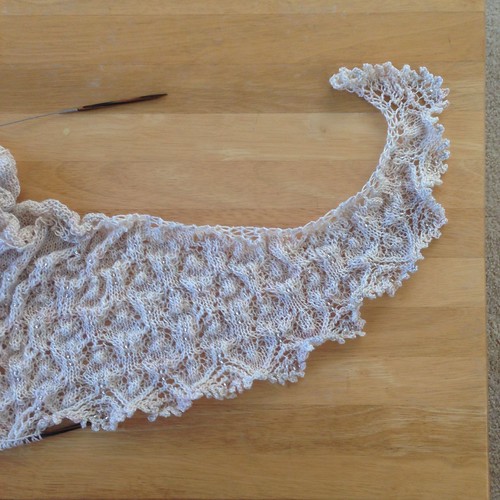
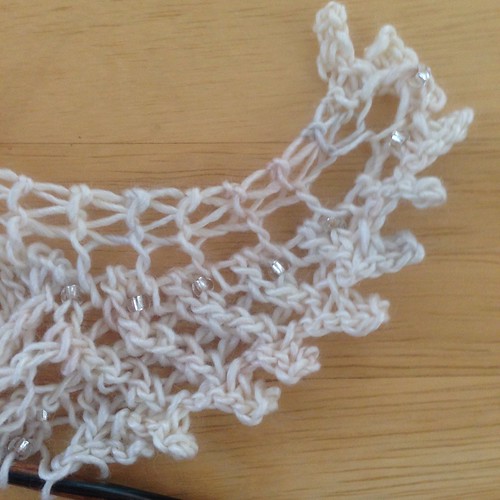
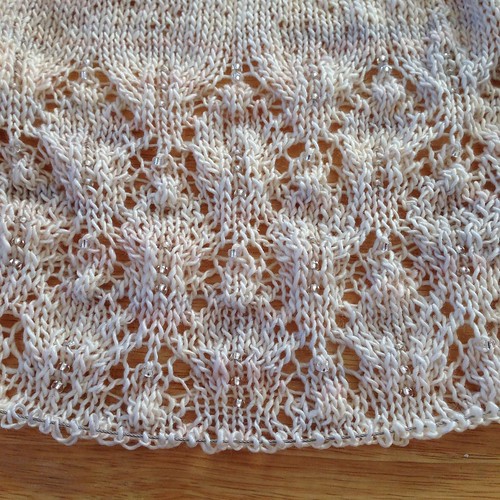
Here’s a detail shot of the edge.  You can see the little picots from the bind off.
image
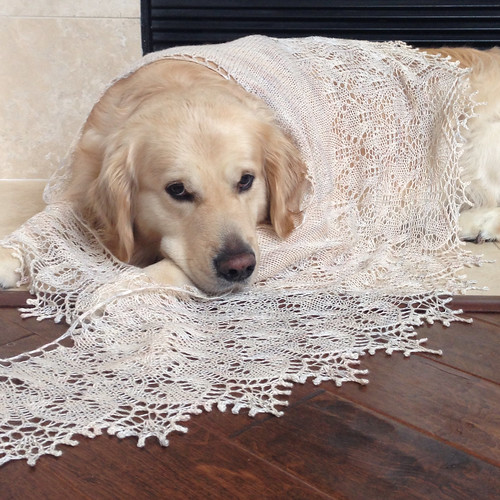
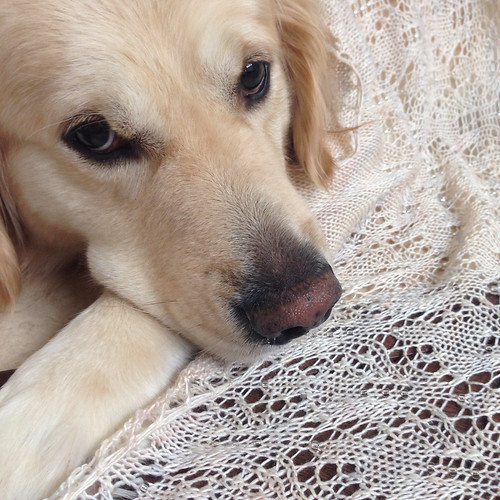
And here’s one last one of the model (with a better expression on his face).  He turned four last week, can you believe it?  He’s become such a good dog.  Just Mommy’s little angel.

Oh, the shawl, yes, that’s why you’re here!  The pattern is Sweet Dreams.  I did one extra repeat of Chart B and used almost the entire skein of Hand Maiden Mini Maiden in Ivory.  I also used 2-1/2 tubes of clear, silver lined beads in size 6.  Here are my Ravelry notes for the project if you need more details.

I’ve the yarn and a plan for Project 2, so I’ll show you those later this week!

Labels: , ,

Friday, June 20, 2014

Finished!

yarma 
Camp Loopy Project 1 for 2014 is finished and off the needles!  Of course it still has to be blocked, but I’ll get that done over the weekend.  I really enjoyed knitting this and while the bind off required a lot more concentration than bind offs usually do, I think it’s worth it for the edge.  Up in the far, left, top corner, you can just see a bit of Max, who was helping me with the photos this morning.  (At the bottom of the photo, you can see the leg of the coffee table I was standing on to take the picture.  Yes, I still stand on the furniture.)

I’ll have finished, blocked pics on Monday!
New running shoes!
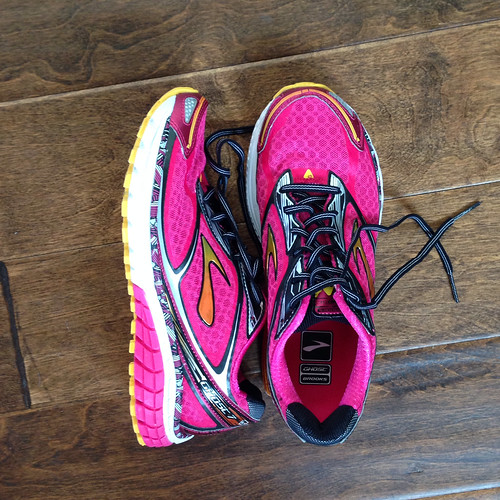
On a completely unrelated note, I got a new pair of running shoes yesterday and this morning I did a quick three miles in them!  These are the pinkest shoes I’ve ever had.  I already told Mickael that I might get another pair just in case, you know for shoe emergencies.  There’s no telling whether or not the next model of the Ghosts will come in pink, or that it will be such a perfect amount of pink.  I think I might need more pink shoes.

I hope you all have a wonderful weekend!  I might make my new pink shoe photo my wallpaper!

Labels: ,

Wednesday, June 18, 2014

Still Binding Off

yarma 
Very slowly, I’m getting this bound off.  I have to count as I do it, it’s not autopilot knitting right now, so no binding off happened during Deadliest Catch last night.  Slow and steady finishes the shawl though.

Labels: ,

Tuesday, June 17, 2014

The Project, Part 1

image 
Today we’re going to take a little detour from knitting.  I’ve started working on The Project, and I’m going to drag the blog along for the ride.  (Because, hey, it’s my blog, and you’re here, so come on!  This will be fun!)  I’m not going to fully explain The Project at this point, it will be made more clear as we go along, with the final reveal sometime this fall!

The first part of The Project is a skirt.  For reasons that will be clear later, the skirt needed to be full and fluffy so it doesn’t constrict my movements.  My initial plan was for a tutu. (The Project isn’t really based in reality.  At all.)  I found some tutu tutorials - say that 5 times fast!  As I was thinking though, I wasn’t quite sure that a tutu was 100% right.  Don’t get me wrong, I think a tutu is the answer to many of life’s problems, but I wasn’t sure it was quite right for The Project.

Then I found this tutorial, and this one, and I knew - I didn’t want a tutu, I wanted a tulle circle skirt! I also found this shop over at Etsy (aren’t they dreamy?) and I briefly thought of a doing a full length skirt, but it won’t work for The Project.  ( I hereby solemnly swear that as I am a Pink Lemon with a sewing machine, a loose grip on reality, and a deep love of all things fanciful, fluffy, sparkly, and impractical with a side of fairy tale, I will put serious thought into the possibility of making a full length tulle skirt for the purposes of holidays, birthdays, and the occasional grocery shopping trip, at some point in the future.)  What I did take away from the previously linked Etsy shop though is the idea of layering the colors of tulle.  I love how it adds dimension and drama to the overall skirt.

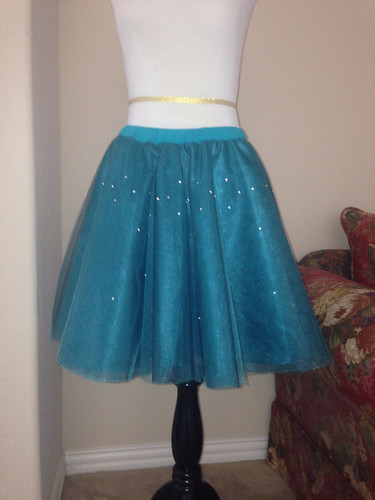
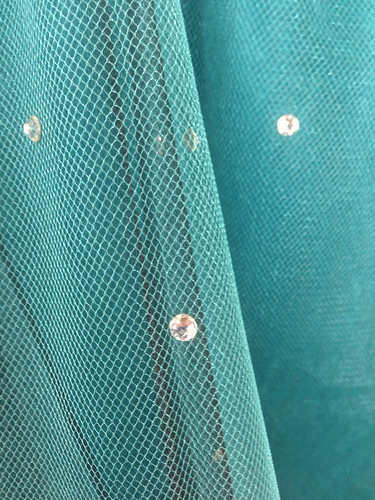
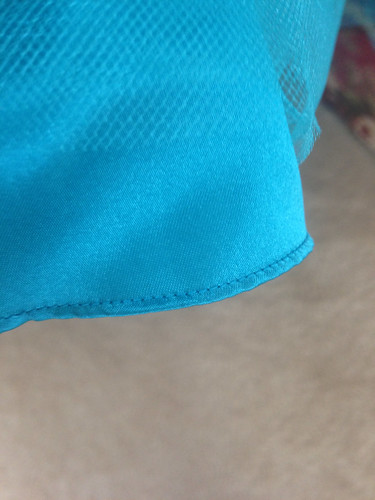
So armed with my game plan, I got out the tape measure and drafted my pattern.  Then I hit Hobby Lobby, who thoughtfully put all their tulle on sale last week.  I got turquoise sparkle tulle, black sparkle tulle and turquoise satin for the lining.  I used the lower edge of a tank top for the waistband casing, along with some non roll elastic. Also, I picked up 120 flat back Swarovski crystals to make the skirt sparkly.  The total cost of my skirt was $25, with about half of that in crystals.
image
I made the skirt following the tutorials (or following the tutorials as I remembered them - I read them ahead of time and then just winged it).  The thing that took the longest was hemming the satin lining, but I used my rolled hem foot and it really just took time and patience since the outer circumference of this skirt is approximately 46 miles - it wasn’t difficult.  I cut five layers of the turquoise sparkle tulle and two layers of the black sparkle tulle, then I decided what order to put the colors in.  I settled on (from the bottom up) lining, four layers of turquoise, two layers of black, and one layer of turquoise on top.  Before I sewed things together, the top layer needed to be embellished with the crystals.  I glued them into place using this glue and let them dry (being careful not to let them glue to the cardboard I was using to work on), then I flipped the tulle over and put a drop of glue on the backside of each crystal.  I did this to “lock” the crystals onto the tulle, since tulle isn’t the most solid material.  I don’t want any sparkles falling off!  Unfortunately, Max woke up during this second gluing and immediately sensed that I needed his help and jumped up to be part of the tulle, crystal, and glue party I was having.  Mickael quickly removed Max to the bedroom and Caleb helped me carry the tulle out of the kitchen to the guest room where we could shut the doors and it could dry in peace.
image
The actual sewing wasn’t difficult and by the end of the day, I had a tulle skirt!  I cut the elastic so it would sit below my true waist because that’s where I like my skirts to hit, so the way you see it on Fifi above, is how it sits on me.

Obviously, there will be more to The Project, but that’s another post, for another day…

Oh, and if you’ve suddenly been overcome with a deep and burning desire to make yourself a full length tulle skirt, I found this place that sells 40 yard bolts of tulle for $11!

Labels: , ,

Monday, June 16, 2014

I’m Binding Off!

yarma 
It’s a picot bind off so I’ll be a while, but I’m on the home stretch, I’m through with the beads, and I should be finished soon!  This was a very nice knit and a fun project.  I can see why some people do multiples of this one.  Easy lace and a fast little shawlette is nice.

Here’s my Ravelry page if you’re interested in more details.

Tomorrow, I am going to show you something completely different.  Tune in...

Labels: ,

Friday, June 13, 2014

Option 2

Last night I sat down with my Camp Loopy project, hoping to get more done on that.  I got all of five rows knitted (only 3 of those had beads).  Why, you ask?  Because I had “help.”  For some reason Max didn’t want to take a nap after dinner, instead he wanted to help me with my knitting.  Specifically, he wanted to hold the beader thing (the Fleegle Beader).  For obvious reasons, I didn’t think this was a good idea, so once I figured out that he wasn’t going to curl up and go to sleep, I swapped projects to one without beads.
image
I’ve done several more inches since you saw this last and I just love watching the stripes appear and change.  Yes, I’m still easily amused by what yarn can do.

I hope you all have a great weekend, and if you get feline assistance, I hope it’s not with beads!

Labels:

Wednesday, June 11, 2014

Camp Loopy 2014

yarma 
I am really moving along on my first Camp Loopy project!  I’ve added 24 rows since you saw it on Monday.  If I counted correctly, I have 17 more rows before I start the bind off.  The bind off is a picot bind off though, so it won’t be particularly fast.  I am hoping (emphasis on hoping) that I can start the bind off sometime this weekend.
yarma
Here’s another shot of more of the shawl.  It’s really just a big, sparkly blob right now.  Blocking will solve that problem later!

Labels: ,

Tuesday, June 10, 2014

My Noro Wrap

Pic Jointer 
Since I don’t have a footie on the needles right now, I grabbed my Noro wrap over the weekend for autopilot knitting.  I got several inches done on it, but at this point it’s just not that interesting to photograph.  Oh look, more stripes!

Fortunately, I have some photo apps that I don’t use enough, so I will inflict them on the blog as I play with them on this project.  You’re welcome.  By the way, the one I used today was Pic Jointer, if you’re interested.  It’s free right now.

Labels:

Monday, June 09, 2014

Sweet Dreams

yarma 
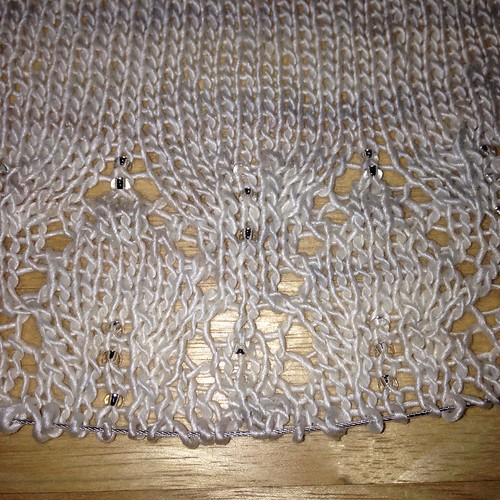
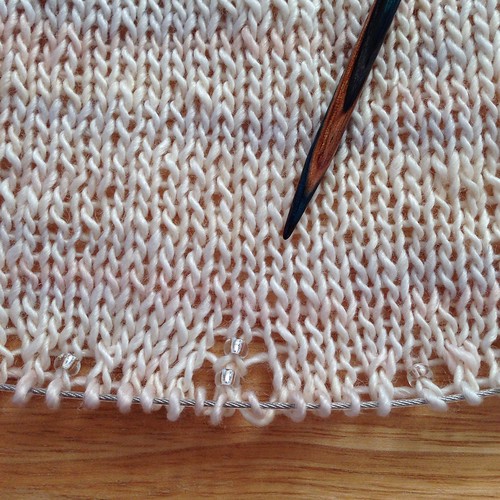
The beading is going faster!  I realize it’s probably hard to see in this photo, because you’re only seeing a little bit of the edge (also it’s pouring rain outside, which doesn’t help either), but I’ve added quite a few rows to my shawl since you saw it last.

I’m using a Fleegle Beader for the beads and it’s really my first time using it.  (I tried it once before, but you need Japanese seed beads to use it and all I had was Czech seed beads at the time.  (Japanese seed beads have a more uniform and larger hole size.))  It’s similar to a crochet hook, although you kind of pop the bead over the yarn instead of pulling the yarn through the bead, but you can load it up with beads and then you don’t have a bowl of beads sitting next to you, just waiting for your cat to dump on the floor.  If your cat likes to do such things.  Mine does.

Here’s a link to my Rav project page if you’re interested!

Labels: ,

Friday, June 06, 2014

Finished!

yarma 
I finished up the Aqua Footies last night!  (Don’t the names of my projects just inspire you?  I put SO much thought into them!)

Anyway.

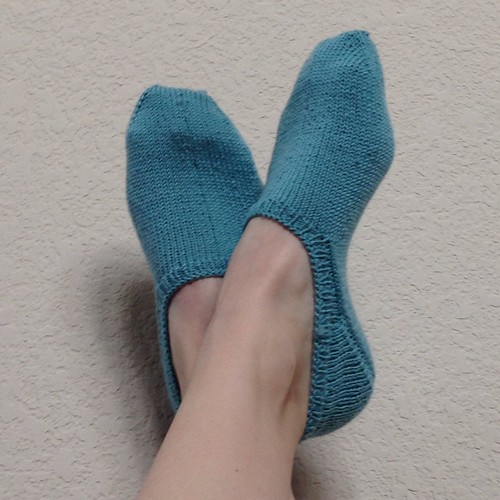
Another pair of footies, this makes three.  I have some more 50 gram skeins in the stash that will probably become footies, but for now, I’m going to work on my other projects on the needles.  Or at least try to.  The footies are a little addictive!

I hope you all have a wonderful weekend!  I’m going to try to avoid the siren call of casting on another pair of footies.

Labels:

Thursday, June 05, 2014

Let the Beading Begin!

yarma 
I have finished the stockinette top section of Sweet Dreams and have just begun the lace and beading section.  (Seriously, I’m all of four rows into the lace and beading.)  Thankfully, Max fell asleep in a  Fancy Feast induced coma last night and I was able to work with the beads by myself.  I can tell I’m going to need to buckle down on this if I’m going to get it finished by the end of the month.  The beads are slowing me WAY down.  I should get faster with some practice, but I really haven’t beaded very much in the last few years.  Hopefully Max will be cooperative and sleepy!

There was a question about tarnishing from the silver lined, clear beads I’m using and while anything is possible, I’ve never had a problem with tarnishing on any of my other projects, and I use the silver lined, clear beads as kind of a default bead.  They go with everything and they look like raindrops.

Labels: ,

Wednesday, June 04, 2014

Adventures

Remember the little green alien I made a couple of weeks ago?  Well I thought I should update you on what the little guy has been up to.  You see, he is with my brother-in-law, John (Mickael’s brother), and they are on an adventure!

Just about two weeks ago, John, the alien, and two suitcases stuffed as full as they could possibly be stuffed, left for China.  John had gotten a job teaching English there for a year!  He was a good sport about taking the alien with him, and one of the first emails we got was a picture of the alien sitting in the Beijing Airport during a layover.  John is living and teaching in Wuxi, which is west and a little bit north of Shanghai.  He’s settled in and has begun teaching, has an apartment, has figured out the local grocery store and even found (of all things) a Golden Retriever in a coffee shop right downstairs from his apartment.

Anyway, the whole reason I’m babbling on about this is because John had the genius idea of blogging his experiences.  It lets him record everything in kind of a digital scrapbook and it lets all of us, back here in the States, know what he’s doing and see pictures of what he’s seeing.  It’s really fascinating and I thought you guys might enjoy it too.  John said he was happy for me to share his blog with you, so if you have a few minutes, go check it out!  Here’s a link to the Wuxi Daily Post (his blog).

On a completely unrelated note, in response to Tiny Tyrant’s comment yesterday: yes, I also work the toe increase round every other round because when I do top down socks, I work the toe decrease round every other round and I just did it that way without looking but it works.  I wonder what else I do that’s a little different from the actual footie pattern?  (Maybe I should read it again.)

Labels:

Tuesday, June 03, 2014

One Down, One on the Go!

yarma 
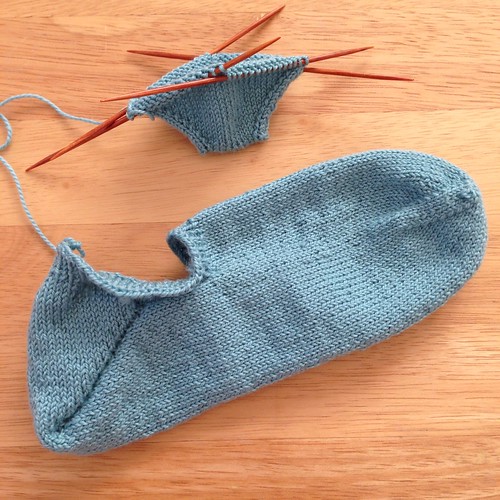
I’ve finished my first aqua footie sock (just like the red footie sock and the wasabi footie sock), and I’ve begun my second one!  These things are so fast, I really think everyone should knit them.  Once you knit your first one, the rest of them just zip right along.  Also, they’re really cute and just use a tiny bit of yarn, that you probably have in your stash anyway and it’s not doing anything there.

Or at least those are my reasons for knitting them.

Labels:

Monday, June 02, 2014

Project 1 for Camp Loopy 2014!

yarma 
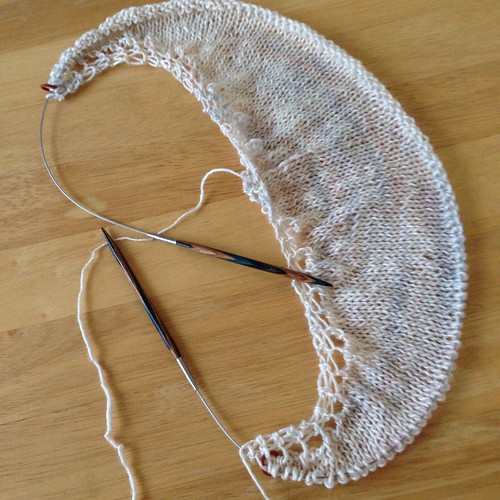
I cast on yesterday and got started on Sweet Dreams.  The first part is stockinette and then the lace starts.  Obviously, I’m still in the stockinette section.  You can see a little bit of the variegation in the yarn, but it’s very subtle.  That’s one reason I love this color - it’s not a plain, solid ivory color; it has a pale, creamy pink, and a soft mushroom gray color in it as well.  It looks like an ivory, but when you pay attention, it’s much more interesting.
yarma
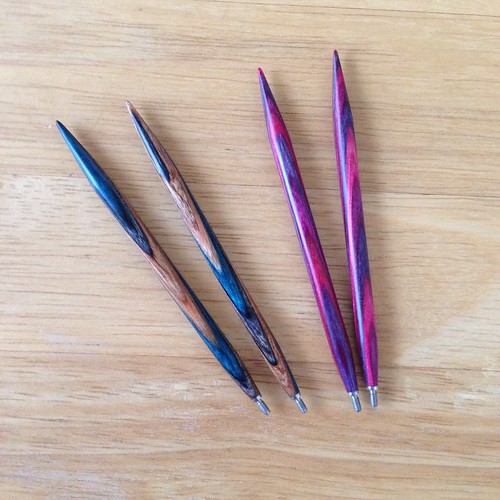
Also, you might have noticed the new needles.  I got two new sets of Darn Pretties from Dyakcraft on Friday.  Both are the shorter, 3.5 inch length and I got them with regular tips.  On the left is the newest color, Heaven on Earth, and on the right is Bubblegum.  I love both of the colors!  They’re so pretty!

Labels: ,