Project Bags
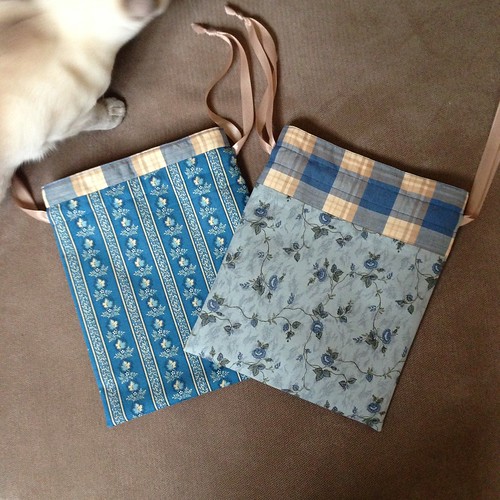
I did a little more sewing! These are the Drawstring Bags from this Craftsy class - it's a free Mini-Class. I changed the piecing on the outer bag fabric, and I used Hem Tape for the ties instead of fabric ties like the pattern calls for. Also, I added some lightweight interfacing - I interfaced the entire outer bag fabric and the lining was interfaced where the drawstring goes. I was originally looking for Grosgrain ribbon for my ties, but couldn't find anything that matched, so when I found the Hem Tape, I decided to go with that. Both bags are lined in the plaid, because I had a lot more of that fabric. The other two fabrics were just fat quarters. I think these were some sort of reproduction fabrics, I want to say late 1800's for some reason (1880's?), but they might be as early as the Civil War.
When I went to grab the pictures from Flickr, I realized that these bags would go with my Cove yarn really well - particularly the floral bag on top. They're too small to put a sweater project in, but they will fit a pair of socks in progress nicely. Max tried to climb in, but he didn't fit as well as he'd have liked. The pattern is an easy one to sew up, all straight line sewing, but it would also be really easy to change the size of the finished bag to fit whatever you need it to. As the pattern is written, this bag finishes at 9 inches wide by 11 inches tall. The drawstring takes a bit of the height away, so keep that in mind if you're trying for a certain size.
Have a great weekend!
Labels: sewing


2 Comments:
Thanks for the link, Melanie! I'm going to make the bucket bag!
Drawstrings make such great project bags because there's nothing for the yarn to get caught up on, thank you for a great link.
Post a Comment
<< Home