<body><script type="text/javascript"> function setAttributeOnload(object, attribute, val) { if(window.addEventListener) { window.addEventListener('load', function(){ object[attribute] = val; }, false); } else { window.attachEvent('onload', function(){ object[attribute] = val; }); } } </script> <div id="navbar-iframe-container"></div> <script type="text/javascript" src="https://apis.google.com/js/platform.js"></script> <script type="text/javascript"> gapi.load("gapi.iframes:gapi.iframes.style.bubble", function() { if (gapi.iframes && gapi.iframes.getContext) { gapi.iframes.getContext().openChild({ url: 'https://www.blogger.com/navbar.g?targetBlogID\x3d10582443\x26blogName\x3dPink+Lemon+Twist\x26publishMode\x3dPUBLISH_MODE_BLOGSPOT\x26navbarType\x3dBLUE\x26layoutType\x3dCLASSIC\x26searchRoot\x3dhttps://pinklemontwist.blogspot.com/search\x26blogLocale\x3den\x26v\x3d2\x26homepageUrl\x3dhttp://pinklemontwist.blogspot.com/\x26vt\x3d4292445769315597913', where: document.getElementById("navbar-iframe-container"), id: "navbar-iframe", messageHandlersFilter: gapi.iframes.CROSS_ORIGIN_IFRAMES_FILTER, messageHandlers: { 'blogger-ping': function() {} } }); } }); </script>

Wednesday, February 27, 2013

Endpaper Mitts

yarma 
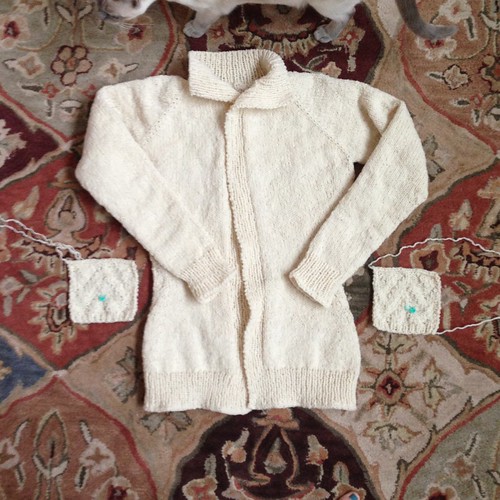
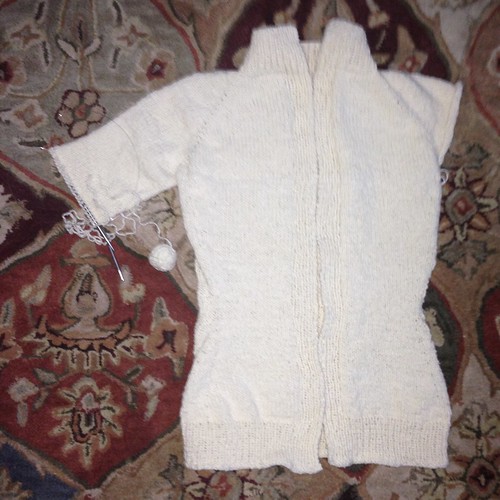
I washed the cardi yesterday and Max helped me spread it out to dry.  The yarn fluffed up beautifully and I can't wait to show it to you once I get it finished.

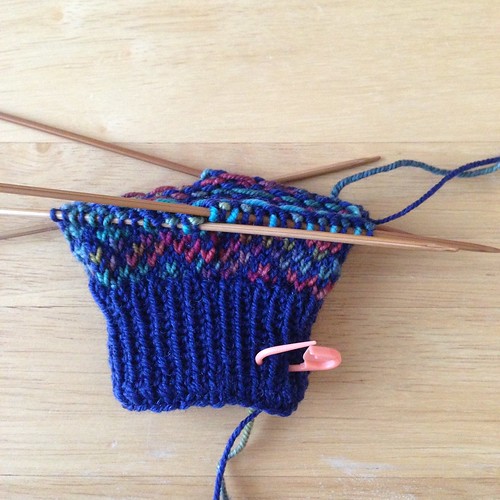
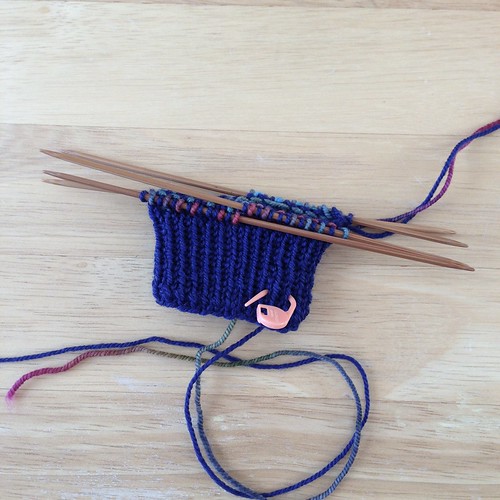
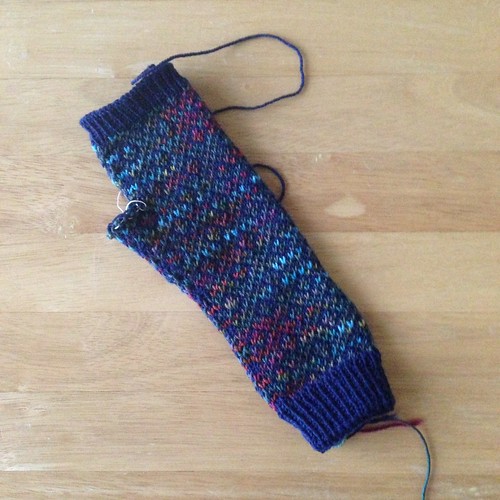
I pulled out the second poor, neglected Endpaper Mitt last night to get some work done on that, and I've actually made it past the place where it wants to curl over itself, so you can see the colorwork.  These are an easy project and do go pretty fast when I actually sit down to knit them, but I've been working on other things for a bit, so they got shoved to a back burner.

I think I've got too many things on the needles right now, so once I get these done, I will probably not cast on anything new.  Right now, in the unfinished projects pile (that I will admit to), I have the Woodstove Season Cardigan (almost finished, but not quite), Endpaper Mitts, Fiori di Sole (the coral colored shawl), Hexipuffs (this is an ongoing project and doesn't really give me any guilt), The Babette (this is taking up space on the sewing room floor and really needs to be sewn up), a pattern I'm doing on commission for a yarn/pattern club (this will be out the door next week, but won't be available to the public until December), a pattern I designed a while back but haven't gotten knitted and all written up, and that Bohus sweater I started in Virginia (I need to double check how things are fitting and switch to my Heavy Metals and get them off the Knit Picks needles).  Also, March starts Friday so I will need to start my second Sweater of 2013 project.  I've already got this one in KnitCompanion, and I took the time to really read through it to make sure I didn't want to make any changes ahead of time (I should have done this with the Woodstove Season sweater so I wouldn't be agonizing over the button band issue).

Labels:

Tuesday, February 26, 2013

The Knitting is Finished!

yarma 
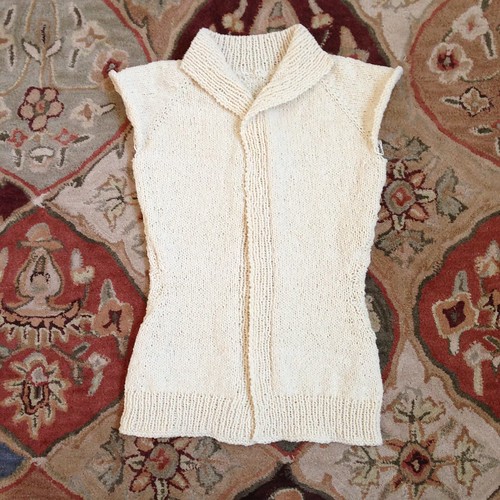
Last night I finished the knitting for my Woodstove Season cardigan!  The ends of the sweater are woven in, the pockets are made, and the whole thing is going to go for a swim today.  I'm washing it to get the yarn to relax, fluff up, and settle into the stitches.  Once it's dry I'll tackle the Button Issue.  My goal was to finish this sweater by the end of the month (this is my first sweater for my Knit Something 2013 project), but since the knitting is done and the buttons will held up by waiting for it to dry, I will count it as finished.  I might go ahead and sew the pockets on before washing it just to make it that much closer to being completed.  It's a heavier weight sweater than what I usually make, but since it's a cardigan I'm sure I'll get plenty of wear out of it.  (Once again, today would be the perfect day to wear it.  I'm fairly certain that upon completion of this sweater, Summer will arrive.)

Thanks for all the positive comments about yesterday's blog post!  I never know what to expect when I go "off road" and really, I set up this blog as a knitting/spinning kind of place.  There's always been a bit of furry goodness thrown in, and recently the occasional crochet project along with a certain bit of random crazy, but I wasn't sure how you guys felt about the sewing.  Since this isn't a sewing blog, I didn't know if A- anyone cared, or B - what level of sewing proficiency you guys were at.  While I was writing the blog for yesterday, in the back of my head was a little voice saying, "This is a dead easy project, why are you giving this many details?  Just tell them to cut, sew, turn, press, sew and be done with it."  I decided to just walk through it step by step anyway, after all, I'd taken a bunch of pictures already.  So, after yesterday's response, I might put some sewing on the blog periodically if you guys are interested.

While we're discussing it, is there anything in particular you'd like to see here?  I used to work at and then later managed a quilt store when I graduated from college and I've done garment sewing off and on since I was little.  The blog will stay mainly knitting, but if there's anything specific you're interested, I could work sewing into the blog occasionally too!


Labels: , ,

Monday, February 25, 2013

And Now For Something Completely Different...

Remember the fabric from Friday's post?  Want to know what it became?  OK, I'll not only show you the finished project, but also tell you how to make it!  First though, I'm going to introduce my assistant for this project, and to the best of my knowledge, she's never been on the blog (although Max helped also, but you've already met him).
yarma
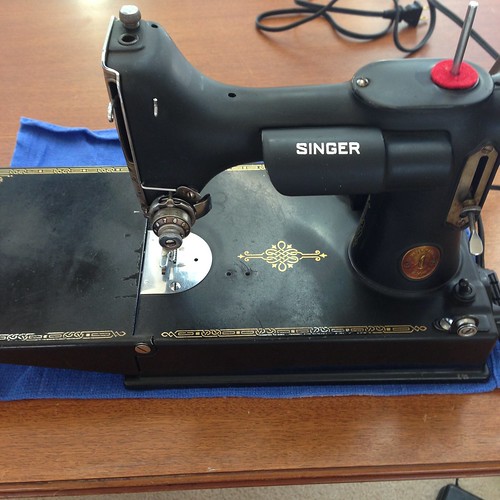
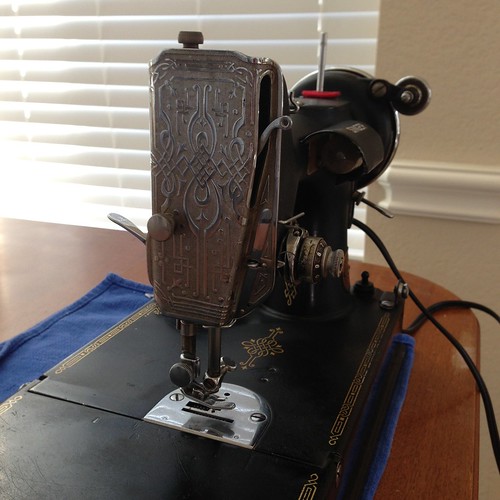
This is Elizabeth, my Singer 221, AKA the Singer Featherweight.  She is from 1939 and has the scrolled face plate.
yarma
Later models had a simpler, striated faceplate.  I got her about 15 years ago, but she hasn't done very much in a while.  I'm not sure if Caleb even saw her before this project.  She's just been quietly sitting in her case, waiting for me to use her.  The first thing I did was clean her up and oil her really well.  There are a couple of things that need to be replaced (her belt is cracking and will probably break any day, the handle on the case is falling to bits - literally, and her oil pad is just nasty), so as I was going over her I made a list and have ordered the parts she needs.  Thankfully, these weren't necessary immediately, so I was able to use her for this project.  She'd like to apologize for the blue towel under her, but she's missing a rubber foot and so she's got a bit of a wobble and will scratch the table without the foot or towel.  (I ordered some new feet cushions too.)

For those of you unfamiliar with the Featherweight, it is a small, straight stitch machine, made by Singer from 1933 until 1961 (black machines).  They later came in white and beige, but the whites are sometimes called green featherweights because there was copper in the paint and it changed color over time.  The machine was made of aluminum, which makes it much lighter than a cast iron machine, it was smaller than a full sized machine and made to be portable.  Like I said, they only do a straight stitch, they go forward and backwards, and take needles and bobbins that are still produced today.  They are very popular with quilters and for piecing they work great.  There is also a Singer 222, which is the Free Arm Featherweight and you can drop the feed dogs on that model, but it is mostly agreed that doing free motion quilting on a Featherweight is a great way to burn out the motor.  The 222 Featherweights are much more rare than the 221's and are priced accordingly.

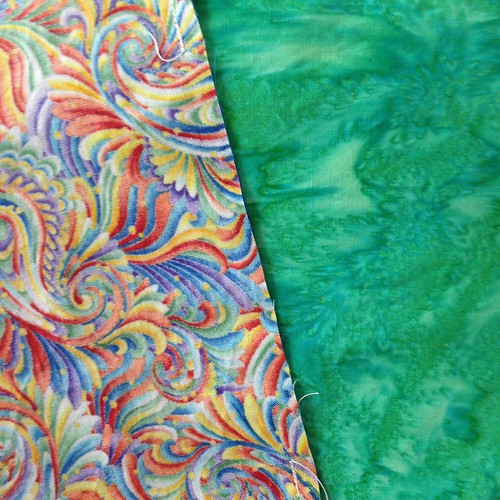
So, what was our project?  Napkins!  We've gotten back to using cloth napkins around here and they were looking a little sad.  Also, it kind of defeats the purpose of using cloth napkins if you only have a few and are running extra washing machine loads to clean them.  I went stash diving and found fabric for three new sets of six napkins.  We have three people in our house and the kitchen table seats six.  I made the napkins 17 1/2 inch square (that was pure, lazy math on my part).  For everyday napkins you want them to be about 16-18 inches square, but if you're doing formal napkins, you'd want 20-21 inch square napkins.  These are lined napkins because I used printed fabrics.  If you're using solid fabrics, woven plaids, or even batiks you wouldn't necessarily need to line them because they're the same on both sides - you could just hem them if you wanted to.  I also mostly used cotton quilting fabrics.  The lining for the bumble bee napkins is cotton/poly gingham because it was so cute.  I don't like using blends because they don't stick to 100% cotton.  Cotton sticks to cotton and will actually work with you when you're sewing it, so if you're buying fabrics for napkins, I'd suggest getting all cotton.

What you'll need:

  • Quilting cotton - you'll need 1/2 yard for every two napkins you make, but add in an extra 1/8 to the total just to give yourself a little wiggle room for cutting.  (6 napkins = 1-1/2 yards + 1/8 = 1-5/8 yards)  You'll need the same amount for lining.  (For the 6 napkin example- 1-5/8 yards of main fabric and 1-5/8 yards of lining fabric.)  Both fabrics will show as you use the napkin so feel free to use something cute for the lining as well as the main fabric.
  • Sewing machine - All you NEED is a straight stitch.  
  • Thread - I went with an offwhite cotton for all three sets.  You could coordinate your thread to your fabrics, but a neutral works also.  I usually use cotton thread with cotton fabrics but this is my quilting background.
  • Sewing machine needle.  Use a Microtex Sharp size 80/12, or a Quilting 75/11 for quilting cotton.  You could use a Universal if that's what you've got, but the topstitching looks neater with a sharp or quilting needle.  Start with a fresh needle.  Most of us don't change our needles often enough - you should change needles whenever you begin a new project.  
  • Point turner - a chopstick or large diameter knitting needle will work for this in a pinch.
  • Iron
  • Something to cut with.  I used my rotary cutter to do the cutting.  You could use scissors if you don't have a rotary cutter and mat.
Directions:
  1. Prewash and dry your fabric the same way you're planning on treating the napkins.  At my house this is hot water and extra scrubby with medium dry.  (The washing machine calls it towels or something, you get the point.)  I'm guessing this is what most of us would use, except for those people with white carpets who wear white clothes all the time and have non shedding white pets and serve only colorless liquids and foods that don't spill.  Unfortunately, most of us don't have unicorns doing our laundry.
  2. You could press the fabrics at this point.  If they're extra wrinkly you definitely should.  Mine came out of the dryer reasonably flat and I was feeling lazy, so I didn't.  The cutting will be more precise if you press them but these are napkins, not NASA.  If I was making napkins as gifts, I would have pressed them.
  3. yarma
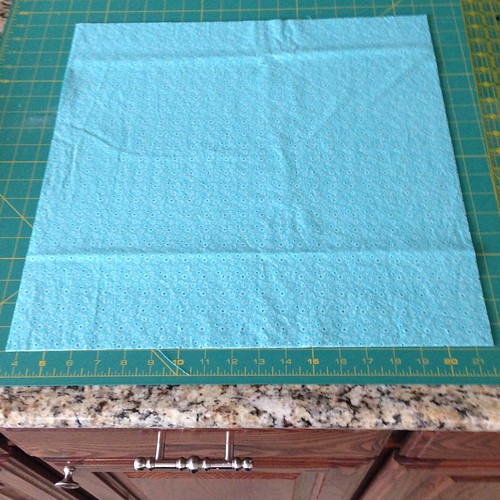
  4. Cut your fabric into 18 inch squares.  Again, I used a rotary cutter to do this.  You'll need one square of main fabric and one square of lining for each napkin.  If you really want to be efficient, you could layer your two fabrics right sides together and then cut them.  That would be impressive.  Keep an eye out for small children and pets who are under the impression they're "helpful."  Rotary cutters are sharp enough to take off fingers.
  5. yarma
  6. Go to the sewing machine.  Change the needle if you haven't already and thread it.  Double check your tension on a scrap of fabric left from your cutting.  If you don't know what correct tension looks like, check your sewing machine manual or google it.  Don't be afraid of adjusting this.  It's not scary and it's something everyone should be comfortable with on their sewing machine.
  7. yarma
  8. Place one main napkin square and one lining napkin square right sides together.  Using a 1/4 inch seamline start sewing about 2/3 of the way down one side.  If you don't have a 1/4 inch foot, just use the edge of your foot.  Even if it's a little bigger than a 1/4 inch, it won't matter as long as you're consistent.  Backstitch the first couple of stitches to lock it, go all the way around the square, stopping about 4-5 inches before the start - leaving a gap for turning.  You don't need a tiny gap here - the napkin is big enough you can make this easy on yourself.  Just make sure you sew past the corners and leave enough of an opening to get your hand through easily.  I didn't measure this, I just eyeballed it.  Do all the napkins like this.
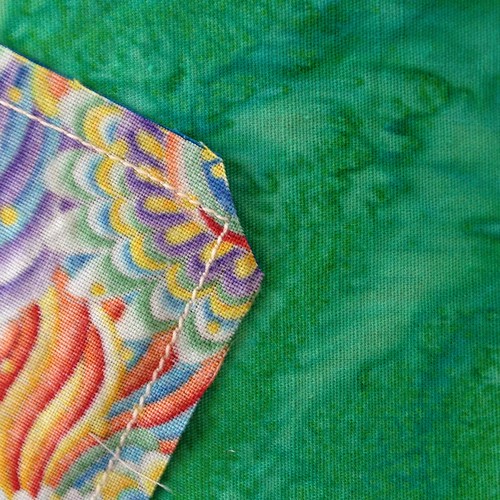
  9. Clip the corners.  This makes the napkin corners easier to turn right side out.  Don't clip the stitching, just get close.
  10. yarma
  11. Turn the napkins right side out.  Use a point turner or chopstick or large diameter knitting needle to make the corners nice and pointy.  Be careful here.  If you're too enthusiastic you could go right through the corner.
  12. Press the napkins.  Roll the seamlines to the edge a little bit at a time as you press them.  You're just making sure the seams are at the edge of the napkins here.  I worked a couple of inches at a time and just kept my fingers a little ahead of the point of the iron.  Be careful.  Irons and fingers aren't a good mix, but you can get the iron pretty close to your fingers without burning yourself as long as you pay attention.  When you get to the side with the opening, fold the open edges in on both the lining and the main fabric and press so you have a straight edge between the beginning and end of the sewing.
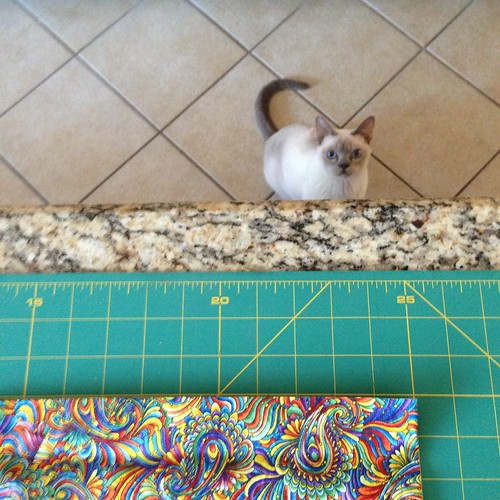
  13. Do this with all the napkins.  If you're lucky at this point the cat will come into to do a quality inspection and upon finding a pile of freshly pressed, warm napkins will joyously roll and purr upon them.  This means you are doing a good job.  Unfortunately, the camera was downstairs so I could not document the rolling purr of quality napkins.  Just be aware that there was much purring and the tiny gray feet were in the air in kitty bliss.  Also, happy wiggles.
  14. yarma
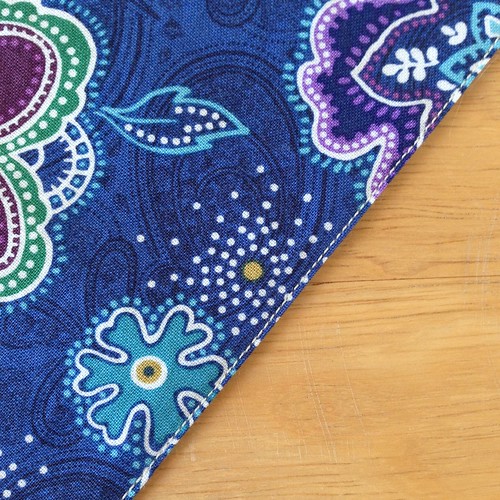
  15. Go back to the sewing machine and sew all the way around all four sides of the napkin to finish it.  At the end, make sure you sew a few stitches over the start to lock the stitching.  This stitching not only gives a nice edge, but also closes the gap from the turning.  You want to sew as close to the edge as you can and since this is visible topstitching, you want to sew as straight as you can.  Pick a place on your foot or the bed of the machine to line up the edge of the napkin and watch this part.  Do not watch the needle - amazingly, it will go up and down as long as you are pressing on the foot control.  Just watch the line you've picked and the edge of your napkin.  This is where using a sharp needle (Microtex or Quilting are both "sharp" types) will pay off - Universal's aren't made to pierce the yarns of the fabric - they shift the yarns to the right or left as they sew.  This is nice for knits, but can make your topstitching look wonky.  I prefer to use a Sharp because that way the topstitching goes in a straight line.  If I'm sewing knits, I use a Ball Point.  In my opinion, Universals are OK for everything but not really great for anything.  The specialized needles are there for a reason.
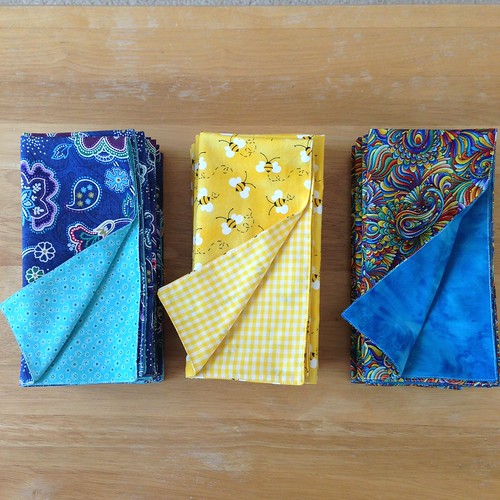
  16. yarma
  17. Now fold and admire your nice pile of new napkins!
If you are using a machine that does more than a straight stitch, you could use a decorative stitch for the final top stitching instead of a straight stitch.  I do recommend using fabrics with patterns on them.  Napkins get used and get food wiped on them.  Some foods stain (the bumble bees are totally NOT for spaghetti night), prints will help hide the stains.  I'm thinking that rainbow swirl fabric on the right could probably handle an entire lasagna wiped on it with no problem.  This project is really easy to do and could make nice gifts if you coordinate the fabrics to someone's kitchen colors.  I used the same color thread for all three sets of napkins so I just sewed them assembly line style and from start to finish, it didn't take too long.

This is a totally easy sewing project and it's easy to do the whole thing in one day.  Hope someone enjoys it!

Oh, and if you're wondering why we use cloth napkins, well for one reason they feel better, and for another reason, if you buy paper napkins or paper towels for this, you're buying something to wipe your face with and throw away.  Essentially, you're buying your trash.  (You're also buying stuff to throw away when you buy garbage bags, but I haven't figured out a way around this one yet.)  With the cloth napkins, we can usually use them for more than one meal (we really don't use a napkin most of the time at breakfast except to sit in our laps) and they're reusable until they fall apart.  Since I wash the napkins with the rest of the kitchen towels, assuming I have enough napkins, I'm not doing any extra laundry so I'm saving money over the long run.  I don't iron our everyday napkins, I just fold them fresh from the dryer and they're ready to go.


Labels: ,

Friday, February 22, 2013

This Weekend

yarma 
I went stash diving (fabric stash this time) and grabbed some things to work on over the weekend.  For this project, I think I'm going to pull out an old friend who has spent way too much time hiding upstairs.  You'll have to wait and see exactly what the project is though!  I also plan to knit, just in case you were wondering.

I loved all the comments yesterday on Max.  Ramius was a good kitty who respected the water bottle.  I could shake it (not even spray it) and he'd stop what he was doing.  Max?  He finds the water bottle refreshing and as soon as he's done doing whatever it is he's doing, he'll wash all that water right off, but just go right ahead and squirt away if it makes you feel better.  As to adding more things to the mantle to make it less accessible to him, he knows how to move stuff and he's not afraid to redecorate.  Yeah, Max is a challenge sometimes.  He's also a sweetie though and he still sleeps through the night - all night, every night.

Have a great weekend!

Labels: ,

Thursday, February 21, 2013

What Max Does

yarma
This is what Max does.  Every morning after Mickael goes to work.  What you can't really tell from the photo is the scale.  The top of the mantle is right at my eyebrow level.  I can't reach Max without getting out the big step stool or a ladder.  He knows this.  He also knows that Mickael can reach him without these things.  So he waits for Mickael to leave and then he goes Up where I can't reach him.  Also, he purrs at me from Up.  He thinks it's funny.  I'm not amused.  What's even less amusing is that I've seen him considering climbing the family papyrus (Mickael had it made when he was in Egypt a few years back).  When I hung it, I made sure it was done right, but I didn't plan for a kitty to climb it.  I hope I never find out what will happen if he climbs it, but I'm afraid it's only a matter of time.  Why does he do this?  He's so strange!

Labels:

Wednesday, February 20, 2013

A Little More Sleeve

yarma 
I did get a little more sleeve done last night, like I'd hoped to.  I keep telling myself that I'm almost finished with this sweater (and I am, almost finished that is), but for some reason I'm having trouble crossing the finish line with it.  I know it fits, I've tried it on.  I think I'll wear it a lot when it's cold, I mean it's going to be warm and it's a neutral color, so it should be worn to bits (ironically, if I'd have finished it by now, I'd wear it today - cold and rainy).  The only thing I can think of is that I'm not entirely sure how I'm going to do the buttons and that's why I'm dragging my feet.  I kind of have a button plan (actually, I have two and the one that seems better is scary), but I'm not 100% committed to it (them) and I've never done them this (either) way.  Hindsight being 20/20 and all, I should have just cast on without the stitches for the front bands and knit them on last.  Then I could have adjusted the spacing and buttonholes and it would have worked out perfectly.  (The pattern has you do buttonholes in the front bands as you go, but the pattern calls for a smaller button than I have, so it wouldn't have worked for me.)  I need to just make up my mind and go for it, whatever I chose.

Labels: ,

Tuesday, February 19, 2013

Not Much to See Here

yarma
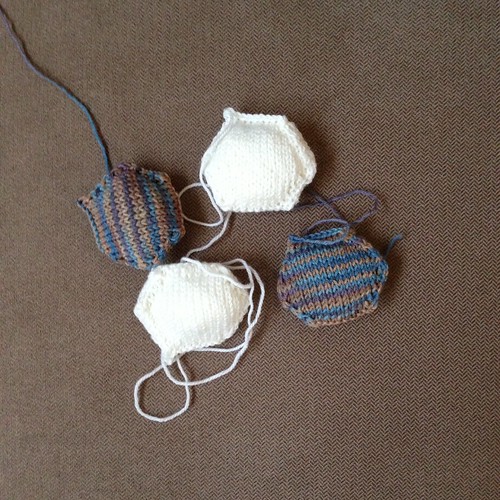
I didn't get any knitting done over the weekend.  Not a stitch.  It was a truly lazy weekend.  Weekends like that are nice periodically, but it means there's nothing to show on the blog either.  These hexipuffs? I made them last week.  It's the only knitting I have around here that I can show you, that you haven't seen before (although we all know you've seen hexipuffs, just not these hexipuffs).  Max tried to steal one as I was finishing their photo, when I turned to set down my phone.  Fortunately, I can count to four in an uncaffeinated state, so I rescued the one he'd puff-napped.

Hopefully today I'll get some knitting done (along with the giant pile of laundry), but it might just be a sleeve.  Yes, I'm still working on my cardi.

Labels:

Thursday, February 14, 2013

Second Sleeve, Same as the First

yarma
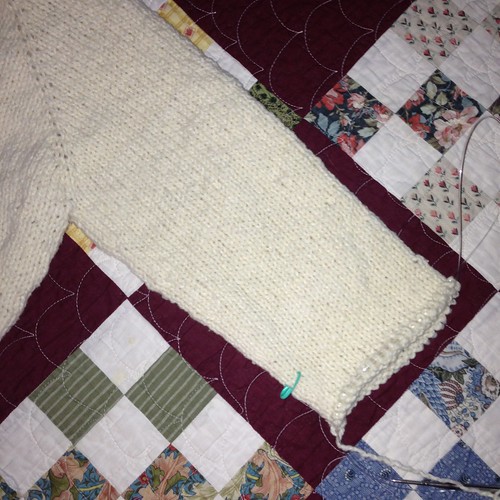
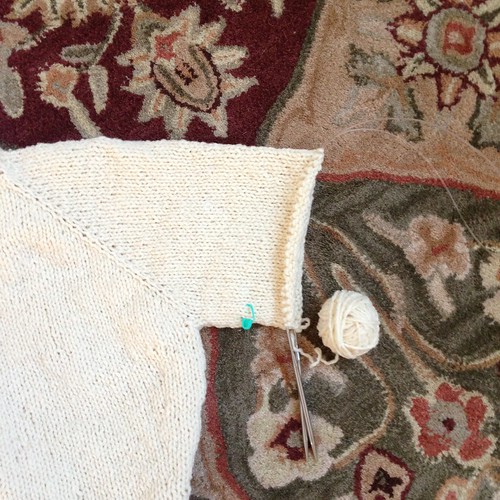
I've started the second sleeve for my cardi.  I always feel like second sleeves move faster because I have all the notes from the first sleeve.  There's no stopping to measure or try on, then knitting a couple of inches and trying again.  I know how many rounds of stockinette I need to knit, I know which rounds have decreases, and I know how many rounds of ribbing to work before binding off.  Second sleeves practically knit themselves!

I hope you have a wonderful Valentine's Day!  I'm making a big pot of gumbo for my boys tonight.

Labels: ,

Wednesday, February 13, 2013

A Reprieve From The Sleeve

yarma 
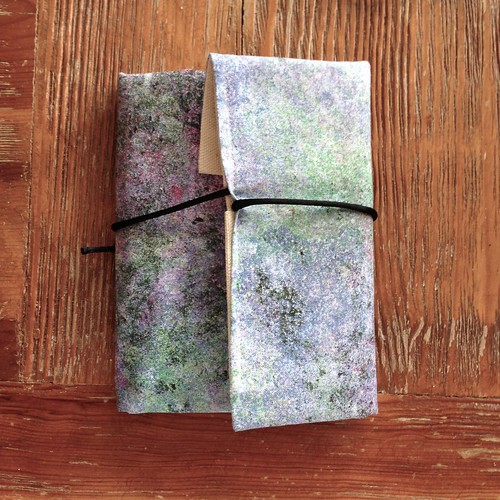
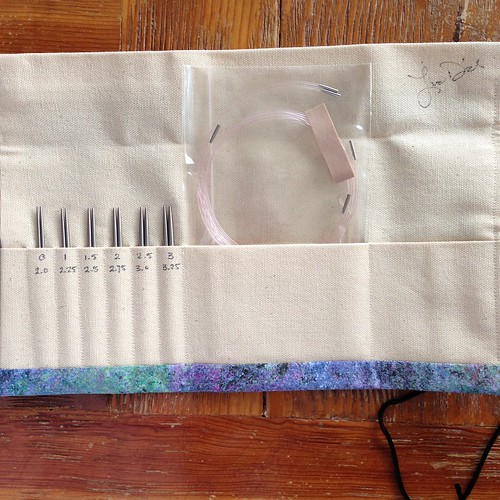
We interrupt your regularly scheduled sleeve update with --- New Needles!  I got my new Dyakcraft 3.5 inch Heavy Metals yesterday.
  yarma 
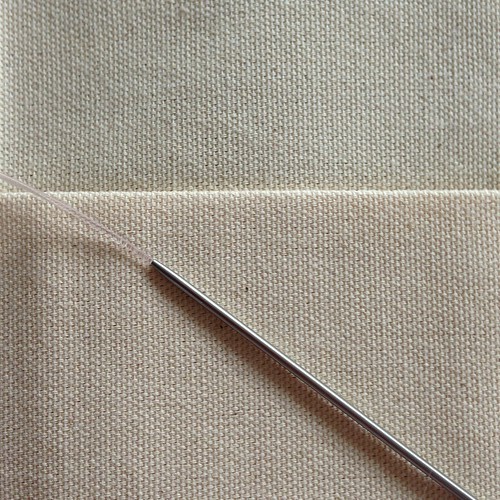
These are their newest interchangeable needles in US 0,1, 1.5, 2, 2.5, and 3 (2.0, 2.25, 2.5, 2.75, 3.0, 3.25 mm)  They are solid stainless steel so even though they're tiny needle sizes, they're strong.  The cables (there are three and I can't remember the lengths off the top of my head) are pale pink and they are smaller than (and don't interchange with) the cables from the Darn Pretties (wood) and Northern Lights (aluminum) that Dyakcraft makes.
  yarma
Like I mentioned, they are interchangeable (you can screw the tips you need on the cables you need, when you need them), but the joins are perfect.  This is the US 0 (2.0 mm) joined to the cable.  Not only is the join nearly invisible, you can't feel it either.  This means yarns, even fine laceweight, will just glide over the joins with no problems.

yarma
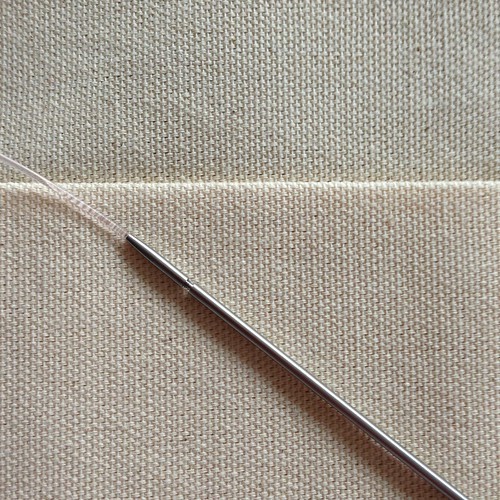
And just to prove that there is a joint there, I unscrewed the tip from the cable a little bit so you could actually see it.  If you zoom in on that picture,  you can see the teeny, tiny threading that holds it all together.

I'm really happy with these, but I don't have anything to knit on them at the moment.  I'll be fixing that soon. 

Labels:

Tuesday, February 12, 2013

One Sleeve Done!

yarma
I was able to get my first sleeve finished up last night!  I never know how much knitting I'll get done on Mondays because it's my busiest day of the week.  I'm going all day from when I wake up to after dinner (which is late on Mondays because Caleb goes to the gym), so by the time I have time to sit down and breathe it's usually after 7:30 PM or even later.  Tuesdays, on the other hand, are much more relaxed.  I'm still working around the house and getting things done, but it's not anywhere near as crazy as Mondays.  Hopefully today I'll get started on the second sleeve!

Labels: ,

Monday, February 11, 2013

More Sleeve

yarma 
I didn't get as much knitting done this weekend as I'd hoped (I worked on getting our tax stuff together, with Max - yeah, he wasn't as helpful as he thought he was), but I did get a little bit more sleeve done.  This is still the first sleeve, but I've tried it on and I'm one inch away from starting the ribbing.  This also means I'll have all the round numbers for the second sleeve, so I won't have to stop and try it on.  (I knit with a row/round counter.  I make notes on which rounds are decrease rounds and where to start the ribbing and how many rounds of ribbing to work.  This way the second sleeve will be the same size as the first.  I like it when both sleeves are the same size!)  I'm really hoping to get this cardi finished this week, but we'll see how it goes.

Labels: ,

Friday, February 08, 2013

Endpaper Mitt Number 2

yarma
I've just barely started, only three rows into the colorwork (it's hiding behind the needles), but the second mitt is underway!

I hope everyone has a great weekend and if you're in the blizzard zone, stay warm!

Labels:

Wednesday, February 06, 2013

A Sleeve!

yarma 
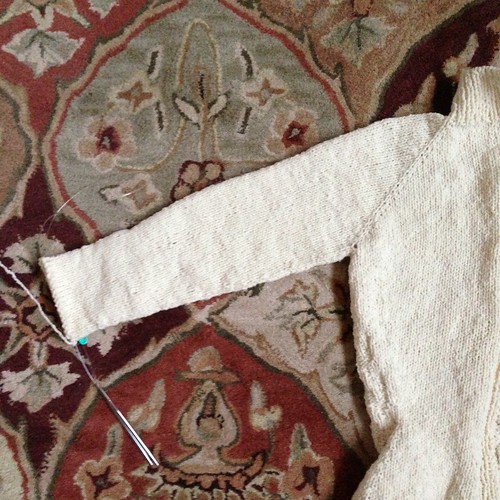
I've got part of a sleeve!  And you want to know the scary part?  I'm Magic Looping!  I've never tried the Magic Looping before because I have a long history of hating circular needles.  The Knit Picks needles had a soft cord, and that helped my attitude about circulars, but they have also fallen apart mid row (with lace) and come unscrewed so many times, I don't use those any more.  My Hiya Hiyas though are well behaved and have a swivel cord so the cord sorts itself out instead of me having to arrange the needles and cord myself.  (Let me say right now that whoever invented the swivel cord is a genius.  Right up there with whoever figured out how to make jelly beans taste like popcorn.  Genius.)

I've got the little 9 inch circular Hiya Hiyas, but this sleeve is bigger than that at the top (probably about 12 inches or so) and the yarn feels bulky (even though it's worsted) so I knew those wouldn't work.  I didn't want to work the sleeves on double points and using the smallest cord on my Hiya Hiya interchangeables would be too big.  I thought about it and tried to make excuses but finally decided to give Magic Loop a try - it never hurts to learn anything new (except maybe bull riding, I bet that hurts) and if I hated it, I'd figure something else out.  So off to YouTube I went to figure out how to do it.  It turns out Magic Loop is a little fiddly, Max chases and attacks the cords if he notices what I'm doing, but it's not so bad that I feel the need to track down and buy a 12 inch circular for sleeves (although it probably wouldn't hurt to have a few, right?)  So I'm Magic Looping my sleeves.  Go figure.

Labels: ,

Tuesday, February 05, 2013

Endpaper Mitts

yarma 
One down, one to go!  These got pushed to the back burner while I designed and knit the Lady Eowyn Mitts, but I have now finished the first Endpaper Mitt (except the thumb of course).  These have a nice long arm section to them - good for keeping out drafts at the wrist.  I'm feeling more comfortable with the colorwork and keeping my tension even after working this first one, so the second one should go even faster.

Quick question:  would there be any interest in a Pink Lemon Knits group on Ravelry?  I'm thinking of starting one so anyone who's knitting one of my designs can get questions answered or keep up with new designs, that kind of thing.  It wouldn't replace the blog and it would only be for my designs (where the blog is for whatever I'm knitting, by whatever designer), but I thought it might be fun if anyone is interested.  I'm still playing with the idea at this point, but leave a comment if you're interested!

Labels:

Monday, February 04, 2013

Getting There

yarma
The body is all done!  The body is all done!  I've woven in the ends too, just to get those under control. Now it's on to the sleeves!  I feel like I'm actually getting somewhere with this now.

I also got what might be a really good design idea over the weekend.  I sketched it out, but it's going to involve swatching and charting before it's really going to go anywhere.  I am wanting to do more designing this year than I have been doing.  There are ideas stirring around in my head, now if I can just make them happen!

Labels: ,

Friday, February 01, 2013

Winter Trees

yarma 
I've been moving right along on my cardigan!  I'm almost done with the body at this point, which makes me think I'm on the home stretch of this cardigan (even though I'll have to knit two sleeves when I do finish the body).  I'm really looking forward to getting this finished, not only because I want to wear it, but because I want to wash it and make the yarn bloom.  This yarn was frogged from another sweater ages ago and instead of skeining it up and washing it then, I just wound it into balls.  The kinks from the previous knitting have disappeared but the yarn is still compressed a bit.  I know once it hits the water, the yarn will relax and bloom into the stitches and sit properly and I really want to see it do that.  I'm planning on washing it after I finish the sleeves but before I sew on the pockets (I'll wash the pockets at the same time I wash the sweater).  Then, when it's all otherwise done, I'll figure out how to add the buttons.  I'm thinking of something like this but with the buttons instead of toggles.
yarma
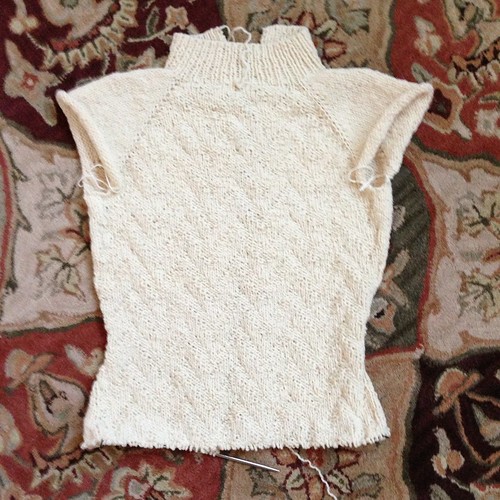
Here's a shot of the chevrons on the back - the pockets will get them too!  Have a great weekend!

Labels: ,